Livinon Mechanical

Ductless mini-split older homes retrofit without ductwork
Thinking about air conditioning or heat for an older house without ductwork can feel like a major project. A ductless mini split system offers efficient comfort without tearing into walls for new ducts. This guide explains when a mini split retrofit without ductwork makes the most sense, how to size it, where to place the equipment, what to expect for electrical and structural needs, typical costs, and how to keep it running clean. It draws on guidance from the U S Department of Energy and ENERGY STAR so you can make smart choices with confidence. For homeowners comparing options for additions, single rooms, whole home retrofits, or persistent hot and cold spots, this is a practical roadmap that puts comfort, efficiency, and historic character first.

Why mini splits suit older homes

Many homes built before central air relied on radiators, baseboards, or gravity ducts. Running new sheet metal through finished walls and ceilings can be expensive and disruptive. A ductless mini split pairs a quiet outdoor unit with one or more compact indoor heads. Refrigerant lines, a control cable, and a small condensate drain connect the two through a neat wall penetration that is typically only a few inches across. You get zoned heating and cooling without a maze of ducts. The U S Department of Energy highlights mini splits as a strong retrofit choice for houses without existing ductwork, for room additions, and for targeted comfort in problem rooms that never seem to feel right in summer or winter. The system delivers both heating and cooling with high efficiency in a compact package that avoids large remodeling work. See the Energy Saver overview for a clear summary of benefits and retrofit details including the small wall opening and line set run options at energy.gov.

Older homes are unique. Many have thick plaster walls, limited attic access, and trim you want to preserve. Mini split equipment keeps most of the work outside or in a single room. The indoor head mounts high on a wall or in a ceiling cassette, leaving floors and windows open. A narrow line cover can be painted to match exterior siding so the retrofit looks tidy on historic facades. Because the system serves specific zones, you condition only the rooms you use which can reduce energy use compared with running a larger central system. ENERGY STAR stresses that certified ductless heat pumps can deliver strong performance in cold climate regions when you choose the right model, and also notes that professional sizing with a Manual J load calculation gives the best outcome for comfort and efficiency. Read more at energystar.gov.

Good use cases include a finished attic or dormer that bakes in summer, a new sunroom or accessory space that would be costly to tie into existing ducts, a garage turned studio, or a back bedroom that never matches the thermostat. For whole home projects, a multi zone system can serve several rooms with one outdoor unit while preserving yard space and limiting exterior equipment.

Single zone or multi zone

Choosing the right layout starts with how you plan to use the space. A single zone mini split pairs one indoor head with one outdoor unit. This is a smart choice when you want to serve a single bedroom, a home office, a studio, or a small addition. The installation is straightforward with a short line set and a simple control setup. Upfront cost is usually lower. Maintenance is easy because there is only one indoor head to clean and service.

A multi zone configuration uses one outdoor unit connected to two or more indoor heads. It is a popular choice for older homes that need comfort in multiple rooms without running ducts through the structure. The outdoor footprint stays small which helps on tight lots. Each indoor head runs independently so you can set different temperatures in different rooms. This can deliver energy savings when parts of the home sit unused during the day. One outdoor unit can also simplify service. You will still want regular cleaning of each indoor filter and coil to maintain performance.

Budget planning matters. Consumer price guides report that a typical installed single zone mini split can fall in a range that begins around the lower thousands of dollars and can extend into the mid range depending on equipment, line set length, electrical work, and local labor. Multi zone projects often start in the mid range and can climb into five figures when you add zones or use high capacity or cold climate models. Real projects vary. Older homes can carry additional costs for electrical upgrades, line hide work, or structural blocking for mounting. A Manual J and an on site visit will produce a more precise proposal than any online calculator.

As a general rule, choose a single zone unit for one room that runs hotter or colder than the rest of the house or for a new addition that sits away from existing equipment. Choose a multi zone system when several rooms need comfort and when you want one outdoor compressor to keep the yard clean. If you already own a central system that serves most rooms, it may still make sense to add a single zone mini split for a tough space like a third floor or sun porch while leaving the rest of the home on the existing equipment.

Sizing with Manual J and BTU basics

Proper sizing decides how well a mini split will heat and cool an older home. Sizing too large can cause short cycling which leads to temperature swings, wasted energy, and unnecessary wear. Sizing too small can leave rooms uncomfortable on the hottest or coldest days. The industry standard method for sizing is a Manual J load calculation that considers square footage, window area and type, insulation levels, air leakage, ceiling height, orientation, and local weather data. ENERGY STAR recommends a Manual J for ductless systems to achieve the right capacity for each zone.

Homeowners often ask for a quick way to think about size before a technician visits. A rough square footage to BTU guide can help you start the conversation. Carrier provides general context for capacity selection and reminds buyers that these numbers are estimates. The best practice is to treat this table as a starting point, then rely on a Manual J for the final choice. Carrier placement and selection guidance is available at carrier.com.

Approximate room size to BTU guide
Room or zone size Typical BTU range Notes
Small room such as office or nursery Six thousand to nine thousand Higher ceilings, sun exposure, or poor insulation may push higher
Medium room such as bedroom or den Nine thousand to twelve thousand Corner rooms or large window walls may need more capacity
Large family room or open plan area Twelve thousand to eighteen thousand Sunrooms and high volume spaces often need a larger unit

Older homes vary widely. A plaster and brick house with original single pane windows may need more capacity for the same floor area than a similar size room in a house with modern air sealing and insulation. Part of a good assessment looks at envelope improvements that reduce the load so you can install a smaller and more efficient unit. For a helpful primer on insulation, air sealing, and ENERGY STAR choices that support lower energy use, see our guide to green HVAC best practices.

Smart placement for indoor and outdoor units

A mini split works best when air can move freely. Mount the indoor head high on an interior wall so cool or warm air washes the room without obstruction. Carrier suggests placing the unit about six to eight feet above the floor with a few inches of clearance from the ceiling for proper intake and discharge. Keep the front of the unit clear so air can reach the whole room. Avoid mounting above a stove, near strong steam sources, or where direct sun hits the unit for long periods. Do not hide the head behind tall shelves or drapery. When you want a more discreet look, a ceiling cassette or floor console may fit the room better.

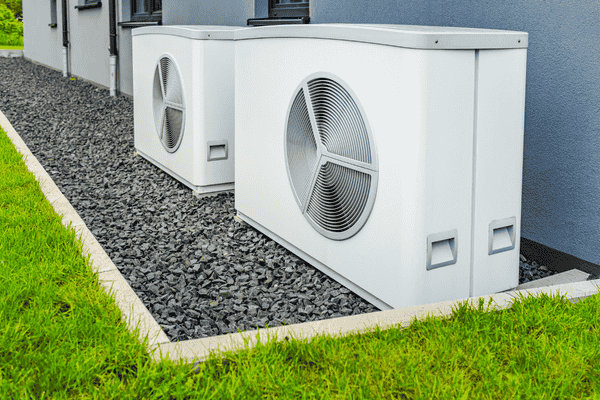
For the outdoor unit, choose a level surface with good airflow. A small pad, wall bracket, or stand above snow line in colder regions can work. Keep shrubs and debris away from the coil. Leave clearance on all sides for service access and airflow. Think about sound as well. Position the unit where it will not point directly at a bedroom window or neighbor yard if possible. Confirm local codes and permitting needs before work starts.

The connection between indoor and outdoor equipment uses a line set that carries refrigerant along with a control cable and a small condensate drain. A single neat wall opening often handles the bundle. The opening can be as small as a few inches across. A line cover matched to the siding keeps the exterior tidy. Manufacturers publish maximum line set lengths and vertical separation limits for each model. Many brands allow runs from roughly fifty feet up to one hundred feet or more, depending on model and line size. Always follow the specification sheet for the exact unit. A summary of line set length considerations by brand is compiled by PickHVAC at pickhvac.com.

Every indoor unit needs to drain condensate during cooling. When a gravity drain is possible, the installer routes a small tube to a safe discharge point outdoors or to a proper drain connection. If gravity is not possible, such as for some basement or interior wall locations, a compact condensate pump moves water to a drain. These pumps are small and quiet, with flow and lift height ratings. You can review a typical mini-split condensate pump example at Little Giant to see what these devices look like and how they mount near the indoor unit at littlegiant.com. For a homeowner-friendly explanation of when a pump is needed, see this overview.

Electrical and structural checklist

Many mini-splits require a dedicated electrical circuit. Smaller single zone models may run on a common household voltage, while larger or multi-zone systems typically call for 208 to 230 volts. The correct breaker size and wire gauge depend on the model and the length of the run. A licensed electrician should review your existing panel and available spaces, then size the circuit in line with the equipment nameplate. Older homes with original fuse boxes or smaller breaker panels sometimes need a service upgrade before the new circuit can be added. A current market overview for panel replacement cost ranges can be found at The Spruce at thespruce.com. Wiring size recommendations by common mini-split capacities are summarized by the manufacturer MRCOOL and by PickHVAC, which gives a helpful sense of typical breaker and wire choices.

Think through structural support for mounting. The indoor head weighs far less than a traditional air handler, yet it still needs solid backing. On plaster walls or in rooms with irregular stud layouts, we may add blocking to prevent vibration and to provide a lasting anchor. For outdoor units, a stable pad or wall brackets keep the cabinet level year-round. In snow country, a raised stand protects the coil and speeds winter drainage. For sound control, rubber isolation feet or pads help. Talk with your installer about the best location based on your home construction, lot layout, and where you spend time both indoors and out.

Permits and local inspections often apply to both electrical and mechanical work. Your contractor should coordinate permit submittals and scheduling, then walk you through any inspection findings. In older neighborhoods, historical review may apply to exterior changes on street-facing walls. A tasteful line cover, thoughtful placement, and paint matching usually meet those requirements. If questions remain, we can propose routing that keeps most of the visible work in less prominent areas of the property.

Costs, incentives, and accurate quotes

Homeowners want honest ranges for planning. As of the current market cycle, consumer sources report a typical single-zone mini-split installation can start in the lower thousands and reach six thousand dollars or more, depending on capacity, accessories, electrical work, and the difficulty of the line-set run. Multi-zone projects commonly start around the low to mid thousands and can reach into the teens when several indoor heads, long line sets, and cold climate equipment are included. See the current HomeGuide breakdown at homeguide.com and EnergySage for broad context at energysage.com. Actual pricing is local. The best step is to request three itemized bids that spell out equipment model numbers, capacities, accessories, electrical work, line hide work, permit fees, and a maintenance plan for year one.

Rebates and credits can improve the payback. ENERGY STAR maintains a directory of certified ductless heat pumps plus links to incentives and tax credits where available. This can include federal credits for qualifying air source heat pumps and state or utility programs for high efficiency equipment. We also cover how incentives interact with other upgrades such as smart controls and insulation in our post on energy-saving HVAC upgrades. A quick call with our team can confirm which programs apply to your home and what documentation is needed for submission.

When you review quotes, look for a Manual J summary and a room-by-room capacity plan. Ask how line sets will be routed and how condensate will drain. Confirm that the electrical work is included or quoted separately. Request warranty details for the equipment and for labor. Clarify what is covered in the first-year maintenance visit. A careful scope reduces surprises after install day.

Maintenance and simple ownership tips

Mini-splits are reliable when kept clean. Filters inside each indoor head need regular attention because the coil is compact and the fan moves a lot of air for its size. A monthly check is a good habit during peak seasons. Wash or replace the filters per the manufacturer’s guidance. Keep the face of the indoor unit clean and free of dust. Inspect the outdoor coil and clear leaves or lint that could block airflow. Verify that the condensate drain is flowing in the cooling season. Schedule professional service once a year or twice a year for homes with heavy use, pets, or construction dust. A routine visit typically includes coil cleaning, electrical checks, drain cleaning, refrigerant checks, and a control test. Typical service pricing falls into a modest range for a single system, with added cost for multi-zone setups.

With proper care, a mini split can deliver a service life in the mid to high teens. Some units run longer when coils stay clean, drains stay clear, and voltage is stable. A maintenance plan can spread out the cost and keep reminders on schedule. We offer installation clients a first-year service that includes filter refresh and coil inspection, then a discounted plan for ongoing care. Ask for details during your estimate visit.

Quick decision guide and FAQs

Will a mini-split heat well in a cold climate? Many modern ductless heat pumps maintain strong output at low outdoor temperatures. Look for models listed as cold climate by ENERGY STAR and check the heating capacity table at your design temperature. A Manual J that uses local weather data keeps expectations realistic in winter.

What about the look of the indoor head? Wall-mounted heads are slim with clean lines. In rooms where a wall head feels out of place, a ceiling cassette or a floor console can blend better with the architecture. Line covers outside can be painted to match trim. On many older homes, careful placement makes the installation nearly invisible from the street.

What if gravity drainage for condensate is not possible? A small condensate pump can be installed near the indoor head to move water to a suitable drain. These pumps are quiet and reliable when installed correctly.

Can a mini-split work with my current central system? Yes. Many owners keep the existing central system for most rooms, then add a single-zone mini-split for a home office, third floor, or addition. This targeted approach gives comfort where it is needed while avoiding duct extensions that may be impractical or costly. Energy use can drop because you do not need to run the central system as often for that one problem room.

How do I get an accurate quote? Start with a site visit that includes a Manual J, a room-by-room plan, and a discussion of placement, line routes, and electrical needs. Ask for an itemized proposal. Request model numbers and performance data. Confirm rebate eligibility for the selected equipment. Our team offers a free in-home assessment with a Manual J and a written estimate.

Your next step

If your older home needs comfort without new ducts, a ductless mini-split offers a clean path forward. Start with a qualified assessment that respects the character of your house, confirms the load with a Manual J, and selects certified equipment that fits your rooms and your climate. Ask about current incentives. Plan for maintenance at the time of purchase. The result is year-round comfort with smart energy use and minimal disruption to finishes.

Book a free Manual J and in-home estimate to compare options, confirm sizing, and see how a retrofit can work in your specific rooms. We can outline costs, available rebates, and a maintenance plan that keeps your new system running clean from day one.
HRV vs ERV Benefits for Cold and Humid Climates

Fresh air should not spike your bills or your indoor humidity. Heat recovery ventilators and energy recovery ventilators give you continuous fresh air with far less energy loss than window airing or simple exhaust fans. The right pick depends on climate, home tightness, and moisture loads. This guide explains how HRVs and ERVs work, the real differences, climate based choices for cold and humid regions, and practical ways to connect a unit to your current HVAC for cleaner air and lower costs.

What HRVs and ERVs do

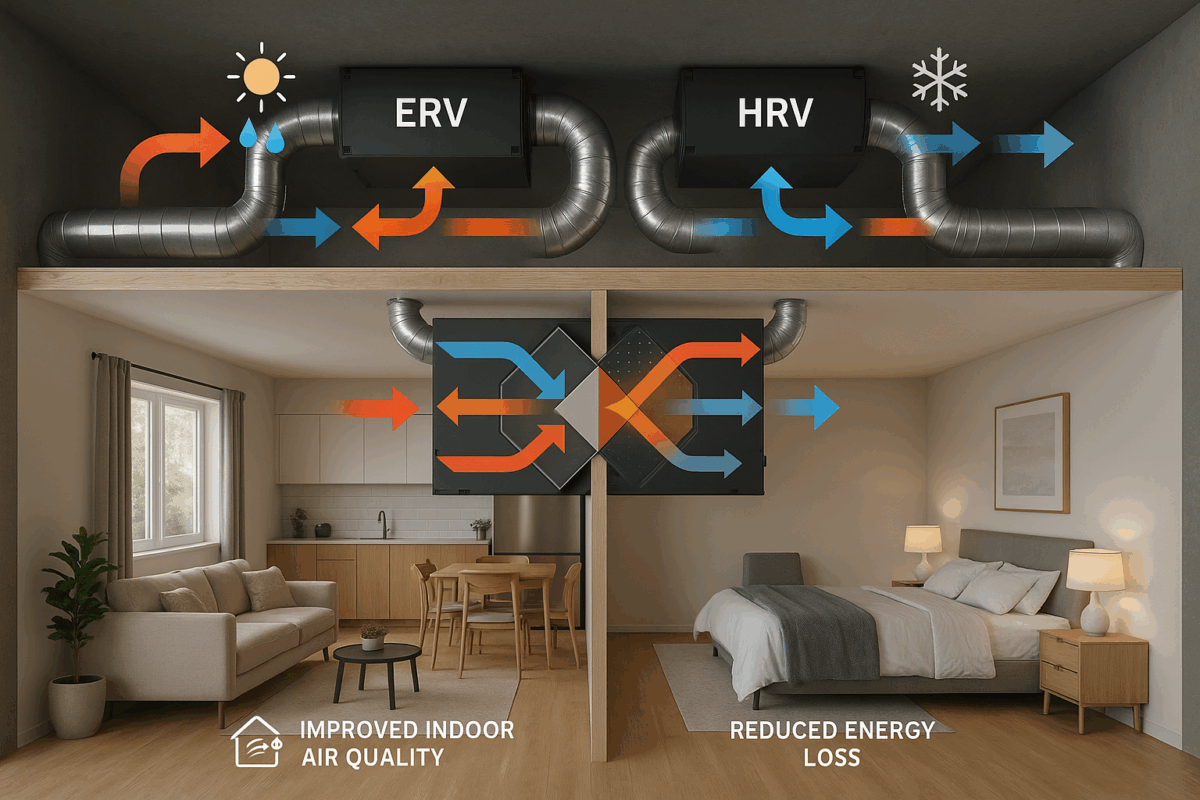
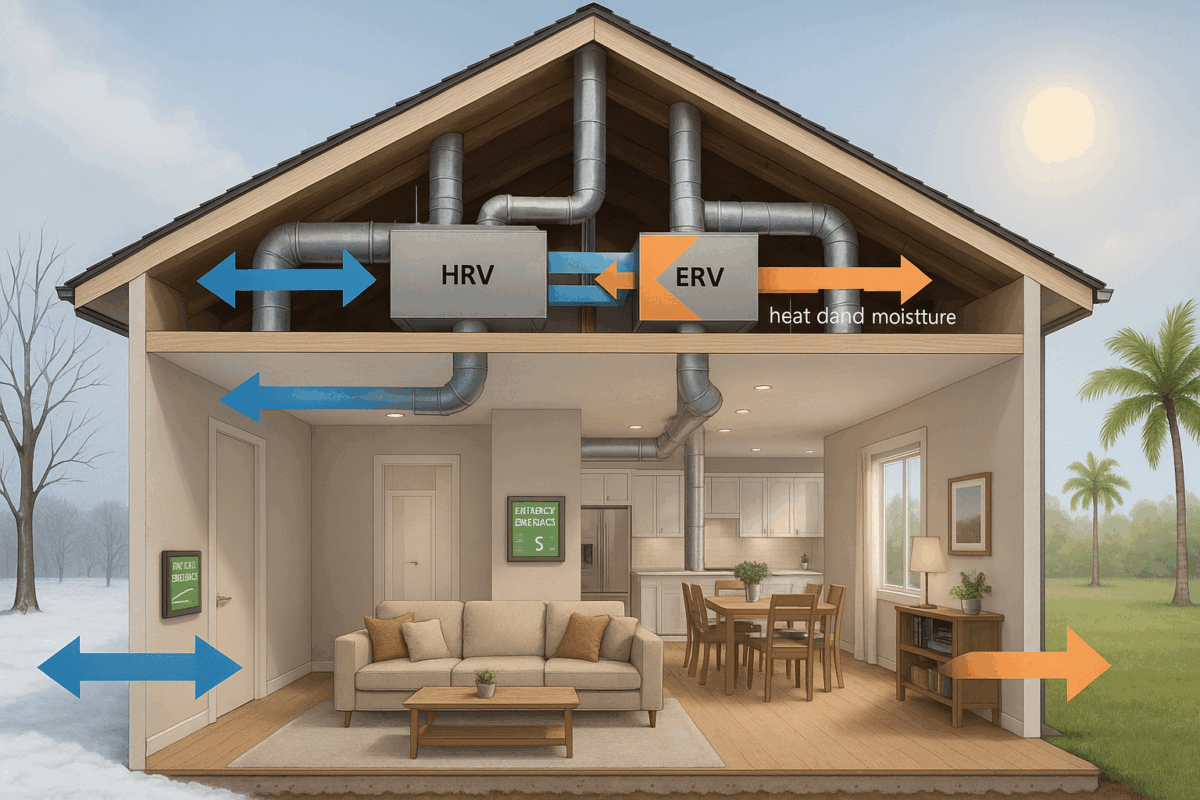
A balanced ventilation system brings in outdoor air while exhausting stale indoor air at roughly the same rate. That balance helps control pressures so your home does not pull unwanted air through leaks. HRVs and ERVs add a heat or energy exchange core between the two air streams. The core lets outgoing air temper the incoming air without mixing the two streams. The result is fresh air that is closer to room temperature before it enters your ducts or living space.

Both HRVs and ERVs reduce the heating or cooling energy needed to condition outside air. The U.S. Department of Energy explains that whole house ventilation with heat or energy recovery can be cost effective in climates with severe winters or summers. Recovery ventilators offer cleaner air with lower load on your furnace or air conditioner. See DOE guidance on whole house ventilation for a clear overview of system types and benefits at energy.gov.

The Home Ventilating Institute provides a helpful summary as well. HRVs recover sensible heat only. ERVs recover heat and also transfer some moisture across a special membrane. That moisture transfer reduces how much humidity tags along with fresh air. Review HVI mechanical ventilation types at hvi.org.

Key differences

Think of an HRV as a heat exchanger for ventilation air. It tempers incoming fresh air using heat from the exhaust stream during winter. It does the reverse in summer when the indoor air is cooler than outdoor air. An ERV does the same but also passes a portion of moisture in the direction that helps stabilize indoor relative humidity. In summer that means less outdoor moisture enters. In winter that means some indoor moisture stays inside rather than drying out the house too much.

Many respected sources note typical heat or energy recovery efficiencies in the range seen in HVI directories for certified products. Look for HVI certified data rather than only brochure values. HVI rates units using Adjusted Sensible Recovery Efficiency and Adjusted Total Recovery Efficiency. These ASRE and ATRE values reflect more realistic field conditions than legacy SRE and TRE lab metrics. HVI explains these ratings at hvi.org and offers a consumer buying guide at this page.

Quick definition you can use

An HRV recovers heat from outgoing air to pre condition incoming fresh air. An ERV does the same but also transfers some moisture, which helps stabilize indoor humidity. ERVs can lower the air conditioners moisture load during humid weather but they are not dehumidifiers. See HVI and Building Science Corporation.

Many homeowners ask whether an ERV will dry a house. It will not. It reduces the moisture that arrives with outdoor air. If your indoor humidity is already high, plan for dedicated dehumidification as needed. Building Science Corporation provides clear guidance on this point in its balanced ventilation brief at buildingscience.com.

Climate picks that work

Climate drives the best first choice. Occupancy, home size, infiltration, and indoor activities still matter. Use these picks as a smart starting point then fine tune with a pro.

  • Cold dry or heating dominated. HRV is the common pick. It exports excess indoor moisture during winter. That helps reduce window condensation and frost. Some homes get too dry with an HRV. An ERV can help retain comfort moisture if the house is leaky or occupancy is low. The nuanced view is explained by Building Science Corporation at this link.
  • Hot humid. ERV is the clear leader. It cuts how much outdoor moisture enters with fresh air. That reduces the latent load on the air conditioner. During spring and fall the temperature may be mild yet humidity stays high. Pair an ERV with dedicated dehumidification or smart controls to hold indoor RH in the comfort range. See DOE ventilation guidance at energy.gov.
  • Mixed humid. ERV often delivers steadier indoor RH across seasons. It moderates moisture during muggy months. It avoids excessive drying during cold snaps. You may still need dehumidification if indoor RH runs high. Building Science Corporation covers this choice at this resource.
  • Hot dry. Either HRV or ERV can work. The goal is efficient balanced ventilation. In very dry regions an ERV can help retain some moisture indoors. During mild periods simple ventilation strategies can be enough. DOE covers these basics at energy.gov.

Humid climate tip you can trust

In hot humid climates choose an ERV. It limits the outdoor moisture that rides in with fresh air which eases your air conditioners workload. During spring and fall add dehumidification or smart ERV controls to keep indoor RH steady. Source: DOE Energy Saver.

Recent Building America research shows that smarter ERV control strategies can cut ventilation related latent loads by roughly half compared to supply or exhaust only strategies in humid regions. See the U.S. DOE summary at this link.

Cold climate nuance that saves comfort

In cold dry regions an HRV often helps by flushing moisture to curb window condensation. Some homes still feel too dry in mid winter. If your house is leaky or the family spends long periods away an ERV can help retain comfort moisture. Small tight homes with many occupants may still need HRV to shed winter humidity. See the Building Science Corporation brief at buildingscience.com.

Austin and Gulf Coast context

Austin sits in a hot humid climate for long stretches of the year. Outdoor dew points often exceed typical indoor setpoints. An ERV reduces the moisture that would otherwise enter with required fresh air which lowers the latent load on your AC. During shoulder seasons when temps feel pleasant but RH stays high, many homes still need moisture control. An ERV plus a whole home dehumidifier and smart control logic keeps indoor RH in a healthy band. DOE offers more guidance on humid climate ventilation at energy.gov. Talk to our team about the right ERV setup for Austin’s humidity. We can guide professional installation and duct integration.

If you fight sticky rooms or musty smells, review our quick read on indoor humidity and comfort issues. It shows why RH control pairs so well with ERVs in our region.

Integrate with existing HVAC

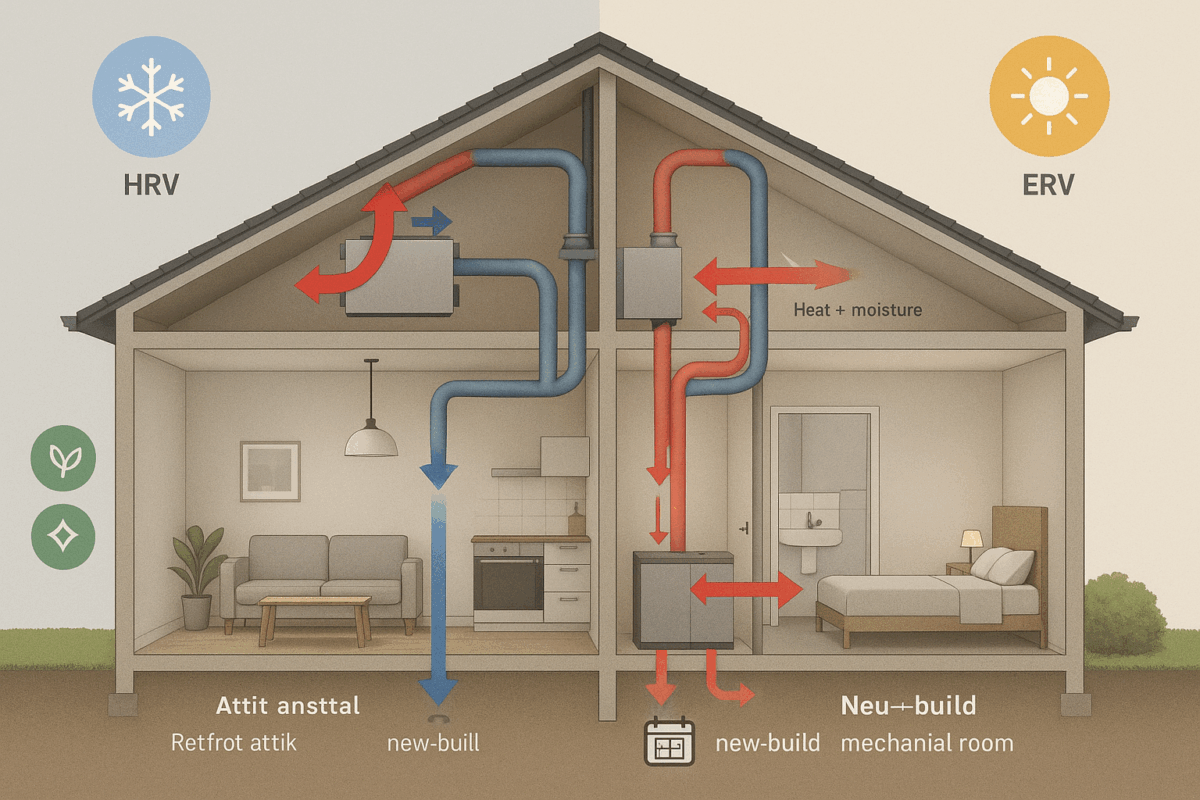
The cleanest path is dedicated supply and exhaust ducting. That gives you accurate balance at the unit. It also gives you freedom to place fresh air supply grilles where people spend time. Bedrooms and living zones see the most benefit. Dedicated ducts often cost a bit more upfront. The payoff is strong comfort and easy commissioning.

Many homes tie the ERV or HRV into central ductwork. This can work well with a clear plan. Building Science Corporation offers diagrams and cautions that we use on projects. The supply from the HRV or ERV should enter the return side of the air handler. Keep the connection point a few feet downstream from the exhaust pickup to avoid short circuiting. A motorized damper on the outside air leg stops uncontrolled flow when the unit is off. Interlock the central fan so mixing happens during ventilation calls. See the full guidance at buildingscience.com.

Do not route a kitchen range hood through the HRV or ERV. Grease and cooking contaminants will foul the core. Keep bath and kitchen fans as dedicated spot exhaust. Use the recovery ventilator for steady background fresh air. DOE also notes the value of filtering outside air and keeping ducts short and sealed in unconditioned spaces. Read more on whole house ventilation at energy.gov.

Filtration matters. Use a good filter on the outdoor air side to protect the core. Choose MERV levels that fit your system and local air quality. Seal and insulate any ducts that run through attics or garages to avoid heat gain and condensation.

Looking to plan a retrofit in a tight closet or attic. We can help design the routing and the controls for your home. See how we handle professional installation and duct integration.

Sizing and performance

Start with ventilation rates from ASHRAE 62.2 2022 for residential design. That standard sets the baseline for continuous whole home airflow and acknowledges credit for spot exhaust. It also guides intermittent control strategies. You do not need to memorize formulas. A qualified designer can calculate your target flow and duty cycle. See the ASHRAE overview at ashrae.org.

Pick models using HVI certified data. The HVI directory lists ASRE and ATRE which adjust for frost and fan energy. These metrics let you compare real world performance across brands. The consumer guide at hvi.org explains the ratings and links to hvicertified dot org for model searches. When you compare units, match rated airflow to your design rate with some headroom. Avoid oversizing since that can raise fan energy or complicate balancing.

Specify features that match your climate. Cold regions call for reliable frost control and easy core access. Humid regions benefit from controls that reduce ventilation during peak moisture events while still meeting daily targets. Smart ERV strategies can further trim latent load as shown in DOE research at this page.

Compliance and quality check. Have your designer size and set ventilation to ASHRAE 62.2 2022 and choose an HVI certified unit with strong ASRE and ATRE ratings. See ASHRAE and HVI for reference.

Energy and health gains

The energy story is simple. Conditioning outdoor air costs money. HRVs and ERVs reclaim a large share of the heat or cool that would otherwise leave your house with stale air. The Department of Energy states that balanced ventilation with recovery can be the most cost effective approach in extreme climates. Proper design avoids high fan power. Clean filters and tuned controls preserve those savings. Learn more at energy.gov.

The health story is strong as well. Ventilation dilutes indoor pollutants from cooking, cleaning products, off gassing, and normal human activity. The U.S. EPA explains that better ventilation reduces exposure to airborne respiratory viruses when paired with filtration and source control. Read the EPA page on ventilation and respiratory viruses at epa.gov. Fresh air also helps with odors and sleep quality. Many clients report clearer air during gatherings when an ERV runs continuously in the background.

ERV humid climate benefits often show up in comfort. Lower indoor RH during muggy spells makes rooms feel cooler at the same thermostat setting. HRV cold climate benefits often show up on windows and walls. Less condensation and better winter comfort without stuffy rooms.

If you want the sustainability angle, see our quick guide to energy recovery ventilators for fresh air with less waste. It sums up why recovery ventilation is a smart piece of an efficient home.

Cold climate operation

Very cold air can frost an HRV core during winter. Quality units include frost control strategies such as periodic recirculation, preheat, or exhaust only cycles. These methods keep the core from freezing and protect airflow balance. DOE covers frost control and maintenance in its whole house ventilation page at energy.gov.

Duct work matters. Insulate and air seal any outside air or exhaust ducts that pass through attics or crawlspaces. Keep runs as short and straight as possible to limit pressure drop. Use smooth metal or high quality flex with large radius elbows. Sloped exterior runs prevent water from pooling in the duct. Seal all joints with mastic or listed tape. Good duct practice reduces fan energy and noise.

Maintenance is simple yet powerful. Change or wash filters on the outdoor air and exhaust legs. Clean the core on the schedule in your manual. Wipe down the drain pan and check the condensate path. These steps protect airflow and recovery efficiency. Protect performance with yearly filter and core cleaning. Book your annual filter and core cleaning and tune ups.

Real home scenarios

Small tight home in a cold region with four occupants. Moisture generation per square foot runs high. Showers, cooking, and human respiration add up. An HRV often fits best to shed that moisture during winter. Look for strong frost control. Keep bath fans for spot loads.

Large leaky home in a cold region with two occupants. Infiltration may already dry the house. An HRV could push the RH too low in winter. An ERV can help retain comfort moisture while still delivering fresh air and heat recovery. Measure leakage and monitor RH before you pick.

Modern tight home in Austin with typical family schedule. AC latent load peaks when fresh air brings in humidity. An ERV reduces that moisture entry. Pair it with a smart thermostat or controller that runs the air handler fan during ventilation calls for better mixing. Add a whole home dehumidifier for spring and fall when cooling run time is low yet RH climbs.

Hot dry climate with mild winters. Either HRV or ERV can work. Many pick ERV to avoid overly dry indoor air during shoulder seasons. The key is correct airflow and distribution. Dedicated ducts offer top performance. A tie into the air handler can work with careful design.

Mixed humid climate with basement. Basements can run humid even when upper floors feel fine. An ERV provides steady fresh air with moderated moisture transfer. A dehumidifier might still be required for the basement zone. Use spot exhaust in baths and kitchen regardless of which recovery ventilator you choose.

FAQs

Will an ERV dehumidify my home

An ERV lowers the amount of outdoor moisture that comes in with fresh air. It will not dry a wet house. If indoor RH is high, add a dehumidifier or adjust controls. See Building Science Corporation guidance at this page.

Do ERVs work below freezing

Yes. Pick models with proven frost control and keep ducts insulated and sealed. Follow cold climate best practices for exterior hoods and drain paths. DOE covers the details at energy.gov.

Can I connect an ERV to existing ducts

Yes. Tie the fresh air from the ERV into the return side. Keep the connections spaced to avoid short circuiting. Interlock the central fan and use a motorized outside air damper. Building Science diagrams show this layout at buildingscience.com. We handle the details in our professional installation and duct integration.

How do I compare HRV or ERV efficiency

Use HVI certified ASRE and ATRE ratings for apples to apples comparisons. These reflect adjusted performance rather than ideal lab numbers. See the HVI buying guide and directory at hvi.org.

What standard sets the minimum ventilation rate

ASHRAE 62.2 2022 is the current residential ventilation standard used by many programs and codes. Your designer will size the system to that standard. Read the overview at ashrae.org.

Do I still need bath or kitchen exhaust

Yes. Keep spot exhaust for baths and the kitchen. Do not run a range hood through an HRV or ERV. Use the recovery ventilator for steady background fresh air. This combination delivers clean air with better moisture control.

Pro tips that pay off

Commissioning matters. Balance supply and exhaust flows with a flow hood. Confirm airflow meets the ASHRAE 62.2 target. Verify outside air damper position during calls. Check fan cycling if the unit ties into your air handler. These steps lock in performance that the ratings promise.

Choose quiet. A quiet system runs more often which improves air quality. Use vibration isolation and proper diffuser placement. Select fan speeds that match the design rate rather than max speed. Keep bends gentle. Keep flex short. A quiet ERV or HRV disappears into the background while it works for you.

Protect the core. Change filters on schedule. Clean the core before the heating season. Check exterior hoods for leaves and nests. These simple steps keep airflow steady and energy savings intact. Our service team can help with annual filter and core cleaning and tune ups.

Think distribution. If you use dedicated ducts, place supply grilles in bedrooms and living spaces. Place returns in common areas or in hallways near baths. If you tie into the air handler, set up periodic mixing cycles to pull fresh air through the supply registers. This avoids rooms that never see the benefit.

Plan for humidity. In hot humid zones pair the ERV with a whole home dehumidifier or controls that increase run time when RH rises above setpoint. In cold zones pick a unit with frost control and set a target RH to avoid window condensation. Our article on indoor humidity and comfort issues explains why 40 to 50 percent RH often feels best.

Why a pro design matters

Balanced ventilation looks simple on paper. Real homes vary. A pro will measure leakage, check duct routes, and right size the airflow. A pro will also select quiet diffusers and controls that match your life. The result is clean air that saves energy over time.

We install HVI certified HRVs and ERVs that fit the climate and your budget. We commission every unit with a balometer or anemometer. We set controls to meet ASHRAE 62.2 targets. We train you on filter care. Then we offer a maintenance plan so the system keeps performing. If you value fresh air with lower waste, see our piece on energy recovery ventilators for fresh air with less waste and ask for a proposal.

Closing thoughts

Pick an HRV if you live in a cold dry climate and winter moisture is a concern. Pick an ERV if you live in a humid climate and want to reduce the moisture that comes in with fresh air. Mixed humid regions often favor ERV for steadier RH across the year. Hot dry regions can use either option with a focus on correct airflow and distribution. Use ASHRAE 62.2 for sizing. Use HVI ASRE and ATRE for model comparisons. Keep bath and kitchen exhausts as separate spot systems. Balance flows during commissioning. Clean filters and the core on schedule. These steps deliver fresher air with lower energy use.

If you want help choosing a model or planning a retrofit, reach out for professional installation and duct integration. We will size it right, set it up cleanly, and keep it running with annual filter and core cleaning and tune ups.

A2L Refrigerant Safety for the R410A Phase Down

Thinking about replacing your AC or heat pump soon. You are hearing a lot of new terms. A2L. R 32. R 454B. R 410A phase down. This guide breaks down what is changing in 2025. How A2L refrigerants work in homes. What codes require in Austin and across the U.S. How much you might pay. How to pick a system that will serve you for years without headaches.

The shift is real. The goal is lower climate impact without giving up comfort or safety.

The 2025 refrigerant change

Starting January 1, 2025, new central AC and heat pump models for homes must use refrigerants with a global warming potential of 700 or less. This comes from the EPA Technology Transitions program. It effectively ends new products that use R 410A for residential comfort cooling after that date. The EPA also limits the sale of higher GWP products three years after the compliance date for each sector. You can review the sector table on the EPA site for details on the limit and date framework at epa.gov.

The EPA provided a limited path for field assembled split systems that were already in the pipeline. Components that were manufactured or imported before January 1, 2025 can be installed through January 1, 2026. After that date, a new field assembled system must use a refrigerant at or below the 700 GWP threshold.

The broader phasedown of HFCs sits under the AIM Act. Supply steps down in stages through 2029 to 2036. The EPA FAQ page shows the step schedule from 2024 onward. This matters for price and availability. Reduced supply can add pressure on cost for older refrigerants.

Recent legal action also supports the direction of travel. In August 2025 the D.C. Circuit upheld the EPA rule that allocates HFC allowances. That ruling helps stabilize the phasedown plans. Read the coverage at Reuters.

Why the industry is moving to A2Ls

A2L refrigerants give a large cut in climate impact compared to R 410A. R 410A has a GWP near 2088. R 32 is about 675. R 454B is near 466. Both R 32 and R 454B sit in the A2L safety class. That class means lower toxicity with a low burning velocity. Systems that use these refrigerants can hit strong efficiency targets. Your comfort does not have to suffer. Your bills can improve.

Want a quick look at how greener refrigerants fit into a cleaner home plan. Refrigerant choice is one piece. Duct sealing, filtration, and controls matter too.

Are A2L systems safe?

Short answer. Yes, when installed to code by trained contractors using listed equipment. A2L means lower toxicity with a flammability subclass that has low burning velocity. This is defined by ASHRAE Standard 34. The A family includes A1, A2L, A2, and A3. A1 is non flammable under test conditions. A2L is labeled mildly flammable because it can burn if a very specific mix and an ignition source are present. You can read the classification context in the ASHRAE Handbook at ASHRAE.

A2L refrigerants need a relatively rich concentration in air before they can ignite. That threshold is called the lower flammability limit. R 32 has an LFL around 14.4 percent by volume. R 454B has an LFL around 11.8 percent. You also need a strong enough ignition source. Normal operation of listed equipment does not create that mix or condition. Industry training resources help frame that context for technicians and homeowners. See definitions in this ACHR News explainer at achrnews.com.

Model codes treat A2L equipment as suitable for homes with specific safeguards. These safeguards are baked into the product listing and the installation rules. The goal is prevention, early detection, and mitigation.

Built in protections

The current safety baseline for comfort cooling equipment is UL 60335 2 40. This standard requires design limits for refrigerant charge based on room size and layout. It also calls for integral refrigerant detection and mitigation for certain systems and sizes. Sensors must react at or below 25 percent of the lower flammability limit. That is a built in safety margin. Detection triggers controls that move air or shut down the system to dilute or prevent a hazard. Setpoints are part of the listing. They are not field adjustable. UL explains these updates in detail at UL Solutions.

Think of this as layered protection. The equipment must meet charge limits. Some systems include integrated detection due to their amount of refrigerant or the space they serve. Sensors must trip early. The system must respond in a predictable way. Contractors install per code to protect every space. Your job is simple. Hire trained pros who follow the rules. Replace filters and schedule yearly service.

Codes and permits

A2L equipment is permitted by the 2024 International Mechanical Code for comfort cooling with references to updated UL standards for high probability systems. The ICC Building Safety Journal covered the A2L changes for the 2024 cycle at iccsafe.org. Even with model code support, local adoption can vary during a transition year. Some states and cities have already adopted new codes. Others may be on a prior edition for a period.

Austin adopted the 2024 technical building codes with an effective date of July 10, 2025. That timing gives clarity for A2L enabled installs in our market. The City announcement is posted at austintexas.gov. If your project is outside Austin city limits, your jurisdiction may be on a different adoption path. Permits and inspections will follow your authority having jurisdiction.

For a national view of which states and cities allow A2L refrigerants today, AHRI maintains a status map. It is a handy check during planning at ahrinet.org.

How to check your AHJ

Call your city or county permit office. Ask which code editions they enforce for mechanical work. Ask whether A2L refrigerants are permitted for residential comfort cooling. Ask about any local amendments that add clearances or equipment requirements. Your contractor should also confirm and pull the permit for you.

Smart controls can help meet comfort goals while you work within local rules.

R 32 vs R 454B

Two low GWP choices dominate new unitary equipment. R 32 and R 454B. Both are A2L refrigerants. Both meet the EPA rule for 2025. Each has brand support and product depth. Both can deliver strong performance when paired with the right coil, compressor, and controls.

R 32 has a GWP near 675. Some brands in the Daikin group, including Goodman, favor R 32 in many product families. Goodman maintains a homeowner resource hub at goodmanmfg.com. R 454B has a GWP near 466. Carrier markets it as Puron Advance and adds integrated dissipation features to its new lines. Read more at carrier.com. Trane and American Standard are also moving to R 454B with integrated detection and mitigation strategies. See Trane homeowner guidance at trane.com.

There is no single winner for every home. Lab numbers on GWP do not predict your comfort or your bill. The system design does. Size it right. Match indoor and outdoor components. Use quality installation practices. Verify code compliance. That gives you safe cooling with lower impact.

What matters more than GWP alone

Whole system efficiency should lead your decision. A better matched system can cut energy use. Look at rated efficiency, compressor type, blower control, and coil design. Consider noise levels. Consider warranty terms and local service support. Factor in rebates from your utility or state program. Ask your contractor for a load calculation and a duct review. That beats picking a refrigerant label in isolation.

If you want a broader view of future ready features, our post on AI in home comfort shows how better controls drive savings today.

Keep or replace your R 410A system

You can keep using and repairing an existing R 410A system. The EPA allows manufacture of components for servicing after January 1, 2025 when labeled for servicing existing equipment only. If you replace both the outdoor unit and the indoor coil after January 1, 2026, that counts as a new system. A new system must use a refrigerant at or below 700 GWP.

If your R 410A system has life left, parts and refrigerant will remain available, subject to phasedown supply. Repairs can extend its useful life. If the compressor fails or the coil leaks and the system is old, a full replacement may make more sense. From 2026 forward, a full field assembled replacement must be low GWP.

No drop in swaps and no mixing

R 454B does not drop in to an R 410A system. R 32 does not either. There are no known low GWP A1 drop ins for typical unitary systems. Never mix refrigerants. Follow the manufacturer instructions and use matched components. Johnson Controls provides a clear overview of these rules at johnsoncontrols.com.

Line sets matter too. Your installer will confirm if a line set can be reused after proper cleaning or if replacement is required. Correct brazing, nitrogen purging, evacuation, and charge procedures protect the new system and the leak detection architecture. Good practice is worth it. If you want routine care steps that protect your air and equipment, see our post on preventing mold in HVAC.

What it will cost

Expect some increase in upfront price for new low GWP models. OEMs guided roughly ten percent or more during 2024 to 2025 for certain lines. Inflation and supply chain shifts also play a role. This change introduces new components, detection hardware in some cases, plus new tools and training for contractors. ACHR News covered this trend at achrnews.com.

Plan your project to find savings beyond the sticker. Right sizing prevents short cycling. Duct fixes cut losses. Smart controls trim runtime without sacrificing comfort. Seasonal rebates and federal credits may offset a portion of the cost. Get quotes from reputable contractors who have completed A2L training. Compare full scope proposals. Look beyond the tonnage line.

Our green HVAC practices article lists simple habits that cut waste.

Ask better questions before you sign. You can get a safe, quiet, efficient system that meets the new rules. You can also set it up for smooth service throughout its life. Use this homeowner checklist during sales calls and at the walkthrough.

A2L ready checklist

  • Confirm the equipment is listed to UL 60335 2 40. Ask for the model number and the listing class.
  • Ask whether your system size and layout require an integral refrigerant detection system. If the answer is yes, confirm the sensors and controls are the exact parts specified by the OEM. No field changes to setpoints.
  • Make sure your installer has completed A2L refrigerant safety training. ACCA offers a recognized program at acca.org.
  • Verify matched components. Outdoor unit, indoor coil, and controls must be designed to work together. No mixing of refrigerants or parts.
  • Discuss line set procedures. Cleaning, pressure testing, and evacuation must follow the OEM manual.
  • Check local code status and permit requirements. AHRI maintains a map that shows jurisdictions authorizing A2Ls at ahrinet.org.

A small note for those who like to peek behind the scenes. Cylinder markings are changing. AHRI Guideline N updated container IDs. Flammable refrigerants receive a red band near the top. Labels remain the primary ID. This helps techs pull the right cylinder for the right job. Read about the update at ahrinet.org.

Rebates, smart controls, and maintenance

Rebates can change monthly. Ask for a rebate check during your estimate. Utilities, state programs, and federal credits can all lower the cost. Smart controls trim energy use during peak hours. They also help the system reach the setpoint without stress.

Maintenance helps protect an A2L system for the long run. Clean coils. Correct airflow. Tight electrical. Proper charge. Those basics extend life. Keep indoor air dry and clean to reduce strain. Our mold prevention guide shows simple steps that help.

If you want a quick read on why the refrigerant shift supports a cleaner home, start with greener refrigerants. That page connects the dots between refrigerants, efficiency, and comfort.

What this means for Austin homeowners

Austin is moving to the 2024 codes with an effective date in July 2025. That clears the way for A2L systems in most homes when permitted and inspected. Many brands now ship A2L models sized for Austin homes. Availability improves month by month. Pricing trends reflect the new tech and training. Expect quotes that look a bit higher than last year. Expect better options for efficiency.

We work with leading manufacturers that have published A2L safety architectures and training. We follow UL 60335 2 40. We verify charge limits by room size. We install listed leak detection when required. We use OEM specified sensors and controls. We train our team through programs like the ACCA A2L course. That is how we deliver safe, quiet comfort with lower climate impact.

Considering an HVAC replacement in Austin. Schedule a consult with our team. We will review A2L ready options, available rebates, and a code compliant plan for your home.

ERV vs HRV humid climates installation cost HVAC

Austin’s summer air feels thick for a reason. Outdoor air brings heat plus moisture. Tight homes trap that moisture. Your air conditioner fights both at once, which raises energy use and still leaves rooms stuffy. Whole home ventilation that recovers energy solves the stale air problem while keeping comfort steady. The question many homeowners ask is simple. ERV or HRV. This guide explains how each system moves heat and moisture, which one suits humid Texas weather, how to size it, how to connect it to your existing HVAC, and what a realistic project budget looks like.

ERV vs HRV basics

Both ERVs and HRVs bring in outdoor air while removing stale indoor air at the same time. Each device uses an air to air heat exchanger. The two air streams pass through separate channels inside the core. They never mix. Energy moves across the core, which cuts the load on your heating or cooling system. That is the shared foundation. The difference sits inside the core material.

An HRV transfers heat only. This is called sensible heat. During a hot day, an HRV core will cool the incoming air with the cooler exhaust air from the house. Moisture stays on its respective side. During a cool night, the outgoing air warms the incoming air. The HRV does not move moisture across the core.

An ERV transfers heat plus moisture. The core includes a moisture permeable membrane. During a muggy afternoon, as fresh air enters, part of that moisture migrates into the exhaust stream that leaves the house. That reduces the humidity load on your air conditioner. During a dry winter day, an ERV can help retain moisture inside. Canada’s ENERGY STAR technical page for HRVs and ERVs explains this difference in simple terms and also clarifies that certification for these products is run in Canada. You can read the definitions there at Natural Resources Canada.

Balanced ventilation systems do more than dilute pollutants. They also reduce the energy penalty of ventilation itself. That is why many high performance homes select ERV or HRV as their fresh air system of record. The right pick for Austin rests on how each device handles moisture. That is the key.

Humid climate choice

In hot humid regions an ERV usually fits best. The ERV core reduces the amount of outdoor moisture that gets pulled into your living spaces. That lowers the latent load on your central AC. It also widens the comfort window on sticky evenings when temperatures drop but dew points remain high. This is the rule of thumb in much of Texas.

There is a common myth that an ERV acts like a dehumidifier. That is not accurate. The ERV reduces the moisture that hitchhikes with outdoor air. It does not actively pull moisture from indoor air. On sultry weeks you may still want a dedicated dehumidifier. Building Science Corporation explains this distinction along with climate guidance for ERV versus HRV selection in its balanced ventilation brief. You can read that at Building Science Corporation.

Austin sits in a humid subtropical zone. Long cooling seasons. High dew points for months. In this pattern, an HRV can bring in too much humidity because it only shifts temperature. That extra moisture shows up as longer run time for your AC and lingering clamminess. An ERV shrinks that penalty. Indoor air feels drier at the same set point. Odors clear faster. Bedrooms feel fresher at night.

There are exceptions. Small homes that see heavy occupancy during winter can prefer an HRV so the home does not get too damp. Homes at elevation with long freezing seasons need frost control on any energy recovery device. Those use cases do not match Austin. The central Texas home that runs air conditioning for most of the year is the archetype for ERV success.

Ventilation is one piece of a moisture plan. Source control in bathrooms. Tight ductwork. Clean gutters. No bulk water leaks. Then balanced ventilation. If you want a short guide to moisture risks inside the equipment cabinet, this post can help you spot trouble early. See how to prevent mold growth in your HVAC system.

Sizing and ratings

Ventilation that is too small does not protect indoor air quality. Ventilation that is too large wastes energy and can swing humidity. Good practice is to set volume to the residential standard from ASHRAE 62.2. This standard lays out a simple formula that weighs floor area and the number of bedrooms. It also sets guidance for intermittent boost flows in wet rooms. You can review the scope and find the document at ASHRAE. Your contractor should size the unit, set the continuous flow, and verify the delivered air with a flow hood or similar tool.

Once you know the target airflow, pick a unit with credible ratings. The Home Ventilating Institute publishes certified performance data that lets you compare models on equal footing. Look for SRE or Sensible Recovery Efficiency. Also look for TRE or Total Recovery Efficiency which includes moisture transfer. HVI also provides adjusted ratings called ASRE and ATRE that account for fan power and test conditions. In muggy summers, TRE and ATRE matter most. These numbers show what the ERV returns to you when the moisture transfer of the core really counts. You can study the rating methods and the directory at HVI’s consumer guide.

A quick word on labels. You will see very high SRE percentages in some brochures. That value does not tell the whole story in cooling seasons because it ignores moisture. A unit with excellent SRE can still let in a lot of humidity if it is an HRV. In Austin the TRE picture carries more weight.

Sound, fan power, and filter size deserve attention too. Quieter units get used more. Lower watt draw trims operating cost. Bigger filters last longer between service visits. An ERV that sits in a closet near a bedroom needs real attention to sound. In an attic, duct layout, insulation, and vibration isolation can bring sound readings down to a whisper.

Finally, ENERGY STAR labeling for HRV and ERV is a Canadian program. The United States does not run a product label for this category at the moment. Do not confuse a Canadian ENERGY STAR ERV with a federal tax credit by default. Read the fine print on any incentive. The Canadian program details live at NRCan ENERGY STAR for HRVs and ERVs.

HVAC integration

You have two broad installation paths. A fully dedicated ventilation duct system. Or a tie in to the existing forced air system. A fully ducted layout supplies fresh air to key rooms and pulls stale air from baths and other source points. This path gives the best distribution and the most control. It also costs more because of the extra ductwork.

A tie in uses the main air handler for distribution. This can work well with the right design. The usual method is to introduce the ERV supply into the supply side of the duct system. This is called a supply injection port. The ERV exhaust usually picks up air from the return side or from bathrooms using small runs. The main blower must run when the ERV runs. That way the fresh air gets pulled into all rooms. Martin Holladay has a clear overview of this method including layout rules and cautions at Green Building Advisor.

Separation of the connection points matters. You do not want the ERV supply and pickup too close to each other on the air handler. Short circuiting reduces exchange effectiveness. The Panasonic Intelli Balance manual spells out supply and return separation and also instructs techs to balance the ERV with the furnace blower running. Those steps prevent false readings. That manual also covers duct sizing and filter maintenance. You can read the instruction set at Panasonic Intelli Balance 200 installation guide.

Many ERV and HRV manufacturers offer a return to return connection method that can speed up installation in retrofits. The Lifebreath guide covers blower interlock wiring, balancing, and how to set modes for cooling and heating seasons. It also details boost options for bathrooms. Review that reference at Lifebreath installation guide.

Commissioning is not a nice to have. Each unit needs full function checks. Set the continuous flow. Confirm bath boost flows. Balance supply and exhaust to within roughly ten percent at high speed. Label the measured flows. Test static pressure. Verify that the air handler blower interlock works.

Controls matter. A simple dehumidistat can call for more ventilation when indoor humidity rises. A timer can run a boost cycle during showers or cooking. A smart controller can pace ventilation to occupancy. Your contractor can also set the ERV to pause on extreme outdoor humidity events to prevent spikes in indoor moisture. That strategy can work well with a standalone dehumidifier. These tweaks help keep indoor conditions steady while still meeting ventilation targets.

Location and duct routing matter in Austin. Attics get very hot. Place the unit in a conditioned space if possible. If the attic is the only choice, insulate the ERV ducts, seal every joint, and keep runs short. Fresh air terminals should sit away from exhaust terminations. Keep them clear of dryer vents. Use hoods with screens sized for easy cleaning.

Plan for service. Filters need cleaning or replacement. Cores need inspection and periodic cleaning based on the manufacturer schedule. Motors need a listen test. Balanced systems drift out of tune over time. Add a balance check to your annual tune up. Our HVAC preventative maintenance guide covers the basics and what we check on each visit.

Installed cost

Whole home ventilation projects span a wide range. Many standard ERV or HRV installations fall in a band from roughly the mid thousand range to around five thousand dollars for parts and labor. That ballpark comes from national cost guides such as Fixr. Scope drives price more than anything else. A fully ducted system with multiple pickups and dedicated supplies costs more than a simple tie in to an existing air handler. High efficiency passive house grade units and very quiet models can push project cost higher as well.

Ductwork and labor usually dominate the quote. Running new insulated ducts in an attic takes time. Routing in a finished home requires careful planning. Penetrations through the building shell need airtight sleeves and weatherproof hoods. Electrical work adds cost. Controls cost varies from a simple timer to a smart panel. Permits vary by city. Commissioning takes time too. Do not skip it. The difference between a balanced and unbalanced system shows up in comfort, humidity control, and energy use.

There are lower cost options for select cases. Single room ductless ERVs can ventilate a bedroom or a home office. They install through an exterior wall. These units often cost in the seven hundred to one thousand dollar range per room including equipment. Build with Rise keeps a current guide to the best ductless ERVs and HRVs by year with typical pricing. You can scan that list at Build with Rise. These devices do not replace a whole home system. They can target a problem room or a tight accessory dwelling where routing ducts is tough.

For a project planning lens, Fine Homebuilding offers a practical overview of whole house ventilation categories with cost context and design tips. Fully ducted multi point systems sit at the premium end. Centralized systems with simpler distribution sit mid band. You can read that guidance at Fine Homebuilding.

Every home is different. An Austin ranch with a vented attic calls for a different layout than a new townhome with a sealed attic and spray foam roof deck. We quote both options when possible. A dedicated duct system for perfect distribution. A forced air tie in for a lower entry cost. We also quote a maintenance plan so the system stays tuned for the long haul.

IAQ upgrades that pair well

An ERV or HRV sets the foundation for consistent fresh air. A few companion steps raise indoor air quality further and cut energy loss at the same time.

Start with air sealing. Reducing uncontrolled infiltration keeps pollutants out. It also lets the ERV do its job at the target rate rather than fighting random leaks.

Improve filtration. Use a quality media filter sized for low pressure drop. Change it on schedule. Consider a dedicated filter on the ERV fresh air intake as well. That reduces dust load on the core. It also keeps pollen out of the living space during allergy season. For more practical tips that help during peak pollen weeks, see our indoor air quality tips for allergy season.

Control indoor moisture. Run bath boosts during showers. Use a range hood that vents outdoors during cooking. Keep relative humidity near fifty percent when possible. If it creeps above that level for long periods, consider a whole home dehumidifier. The ERV will cut the outside moisture load. A dehumidifier will tackle internal gains from showers, cooking, and people.

Mind the ducts. Leaky supply or return ducts waste energy and can pull dusty attic air into the system. Seal obvious joints with mastic. Insulate ducts in hot attics to reduce condensation risk. Clean supply vents as needed. Inspect outdoor hoods each season. Clear debris and confirm the flapper operates freely.

Finally, make maintenance routine. Clean or replace the ERV filters as directed. Vacuum the core face gently when dusty. Wash the core if the manufacturer allows it. Check the condensate path in cooling season. Schedule a balance check yearly. These simple steps protect the investment and keep indoor air clean.

FAQs

Is an ERV better than an HRV in humid climates
In most humid regions the ERV is the better pick because it reduces the moisture that outdoor air brings inside. That lowers the latent load on your air conditioner and helps keep rooms comfortable. Building Science Corporation presents this guidance in its balanced ventilation write up at Building Science Corporation.

Do ERVs dehumidify my house
Not exactly. An ERV reduces moisture coming in with the fresh air stream. It does not act like a dehumidifier. During very humid weeks you may still need a dedicated dehumidifier. This point is explained in the same Building Science resource above.

How much does an ERV or HRV cost installed
Many homes fall in a typical band from roughly the mid thousand range to around five thousand dollars. Ductless single room ERVs often land in the seven hundred to one thousand dollar range per room. Project scope and ductwork drive the final number. See national cost guides such as Fixr and ductless product roundups at Build with Rise for context.

Can I connect an ERV to my existing HVAC
Yes. With a proper design. Use a supply injection port on the supply side of the duct system. Interlock the furnace or air handler blower with the ERV so fresh air distributes through the ducts. Keep good separation between the ERV supply and the pickup point. Balance the system at high speed. Guidance on this method is covered by Green Building Advisor and by manufacturer manuals such as Panasonic Intelli Balance.

What size ERV or HRV do I need
Size the airflow to meet the residential ventilation standard ASHRAE 62.2. Then select a unit with HVI certified ratings to compare performance fairly. Review the standard at ASHRAE and rating guidance at HVI.

Are there ENERGY STAR ERVs or HRVs
Yes in Canada. Canada runs ENERGY STAR certification for HRVs and ERVs. The United States does not label this product category at this time. Learn more at Natural Resources Canada.

Schedule a ventilation assessment

If you live in Austin or nearby, we can size, specify, and install an ERV that fits your home and your budget. We also tune existing systems. That includes balancing, bath boosts, and blower interlocks. If an HRV makes more sense for your goals, we will tell you and quote that option too. Book a visit through our home page.

A final thought. Balanced ventilation pays off when the home is reasonably tight, the system is sized to ASHRAE 62.2, the unit carries HVI rated performance, the duct layout suits the house, and commissioning is done with care. In humid Central Texas, an ERV most often checks those boxes and gives you fresh air without the sticky side effects.

HRV vs ERV Whole House Ventilation Guide

Fresh air feels great for a minute, then your comfort drops as heat and moisture rush in. That is why balanced ventilation has become the standard for tight homes. Heat recovery ventilators and energy recovery ventilators bring in filtered outdoor air while sending stale air out through a heat exchange core. You get cleaner air with far less energy waste. This guide explains HRV vs ERV technology, shows which one fits your climate and home, covers sizing, retrofit or new build strategies, costs, upkeep, and how to choose a model with confidence.

Why balanced ventilation matters

Balanced ventilation supplies outdoor air in a controlled way while exhausting pollutants at the same time. Each airstream gets filtered. The core transfers energy between the two flows so the incoming air arrives tempered for comfort. Berkeley Lab describes how balanced systems cut indoor pollutant levels compared with exhaust only strategies that pull makeup air from random leaks and garages. You get steady dilution of carbon dioxide, odors, and VOCs without the comfort penalty of cracked windows. See the balanced ventilation primer from Lawrence Berkeley National Laboratory for a clear overview at svach.lbl.gov.

Central Texas homes face humidity swings for much of the year. Infiltration brings moist air that burdens your cooling system. Controlled outside air through an ERV helps keep that extra moisture out.

Tightening the envelope with air sealing often comes first in energy upgrades. Less leakage cuts bills yet it also reduces incidental fresh air from cracks. That raises the value of a dedicated fresh air system.

What is an HRV and an ERV

Both devices are balanced ventilation systems. Each pulls stale air out while bringing outdoor air in. The two airstreams pass through a core that recovers energy you would otherwise throw away.

A heat recovery ventilator moves heat between the outgoing and incoming air. It does not move moisture by design. An energy recovery ventilator moves both heat and moisture using an enthalpy core or wheel. These working definitions come from the ENERGY STAR HRV and ERV specification page hosted by Natural Resources Canada. See the formal descriptions at natural-resources.canada.ca.

How the cores transfer heat and moisture

Think of the core as a highly specialized radiator. In an HRV, the surfaces conduct thermal energy from the warm airstream to the cooler one. The two airstreams never mix. In winter, outgoing warm air preheats the incoming cold air. In summer, outgoing cooler indoor air precools the incoming hot air. That is heat recovery.

In an ERV, the core also allows a portion of water vapor to move across a membrane. During a humid summer, an ERV passes some moisture back to the outgoing airstream so the air entering your home carries less water. During a dry winter, it can hold on to some indoor moisture so indoor relative humidity does not crash. The key nuance from Berkeley Lab is simple. An ERV does not dehumidify the house. It only reduces the amount of moisture the ventilation air brings in or takes away. See that clarification at svach.lbl.gov.

What HVI ratings mean

Comparing models by brochure buzzwords falls short. Use the standardized ratings from the Home Ventilating Institute. The HVI Consumer Guide explains the metrics in plain language and links to an online directory for side by side comparisons at hvi.org.

Key terms you will see:

  • SRE or Sensible Recovery Efficiency. This shows how much sensible heat the unit recovers after accounting for case losses, airflow imbalance, leakage, defrost, and actual fan power. Use this for heating season comparisons.
  • TRE or Total Recovery Efficiency. This adds latent energy to the picture. It is most helpful for cooling season performance and ERV comparisons.
  • ASRE and ATRE. These are adjusted metrics that remove fan energy. They support whole home energy modeling and fair apples to apples checks.

Why this matters. Older ASE or ASEF values can hide high fan watt draw or leakage. Fantech summarizes this pitfall and why SRE or TRE tell a more honest story. Their short explainer is at fantech.net.

HRV vs ERV by climate

Climate drives the choice more than brand or gadget features. In hot humid regions such as Austin, Houston, or Atlanta, an ERV shines. The enthalpy core reduces the added moisture load that would otherwise ride in with your fresh air. A peer reviewed modeling study found ERVs cut total HVAC energy compared with HRVs by roughly ten to seventeen percent in Miami, Houston, and Atlanta. The study also showed gains in Baltimore and Los Angeles, though recovery did not beat no recovery in Los Angeles due to mild conditions. You can read the open access paper at pmc.ncbi.nlm.nih.gov.

In cold or cold dry climates, many homes still favor an ERV because it helps keep indoor relative humidity from plunging in winter. Wood floors, trim, and musical instruments hold up better with stable humidity. Family comfort improves when winter air does not feel parched. That said, some tight small homes with high occupant density may need an HRV in winter to keep indoor humidity in check. Energy Vanguard explains this nuance well at energyvanguard.com.

In the mild Pacific Northwest, many projects use HRVs due to modest temperatures and fewer high humidity events. The better answer is still project by project. Think about occupant loads, cooking or shower habits, pets, and allergy concerns. Match the device to the moisture profile you expect. A good designer will review both SRE and latent effectiveness for the target airflow.

One more reminder. An ERV limits how much moisture the ventilation air adds or removes. It does not replace a whole home dehumidifier in a hot humid climate with long wet seasons. Berkeley Lab makes this point directly in the balanced ventilation primer linked above.

How to size ventilation

Sizing starts with the ASHRAE 62 point 2 whole building rate. The simple formula used in many U S codes is about one cfm per one hundred square feet of conditioned floor area plus seven point five cfm times the number of bedrooms plus one. Energy Code Ace shows the calculation with examples and a small table at energycodeace.com.

Quick example for context. A one thousand eight hundred square foot home with three bedrooms lands near forty eight cfm for continuous ventilation. That is a starting point. Some projects select a unit with higher maximum airflow for boost mode during parties or large gatherings. Some regions permit intermittent operation with higher cfm and shorter run time. Your local code and comfort goals set the final target.

Remember filters. If you want MERV thirteen intake filtration for allergy control, account for the added pressure drop. A larger unit can run at a lower fan speed to stay quiet and efficient.

If allergies flare up each spring, you will find practical tips in our guide to improve indoor air quality. Better filters in your HRV or ERV are a strong start.

Retrofit vs new build

New construction offers a clean slate. You can route short, straight ducts to bedrooms and living areas for supply air, then pull exhaust from baths, laundry, and near the kitchen. Retrofits require creativity. Finished ceilings and tight chases push design toward compact units, decentralized strategies, or careful integration with existing ductwork. Good outcomes come from simple airflow paths, low fan watts per cfm, quiet operation, and clear service access for filters and core cleaning.

Fully ducted best practice

A dedicated supply to the main living spaces gives you fresh air where people spend time. Dedicated exhaust from baths and laundry removes moisture at the source. Place a pickup near the kitchen rather than over the range. A range hood still handles cooking peaks. Keep duct runs short for lower static pressure. Choose ECM motors with low watts per cfm. Pick a unit rated for quiet operation in bedrooms. Fine Homebuilding summarizes this strategy and warns against using a central furnace blower to move ventilation air due to the energy hit from continuous fan operation. Read their overview at finehomebuilding.com.

Integrate with existing ducts

Many retrofits tie a supply from the HRV or ERV into the return trunk of a furnace or air handler. That can work if designed correctly with interlocks. It can also short circuit if both intake and exhaust tie to the return, which just recirculates air without delivering outdoor air to rooms. The Building America Solution Center flags this risk and offers guides to avoid it at basc.pnnl.gov.

In hot humid regions, field pros often avoid dumping outdoor air into a return unless the plan is engineered in detail. Poor design can create condensation in ducts, wet insulation, mold, and comfort complaints. HVAC School has a clear warning on return tie pitfalls plus better options at hvacrschool.com.

Integrations must prevent the air handler from running full time just to distribute ventilation air. Separate controls or a smart relay help. The goal is tempered outdoor air delivered efficiently without an energy penalty.

Spot ERVs for tight spaces

Some homes cannot fit new ductwork without major drywall work. A small spot or decentralized ERV can meet the ventilation requirement in a compact package. Panasonic WhisperComfort models sit in a ceiling bay or wall, run at modest cfm, and use small diameter ducts with a single wall cap. They are popular for apartments or targeted rooms. See the 60 cfm model overview at na.panasonic.com and the product page at iaq.na.panasonic.com.

Cold weather operation

When outdoor air drops below freezing, moisture can condense and freeze inside a core. HRVs and some ERVs use frost control strategies to protect the core. Methods include a preheat coil upstream of the intake, periodic defrost cycles, or a temporary supply and exhaust imbalance that warms the core. The right method depends on your unit and climate. RenewAire outlines frost control approaches at supporthub.jswmi.com. Zehnder has a concise cold weather FAQ at zehnderamerica.com.

Cold climate owners sometimes worry that ERVs cannot handle deep winter. Modern ERVs with proper frost control operate well. They also help keep indoor air from becoming desert dry. In certain small and very tight homes, a winter HRV core may better manage moisture. Some multifamily Passive House projects even swap cores seasonally. Steven Winter Associates compares winter HRV and summer ERV strategies in multifamily at swinter.com.

Costs and what drives price

Installed cost spans a wide range because every home is different. Many contractor quotes fall in the two thousand five hundred to five thousand five hundred dollar range for a conventional HRV or ERV with moderate new ductwork. Examples include a Midwest contractor page at womackheatingandcooling.com and a Southeast contractor page at arrowhvacsc.com. Cost calculators sometimes cite eight hundred to twelve hundred dollars for install labor if ducts already exist or a lower add when paired with new HVAC. Treat those as low end. Inch Calculator provides context at inchcalculator.com.

On the other end, premium European systems with fully ducted layouts and high grade filtration can reach five figures in large homes. Market anecdotes often cluster between four thousand five hundred and six thousand one hundred dollars for mid range jobs, with top tier packages running fifteen to twenty thousand in single family homes. Treat forum posts as stories rather than quotes. The point is to set expectations about spread. A typical thread with user reports lives at reddit.com.

What moves price up or down in real projects:

  • Whether new ducts must be added or existing ducts can be tapped without short circuiting
  • One story versus two story routing with long vertical chases
  • Target filtration such as MERV thirteen or HEPA cabinets
  • Noise goals for bedrooms that push toward larger, slower fans
  • ECM motors and smart controls with boost timers and humidity limits
  • Commissioning, balancing, and post install airflow verification

A site visit gives the only reliable quote. We measure actual static pressure paths, check attic and crawlspace access, evaluate exterior termination locations, and confirm make up air paths in closed door scenarios.

Maintenance checklist

HRVs and ERVs last a long time with simple care. Set reminders for filter checks and a yearly core inspection. A little attention protects airflow, efficiency, and clean air delivery.

Use this quick list as a guide. Always follow your specific manual.

  • Filters. Inspect every two to three months. Clean or replace every six to twelve months or sooner in dusty seasons. Many units accept MERV eight to MERV thirteen. Venmar offers a clear maintenance outline at venmar.ca.
  • Core service. HRV cores can be washed gently with mild soap in warm weather so they dry completely before reassembly. ERV paper type enthalpy cores should not be washed. Vacuum dust off the surface only.
  • Exterior hoods. Keep intake and exhaust at least ten feet apart. Clear leaves, lint, and nests seasonally. Verify screens are free of debris.
  • Condensate. Check drains for clear flow in humid months or during defrost cycles.
  • Balance. Recheck and adjust flows after any filter or core work. Consider a yearly professional balance and a tune up. Book HVAC preventative maintenance to keep ventilation performance on track.

What to look for in a model

Two units can look similar yet perform very differently once installed. Focus on ratings, fan energy, sound, and service. Your future self will thank you.

Use this buyer checklist when comparing options:

  • HVI certified SRE and TRE at the airflow you plan to use. Also check ASRE or ATRE if you need modeling inputs. Then verify fan watts per cfm at that same point. The HVI directory is at hvi.org.
  • Latent effectiveness for ERVs in humid climates. Better latent transfer reduces the moisture you bring in during sticky months.
  • Noise rating in sones or decibels. Bedrooms demand quiet. A larger unit running slower can help.
  • Filter options. Can the intake side take MERV thirteen without a large pressure drop. Is there room for a deeper filter to extend life.
  • Frost strategy for cold regions. Check if the unit uses preheat, recirculation, or duty cycle defrost and whether your climate calls for one method or another.
  • Service access. Filters should slide out without special tools. The core should be reachable without removing the entire unit.

When comparing literature, rely on SRE and TRE rather than older ASE numbers. As Fantech notes, high ASEF can hide high fan watt draw. Better to choose a unit with honest recovery numbers at low watts per cfm, especially for continuous operation.

FAQs

Do I need an ERV or an HRV in Austin TX

Most homes in Austin benefit from an ERV. The ERV reduces the extra moisture carried by your fresh air during long humid seasons. A peer reviewed study showed ERVs beat HRVs on total energy in hot humid cities. See the study at pmc.ncbi.nlm.nih.gov. Pair the ERV with good dehumidification if indoor humidity still rises above comfort targets. The Berkeley Lab primer also explains why the ERV helps by limiting moisture transfer, not by drying the house. See svach.lbl.gov.

Will an ERV control indoor humidity by itself

No. An ERV does not dehumidify a home. It simply reduces how much water vapor the ventilation air adds or removes. In hot humid regions, plan on an ERV plus sensible cooling that runs long enough to pull latent load, or a dedicated whole home dehumidifier when needed.

Can ERVs be used in cold climates

Yes. Modern ERVs operate in cold climates with proper frost control. They help prevent the house from feeling bone dry. Follow the manufacturer guidance for defrost. RenewAire and Zehnder offer good references at supporthub.jswmi.com and zehnderamerica.com.

Can I connect an ERV to my furnace return

Tread carefully. A simple dump of fresh air into the return can short circuit or cause condensation issues in humid climates. At least one side should be separately ducted. Proper controls must prevent unnecessary blower energy. The Building America Solution Center and Fine Homebuilding both warn about this path and show better options at basc.pnnl.gov and finehomebuilding.com.

How loud are HRVs and ERVs

Quieter models publish lower sone or dB values. Real world noise also comes from duct design. Short, smooth, well insulated ducts reduce blower noise. Bedrooms call for low fan speed or remote units. This is one reason fully ducted systems often cost more yet deliver a better daily experience.

What is better for small tight apartments in winter

It depends on occupant density and moisture sources. A small tight apartment with frequent showers and cooking may push winter humidity too high. An HRV can help dry the space. Some designers swap an HRV core for winter and use an ERV core for summer in larger projects. Steven Winter Associates discusses this seasonal approach for multifamily Passive House at swinter.com. For tight retrofits where ducting is tough, a spot ERV can meet code rates without major work.

Safety and installation notes

Keep outdoor intake and exhaust terminations separated to avoid cross contamination. Ten feet is a common minimum in manufacturer manuals. Do not pull air from garages, attics, or crawlspaces. Seal and insulate ducts per ACCA Manual D and the unit manual. The Building America Solution Center offers practical installation tips at basc.pnnl.gov.

A quick way to move forward

Start with a short assessment. We measure your current airflows, check rooms that need supply or exhaust, look at filter goals for allergies, verify access for a serviceable installation, and match a model to the airflow you need. Balanced ventilation supplies filtered outdoor air while exhausting stale air, which reduces pollutants compared with exhaust only approaches. Berkeley Lab makes that case clearly in their primer at svach.lbl.gov.

If you live in a hot humid climate like Central Texas, an ERV is often the smarter choice for comfort and energy. If your project is a cold climate new build, an ERV with frost control often keeps winter comfort steadier. Tight homes need fresh air by design after envelope work, so coordinating sealing air leaks with a fresh air plan pays off. Schedule a ventilation assessment or ask about pairing ERV with whole home dehumidification. If your system is already in place, book HVAC preventative maintenance so filters, cores, and flows stay in top shape.

Solar Powered HVAC Worth the Investment

Solar powered HVAC systems offer a unique solution that combines sustainability with comfort for homeowners. With energy costs continuing to rise and environmental concerns at the forefront, many are searching for practical ways to reduce expenses and minimize their carbon footprint. Using solar panel heating and cooling completes that goal, supporting the transition to cleaner energy while providing reliable temperature control. In this article, learn what solar powered HVAC means for your home, how it compares financially, and the best methods to take advantage of this technology, from system types to installation guidance.

Understanding Solar Powered HVAC Systems

Solar powered HVAC systems make use of one of two main technologies. The first, solar photovoltaic systems, use solar panels to convert sunlight directly into electricity. This electricity supplies your heating and cooling units, which means less power is drawn from your local utility grid. A second type, known as solar thermal, harnesses the sun to heat a fluid. That fluid circulates and helps manage air temperature indoors, contributing to both heating and cooling operations. Both designs use renewable energy to significantly lower household emissions and reliance on grid power.

For many homes, solar photovoltaic systems make the most sense. They pair well with conventional air conditioners, heat pumps, or other electric-based HVAC units. Installation requires an array of solar panels, proper wiring, and connection to the existing HVAC infrastructure. Homeowners in regions with frequent sun exposure get the best return. For those in cloudier areas, performance may dip, though modern systems remain quite effective. Solar thermal options are less common in the United States but have carved out a niche for those looking for advanced energy integrations. The right choice depends on your home’s orientation, climate, and preferred method for heating and cooling.

Initial Cost Compared to Long Term Savings

One of the first questions homeowners have concerns cost. Installing a solar powered HVAC system requires a higher investment upfront than a traditional system. Equipment, installation, and upgrades to fit your existing home must be considered. Despite this, monthly savings quickly add up. Most homeowners see bill reductions after the first season of operation. Depending on location, usage habits, and system selection, some homeowners report savings as steep as forty percent over traditional HVAC costs.

The timeline for return on investment depends on numerous factors. In many cases, solar powered HVAC pays for itself within a few years. As electricity prices continue to climb, these savings could increase as time goes by. When paired with available incentives and low interest financing, the initial investment becomes easier to manage for the long haul. The true value shines when considering rising grid power costs and the steady output of solar energy, especially in sunny climates.

Regional Factors for Solar Powered HVAC

Solar panel heating and cooling performs best under strong, direct sunlight. Places like Austin, TX, see robust results with rapid payback due to generous sun exposure. Customers in these regions often benefit from faster installation and increased options from local professionals. Even homes outside high sun zones can gain advantages, though the efficiency ratio shifts. In areas with less consistent sun, systems may need to be larger or backed up by grid power more often. However, advancements in solar panel design now allow for far greater energy collection during lower light conditions than ever before.

Take into account shading, seasonal sunlight patterns, and roof orientation. A professionally conducted assessment helps pinpoint whether your property is a strong candidate for solar integration. While nearly any home can use solar technology with the right equipment, some locations simply produce better results due to weather patterns and available daylight.

Best System Pairings for Efficiency

Combining solar panel power with high-efficiency HVAC systems brings together the strengths of both. Heat pumps, known for their ability to move heat rather than generate it, make a fitting match with solar setups. These units only require electricity to transfer heat in or out of your living spaces. Solar panels provide the majority of this power, leaving grid dependency at a minimum. Modern variable-speed compressors and ductless mini-splits only enhance this match, operating with precision and consuming less energy at every stage.

Smart thermostats and energy recovery ventilators take things further by keeping energy use well-managed throughout the home. The synergy between efficient HVAC and solar panels maximizes comfort with minimum power draw. Selecting quality components ensures the system works reliably, delivering peak efficiency without high operational costs.

Understanding Federal and State Incentives

Financial help is available to make solar installations attractive. The Federal Solar Investment Tax Credit provides a thirty percent reduction in system cost through your annual taxes for qualifying solar panel projects between now and 2031. Some states offer their own rebates, low interest loans, or additional credits that can piggyback with federal programs. These incentives can reduce initial expenses and improve long-term value, making solar panel heating and cooling a more approachable choice for many families.

The application process for incentives is straightforward but does require documentation. Work closely with your installer and tax advisor to confirm you are eligible and prepared with the required paperwork. By utilizing credits and rebates, the net cost of upgrading falls well below sticker price, making renewable energy accessible even for homeowners on a budget.

Professional Strategies for a Successful Installation

The path to a smooth solar powered HVAC installation starts with a professional evaluation. Certified contractors have the tools and experience to design a system tailored to your property. They check roof condition, proper orientation, and potential obstructions to sunlight. The goal is to place solar panels where they can yield the highest output.

PNeglecting quality equipment brings future headaches with performance and reliability. Choose solar panels with proven durability, high efficiency, and good warranties. The same holds for the HVAC system you pair with the solar setup. Reliable brands with established support networks make repairs and maintenance less daunting, should the need arise.

Routine care is needed to protect your investment. Professional maintenance includes inspecting connections, checking for worn parts, and cleaning solar panel surfaces. Clear panels work at higher capacity and reduce operating strain on your HVAC units. Homeowners committed to regular upkeep see their systems last much longer and maintain their savings over time.

Work with a contractor who is familiar with incentive programs and can streamline your paperwork. Companies like Livinon Mechanical know what Austin, TX homes need and guide clients through local requirements. Local experience speeds up installation, brings confidence to system design, and supports long-term care of your system.

Choosing the Right Type of Solar System for Your Needs

When weighing options, consider your home’s size, energy usage patterns, and climate. Full solar photovoltaic systems work exceptionally for homeowners who need cooling through long, intense summers, like those in Texas. Households with lower energy demands or more moderate climates might benefit from a smaller investment or a hybrid solar approach that combines solar with grid support.

Solar thermal systems can offer higher efficiency for heating needs but may not be as effective for air conditioning on their own. Consult your installer for guidance on matching the system to your lifestyle. Every home is unique, and a customized approach keeps costs balanced with savings. If your property cannot support enough panels for a full solar solution, partial systems or energy storage add flexibility and value to the setup.

Environmental Impact of Solar Powered HVAC

Replacing grid-based electricity with solar power makes an immediate impact on your home’s emissions. Solar panel heating and cooling lowers demand for nonrenewable resources, shrinking your household’s footprint year after year. Smaller environmental impact also brings benefits at the community level, reducing strain on the grid during high demand seasons.

In many areas, grid electricity is produced using fossil fuels. Using solar powered HVAC breaks this cycle, providing cleaner air, fewer emissions, and increased energy independence. Even partial adoption helps, with any reduction in grid use making meaningful progress. Eco-conscious homeowners appreciate the role solar power plays in broader sustainability efforts, every kilowatt generated on site benefits both home and environment.

Overcoming Common Challenges in Solar HVAC Adoption

Concerns about cloudy weather, installation complexity, or maintenance routines stop some homeowners from taking the next step. Modern solar panels now operate efficiently under a variety of conditions, not just full sun. Advances in battery technology and grid-tied systems make it possible to store solar energy for use at night or on overcast days. Professional installers anticipate installation barriers, helping overcome issues like roof angle or limited space.

Maintenance requirements are less demanding than many expect. Solar panels are largely self-sufficient after installation, requiring only periodic cleaning and visual inspections. Most well-installed systems run flawlessly for many years with simple routine care. Working with knowledgeable providers means help is always available if challenges do arise. The peace of mind grows along with your savings, as each year of operation builds confidence in the technology.

Why Austin, TX Homes Are Perfect for Solar Powered HVAC

Austin residents enjoy ample sunlight, making this region one of the top choices for solar investments. Frequent sunshine provides consistent energy production, allowing homes to operate HVAC systems during the hottest months with minimal grid use. Local expertise makes installation more efficient, thanks to contractors with experience managing the region’s heat, humidity, and unique building requirements. The blend of high sun exposure, rising energy prices, and supportive local policies creates a favorable environment for adopting sustainable heating and cooling technologies.

Livinon Mechanical specializes in air conditioning connections, preventative maintenance, and custom solar solutions tailored for Austin homes. Their approach considers each property’s specific features, from roof design to family lifestyle. The result is a system that blends green energy with dependability, making year-round comfort both sustainable and cost-effective.

Bringing Solar Power to Your Home’s HVAC

Combining solar energy with HVAC systems delivers multiple benefits. Lower energy bills, decreased emissions, and less grid dependency become a reality the moment the system activates. Consider a professional assessment, select quality equipment, and take advantage of state and federal incentives for the best results. In regions like Austin, TX, the decision becomes even easier due to favorable sunlight and a strong network of experienced solar professionals.

Solar powered HVAC is an investment with financial and environmental returns. For homeowners committed to sustainability and seeking reliable indoor comfort, integrating solar panel heating and cooling answers those needs without compromise.

Green HVAC Practices for a Sustainable Home

Creating a greener home starts with how you heat and cool your space. While eco-conscious choices in lighting and appliances are often top of mind, HVAC systems have a significant impact on both energy use and the environment. Making a switch to an eco-friendly HVAC system can dramatically reduce your home’s carbon footprint. Whether you’re upgrading your system, considering new technologies like geothermal heating, or adjusting your maintenance habits, you can make choices that help your home become more efficient and less harmful to the environment.

Why HVAC Efficiency Matters

Your home’s heating and cooling system is one of the largest energy consumers in your household. HVAC systems that are outdated or poorly maintained use more energy than necessary, often relying on older equipment and outdated refrigerants that release greenhouse gases into the atmosphere. This results in higher operational costs, stronger demands on the electrical grid during peak seasons, and increased environmental harm over time.

More efficient systems reduce the amount of electricity or fuel needed to maintain your indoor climate. That translates into lower emissions and smaller utility bills. While the initial cost of upgrading can sometimes seem high, the savings realized over time can make a big difference. Not just financially, but environmentally as well.

Choosing Energy-Efficient HVAC Systems

Modern HVAC systems are designed with energy conservation in mind. When selecting a new unit, look for systems certified under programs like Energy Star. These certifications mean the units meet stricter efficiency guidelines than standard models, using less energy to perform the same tasks.

Another key feature is the Seasonal Energy Efficiency Ratio (SEER). The higher the SEER rating, the more efficient the unit operates. Systems with a high SEER rating can cool a home using significantly less electricity than older models, especially during high temperatures. As technology continues to improve, newer systems increasingly reach SEER values that were unheard of in past years, meaning even greater savings and lower environmental burdens.

Don’t overlook variable speed motors and compressors. Unlike single-speed components that are either all on or all off, these adapt their performance to the precise demand of your home. That means less energy waste and a system that runs quieter and lasts longer.

Using Eco-Friendly Refrigerants

Older HVAC systems still rely on refrigerants such as R-22, which are harmful to the ozone layer. Modern systems use alternatives like R-410A and R-32, which offer improved cooling performance and are less environmentally toxic. While still not zero-impact, these newer refrigerants release fewer greenhouse gases when compared to their predecessors.

Transitioning to an eco-friendly refrigerant might mean replacing your HVAC equipment, but in many cases, it’s a necessary step for reducing harmful emissions. The global HVAC industry is moving toward even safer solutions, such as hydrofluoroolefins (HFOs), intended to further reduce global warming potential. Staying ahead and installing a compliant system today can help you avoid replacement rushes as regulations continue to evolve.

Upgrading to a Geothermal Heating System

Geothermal heating provides one of the lowest-impact solutions for home climate control. Rather than generating heat through combustion or electrical resistance, geothermal systems use the constant temperature of the earth below your home to move heat in and out.

During the winter, heat is absorbed from the ground and transferred into your home. In the summer, the process is reversed, pulling heat from your home and moving it underground. This process uses far less electricity than traditional cooling methods and eliminates the need for fossil fuels entirely.

Geothermal systems are buried underground, often lasting up to 50 years with minimal maintenance. While the upfront investment can be higher than conventional systems, federal and local tax credits can reduce these costs significantly. Plus, the long-term savings on energy bills are hard to ignore. These systems are quiet, reliable, and produce fewer emissions than even some of the cleanest electric systems available today.

Improving Airflow and Insulation

Even a highly efficient HVAC system won’t perform well if your home is poorly insulated. Energy escapes through windows, rooflines, and door gaps. Improving your home’s insulation and sealing leaks can reduce the workload on your HVAC unit, keeping your home comfortable with significantly less energy.

Upgrading insulation in attics, crawl spaces, and walls slows down the transfer of heat. When combined with energy-efficient windows and well-maintained ductwork, this can dramatically cut heating and cooling requirements throughout all seasons of the year.

Proper airflow also plays a part. When air isn’t circulating well, your system runs longer than it should. Make sure furniture isn’t blocking vents and that registers are fully opened. Have a technician inspect your duct system for cracks and blockages that can waste cooled or heated air before it reaches the living spaces.

Smart Thermostats for Greater Control

Heating and cooling systems don’t need to run at full power when no one is home. Smart thermostats allow homeowners to schedule temperature settings based on time of day or occupancy status. Over time, many learn your living patterns and can adjust settings automatically, preventing unnecessary energy usage.

These devices often provide consumption data, which helps you recognize when adjustments are needed. Being able to monitor and manage your system from a mobile device or voice assistant adds a level of convenience that encourages more consistent energy-conscious decisions.

Rethinking the Size of Your System

Bigger isn’t always better when it comes to HVAC equipment. A system that is too large for a space doesn’t heat or cool more effectively. In fact, it often leads to short cycling, which wastes energy and wears out parts faster. On the other extreme, a unit that’s too small will work harder than it should, leading to premature failure and high utility costs.

An HVAC professional can perform a proper load calculation to determine what size unit is ideal for your home. This calculation considers square footage, ceiling height, insulation types, and other factors that influence demand. Right-sizing your system helps make the most of any eco-friendly upgrades you choose and ensures smoother year-round comfort.

Energy Recovery Ventilators

Indoor air quality and HVAC efficiency often work against each other in traditional homes. Opening windows for fresh air raises indoor humidity and temperature levels, adding to your system’s load. But keeping windows closed leads to stale air and indoor pollution buildup.

Energy Recovery Ventilators (ERVs) offer a balance. These systems allow fresh air into your home while transferring heat and moisture between incoming and outgoing air streams. During winter, heat from outgoing air warms the incoming air. During summer, the opposite happens. This process reduces the shock load on your HVAC system and gives indoor air a boost in freshness with less energy consumption.

Incentives for Green HVAC Choices

Municipal and federal programs often offer incentives for homeowners who switch to eco-friendly HVAC options. Whether in the form of tax rebates, cash-back incentives, or zero-interest loans, these programs can make the investment more appealing.

Always check for available programs before purchasing equipment. Utility companies and state agencies may offer perks for upgrading to a high-efficiency unit or switching to geothermal heating. These incentives can reduce costs significantly, making green choices even more financially wise in the long run.

Regular Maintenance and Long-Term Habits

Seasonal maintenance keeps your system in top working condition while supporting long-term environmental sustainability. Simple, consistent habits—paired with professional care—prevent prolonged high energy use and avoid expensive repairs due to unnoticed inefficiencies.

Professional Care

By contacting a certified HVAC technician once or twice a year, you ensure your system runs optimally. A professional can inspect your duct system for cracks or blockages that waste conditioned air, check for refrigerant leaks, and deep-clean internal components like coils to keep the overall workload on your unit low.

Daily and Seasonal Habits

You can handle several high-impact maintenance tasks and behavioral shifts right at home:

Filter Care: Change your air filters on a regular basis to ensure unrestricted airflow.

Clear the Perimeter: Clear out debris, leaves, and weeds from around your outdoor unit, and make sure indoor vents are free from furniture or obstructions.

Thermostat Consistency: Avoid excessive or sudden adjustments to your heating and cooling settings. Keep temperatures consistent, and adjust blinds seasonally or use ceiling fans to naturally assist with air circulation.

Taking charge of these small efforts minimizes unnecessary strain on your equipment, extends its lifespan, and ensures smoother, more eco-friendly comfort year-round.

AI Transforming HVAC for Smart Home Comfort

As smart technology finds its way into more corners of our homes, heating and cooling systems are evolving faster than ever. Artificial intelligence is reshaping the way we manage indoor comfort, helping homeowners reduce energy consumption while tailoring settings to match individual lifestyles. Traditional thermostats are being replaced with intelligent systems that adapt, learn, and respond proactively, delivering comfort with efficiency. This article breaks down how AI-driven HVAC is changing home temperature control, how it’s being implemented, the science behind its functionality, and what future advancements might look like for homeowners ready to modernize their systems.

How AI is improving residential HVAC

Traditional HVAC systems operate by reacting to temperature changes when prompted by a set thermostat. AI systems take a completely different approach, working in the background to predict conditions and adjust settings automatically. These smart systems analyze data over time, which can include usage patterns, occupancy schedules, weather conditions, and even air quality levels, to build a complete profile of the home’s comfort needs.

Understanding AI-driven HVAC automation

At its core, artificial intelligence in HVAC depends on machine learning. These systems begin by using sensors and cloud-based algorithms to collect and process data from various sources around the home. Over time, they start to spot patterns, such as when a kitchen tends to overheat due to sunlight through large windows or how quickly a bedroom cools in the evening versus the living room.

The system uses this data to anticipate rather than just respond. It might start the cooling process gradually before a homeowner returns from work, rather than waiting until the thermostat registers a cue. Because of this type of predictive behavior, inhabitants enjoy a consistently regulated indoor climate with less energy consumption. This is especially useful in regions with fluctuating temperatures or where energy rates shift based on demand times during the day.

Smart climate control and energy management

AI doesn’t just fine-tune temperatures; it makes real-time decisions that affect energy usage throughout the day. Some systems integrate solar data, analyzing when panels are most productive so they can operate cooling or heating equipment when renewable energy is abundant. Others connect with smart grids to adjust consumption based on neighborhood demand. All of this happens silently, without direct direction from the user. What makes this possible is AI’s ability to adapt quickly while interpreting nuanced data sets that would be impossible for a human to manage manually.

Behavior learning for personalized comfort

Imagine walking into your living room at 7 PM and it always feels exactly how you like it. AI in HVAC makes this possible. These units monitor how different people within a household interact with climate settings and use that information to personalize the experience for each user. As the system learns over time, it begins to predict preferences without needing constant input or adjustment.

Some use voice-command assistants, allowing users to mention when they’re cold or hot. The system takes that feedback and adjusts accordingly. Even more advanced setups use presence detection, temperature zones, and motion sensors to deliver localized comfort where it’s needed, shutting off airflow to unused rooms or concentrating efforts where people are congregating.

This level of adaptability gives each member of the household a customized experience. Rather than fighting over static thermostat settings, AI systems recognize patterns and attempt to meet all parties halfway depending on where they are and for how long they reside in a given room.

Adapting to weather in real time

Integrating real-time weather forecasting into heating and cooling decisions takes intelligent automation to another level. AI-powered systems pull local meteorological data, considering not only the current outdoor temperature but also humidity, wind speed, and the forecasted shift in conditions throughout the day. Instead of waiting for the house to cool down as a heatwave starts, the system might adjust earlier in the morning, maintaining consistency while conserving energy.

This type of proactive strategy allows AI-driven HVAC systems to be several steps ahead, taking into account seasonal changes or sudden dips and spikes. It avoids overcorrecting or inefficient short bursts of heating or cooling, replacing them with smoother transitions that use less power but yield better comfort.

AI and maintenance prediction

Beyond managing comfort, artificial intelligence is significantly improving how equipment upkeep is handled. By analyzing system performance and tracking small shifts in operation, AI can forecast potential breakdowns and maintenance needs before they become critical. For instance, if the system begins using more energy than usual to reach a set temperature, it may flag a blockage or failing component.

Rather than waiting for the furnace to stop working entirely, homeowners or technicians receive notifications suggesting preventive action. This predictive approach lengthens the lifespan of the HVAC equipment and helps avoid costly emergency repairs. For homeowners, that means peace of mind while reducing annual repair costs.

Factory runtime data, sensor diagnostics, and filter usage can also be tracked. Many platforms alert users when filters need to be changed or when airflow seems weaker than it should be. It stops homeowners from having to guess when service is needed, changing repairs from reactive to proactive.

Integrating with smart home devices

Artificial intelligence does not function in isolation within a smart home. HVAC systems today are frequently connected to a network of smart products, from lighting and blinds to security systems and voice control assistants. This networked communication allows for deeper control strategies that merge different tasks to create ideal living environments.

For example, automated blinds might close in the afternoon to keep the home cool, based on sunlight trajectory, while the HVAC unit shifts into ventilation mode rather than heavy cooling. LED lights adjust color temperature to mirror exterior daylight conditions, syncing with the internal temperature profile for better sleep patterns or productivity during work hours.

Compatibility remains a strong focus as more brands streamline cross-platform support, making it easier for homeowners to upgrade without being locked into a single manufacturer. Over time, the connected nature of these devices encourages smarter behavior across every system in the house, further reducing the manual effort required to create a comfortable setting.

Benefits for homeowners planning upgrades

For those considering an HVAC replacement or a system enhancement, integrating AI-driven controls can future-proof their homes. While the initial cost of some AI-enabled systems may be higher than standard options, the savings seen over time through reduced electrical use and fewer maintenance issues often make up for the difference.

These systems also meet the growing demand for greener living. Because energy use is constantly reviewed and adjusted, excess consumption is trimmed automatically. Some AI integrations are eligible for rebates or incentives from local utilities, further improving long-term return on investment.

Retrofitting existing HVAC equipment with AI-compatible controls is another path many choose. Smart thermostats alone can offer many of the benefits without a full system overhaul. Upgrades can happen gradually, allowing homeowners to enter the smart climate control space at their own pace without full replacement.

Looking at future innovations

Artificial intelligence is still evolving. In the HVAC context, the amount of data systems will be able to process in the near future promises even more refined control and efficiency. Future rooftops may house local climate sensors that feed into shared databases, giving each HVAC system location-specific intelligence that adjusts to street-level differences in microclimate.

Expect to see more developments in self-healing systems, where internal diagnostics not only flag problems, but recalibrate or rewire themselves to fix minor issues without human intervention. Improved machine learning models will also increase adaptation speed, meaning a new system will need less time to learn occupancy patterns and preferences.

Soon, multiple AI-managed homes in a community may share data anonymously, creating smarter infrastructure overall. Homes on the same block could collectively reduce load during peak hours, easing demand on the power grid and avoiding brownouts. Machine-assisted climate planning could become a default part of home construction, factored into walls, windows, and foundation design from day one.

Why AI matters in today’s homes

Homeowners no longer need to settle for static, wasteful climate control systems. AI-driven HVAC shifts heating and cooling from a hidden, mechanical necessity into an active partner in sustainable modern living. By quietly adapting to real-world habits, fluctuating utility rates, and shifting weather patterns, these systems eliminate the compromise between indoor comfort and environmental responsibility.

Ultimately, the real value of artificial intelligence in the home isn’t just the hands-off convenience, it’s the massive reduction in wasted energy and the long-term preservation of your equipment. As smart infrastructure continues to mature, upgrading to an intelligent climate system is no longer just about modernization; it’s a practical investment in a smarter, more resourceful household.

If you’re ready to upgrade your system today, contact us for a free quote on your service.