Livinon Mechanical

What Austin’s Hard Water Is Doing to Your Plumbing (and How to Stop It)

White crust on the showerhead. Cloudy spots on glassware no matter how you load the dishwasher. A water heater that rumbles like it’s digesting gravel. None of these are cleaning failures. They are all symptoms of the same thing: hard water, and Central Texas has plenty of it.

This post explains where Austin’s hard water comes from, what it does to plumbing and appliances over time, which symptoms deserve a plumber’s attention, and which treatment options are worth the money.

Why Austin water runs hard

Rain that falls over the Hill Country filters through thick limestone before it reaches the Colorado River, the Highland Lakes, and the aquifers that supply Central Texas. Limestone is calcium carbonate. Slightly acidic rainwater dissolves it on the way through, so by the time water reaches your tap it carries a load of dissolved calcium and magnesium.

Water hardness is measured in grains per gallon. Anything above 7 gpg counts as hard, and above 10.5 gpg is very hard. Levels across the Austin metro vary by neighborhood and water source, with some areas testing well into the very hard range. Your utility’s annual water quality report lists the numbers for your address, and a plumber can test hardness on site in a couple of minutes.

Hard water is safe to drink. The minerals pose no health risk. The damage is to your home, and it happens slowly enough that most people never connect the symptoms to the cause.

What hard water does inside your pipes

Every time hard water is heated or evaporates, dissolved minerals come out of solution and bond to the nearest surface as scale. That chemistry plays out everywhere water flows in your house.

Water heaters take the worst of it. Scale settles as sediment at the bottom of a tank, forming an insulating layer between the burner and the water. The heater runs longer to do the same job, energy bills creep up, and the popping and rumbling you hear is water boiling through sediment pockets. In tankless units, scale coats the heat exchanger directly and can cut the unit’s lifespan roughly in half when maintenance is skipped.

Fixtures and valves clog and stick. Aerators plug up, showerhead spray patterns go sideways, and the small moving parts inside fill valves and cartridges seize. If a faucet drips no matter how hard you close it, mineral buildup on the seat is a frequent culprit.

Pipe capacity shrinks over decades. In older homes with galvanized steel pipe, scale and corrosion narrow the inside diameter year after year. The symptom is falling water pressure at fixtures, especially hot water pressure, since heat accelerates scale formation.

Appliances age faster. Dishwashers, washing machines, and ice makers all run hard water through small valves and heating elements. Manufacturers design around average water. Very hard water pushes those components past their design assumptions.

Symptoms worth a service call

Some hard water effects are cosmetic. Others signal real damage in progress. Call a plumber when you notice:

Rumbling, popping, or crackling from the water heater. That is sediment. A flush may restore quiet operation if it’s caught early. A heater that has rumbled for years may be past saving, and sediment shortens tank life either way.

Hot water pressure noticeably weaker than cold. Scale accumulates fastest on the hot side. Weak hot pressure at multiple fixtures points to buildup in the heater outlet, hot supply lines, or both.

Recurring drips and running toilets shortly after repairs. When new cartridges and flappers fail within a year or two, mineral-laden water is usually grinding them down. Treating the water fixes the pattern instead of the symptom.

Water heater running out faster than it used to. Sediment displaces capacity. A 50-gallon tank with years of buildup may hold far less usable hot water than its label claims.

Any of these fall under a standard plumbing repair visit, and the fix often costs less than the water and energy the problem wastes each year.

What actually works against hard water

Whole-home water softener. The proven fix. A softener swaps calcium and magnesium ions for sodium through ion exchange resin, delivering soft water to every fixture and appliance. Sizing matters: household size multiplied by daily water use multiplied by your hardness level determines the grain capacity you need. An undersized unit regenerates constantly and lets hard water break through during heavy use. Expect a properly sized, professionally installed system to protect water heaters, extend fixture life, cut soap and detergent use, and end the white crust cycle. Softener installs are a standard part of our plumbing installation work.

Salt-free conditioners. These systems alter how minerals crystallize so scale sticks less readily, but they do not remove hardness from the water. Results vary with water chemistry and flow patterns. For very hard water they are a partial measure, not a substitute for softening.

Regular water heater maintenance. With or without a softener, an annual tank flush or tankless descale is the cheapest insurance available for the most expensive water-using appliance in the house. Details are covered on our water heater services page.

Point-of-use filtration. A reverse osmosis unit at the kitchen sink improves drinking water taste and handles what a softener does not, but it protects one tap, not your plumbing. Pair it with a softener rather than using it as a replacement.

One note on softeners and chloramine: Austin’s utility disinfects with chloramine rather than free chlorine. Softener resin does not remove it. If taste or odor bothers you, that is a filtration question layered on top of the hardness question, and the two systems work together.

The cost of doing nothing

Hard water damage compounds quietly. A water heater that should have lasted twelve years fails at eight. Faucet cartridges get replaced twice as often. Pressure problems get blamed on the city supply. Detergent use climbs. Spread across a decade of ownership, untreated very hard water routinely costs more than the softener that would have prevented it. The equipment pays for itself in the failures that never happen.

FAQs

Is hard water bad for my health? No. Calcium and magnesium are minerals your body uses. The damage is to plumbing, appliances, skin, and laundry, not to you.

How do I find out my exact hardness level? Check your water utility’s annual Consumer Confidence Report, use an inexpensive test strip kit, or ask for a test during any service visit. Hardness varies enough across the metro that testing your own tap beats relying on a citywide average.

Will a softener make my water taste salty? Properly configured, no. The sodium added during ion exchange is small at typical hardness levels. Anyone on a strict sodium-restricted diet can plumb a hard water line to the kitchen cold tap or add an RO unit for drinking water.

Can scale buildup in pipes be reversed? In fixtures and heaters, descaling helps. Inside decades-old galvanized pipe, buildup and corrosion are effectively permanent, and repiping is the real fix once pressure loss becomes significant.

Test first, then decide

The right treatment starts with knowing your actual numbers. We test water hardness on site, check your water heater for sediment damage, and will give you a straight recommendation with a free estimate, whether that means a softener, a flush, or nothing at all this year.

Call (737) 308-0506 to schedule a visit.

Keep Indoor Air Clean During Home Remodeling with HVAC

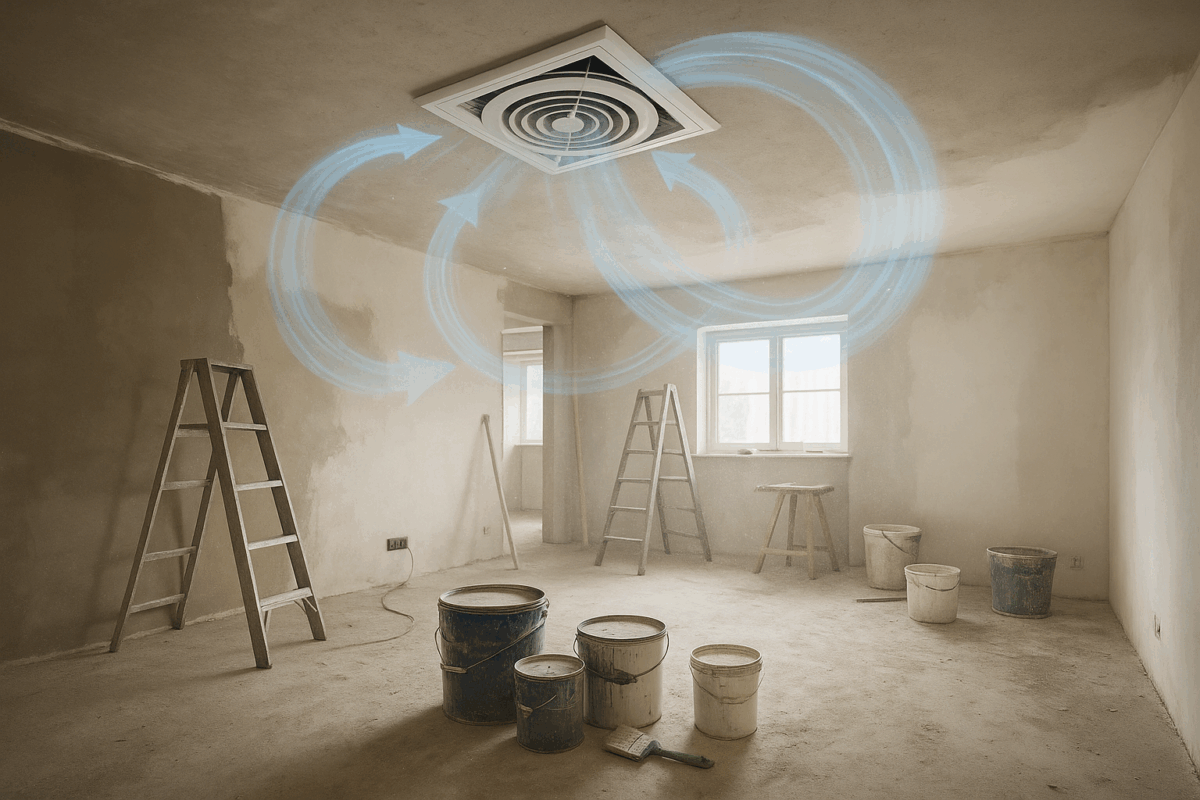
Home remodeling breathes fresh energy into a space. New flooring, kitchen makeovers, and updated paint bring comfort and satisfaction. These projects also disturb the balance of indoor air. Dust, chemical fumes, and other pollutants accumulate quickly. Many homeowners overlook these invisible dangers. The comfort of a renewed room can quickly lose its appeal if the air becomes irritating or even harmful. The HVAC system stands as a powerful tool to protect and improve indoor air during and after upgrades. Invest time and focus on how your equipment can help you achieve a clean, healthy atmosphere during every phase of remodeling.

How Remodeling Projects Compromise Indoor Air

Every home project, from installing new cabinets to a bathroom retile, disturbs the balance of indoor air. Activities like sawing wood, demolishing walls, and stripping floors throw massive amounts of dust into every corner. Even the most careful contractor cannot stop airborne particles from traveling far beyond the active workspace. In older homes, these disruptions carry hidden risks such as lead dust or asbestos, hazards that often remain undetected without proper testing.

Beyond physical debris, fresh materials introduce volatile organic compounds, or VOCs. Paint, adhesives, varnishes, and manufactured wood products all release chemical fumes when new. While the scent of fresh paint signals exciting progress, it also introduces substances that cause immediate symptoms ranging from mild headaches to throat irritation. These gases present a unique threat because they lack a persistent odor as they disperse, yet they can continue to off-gas from synthetic carpets and flooring for weeks or months.

The consequences of these remodeling pollutants mount gradually but steadily. Fine dust from sanding drywall or cutting tile settles deep inside HVAC ducts, allowing the system to redistribute the debris throughout your living spaces long after the tools are packed away. This constant recirculation causes ongoing eye and respiratory irritation, complicating existing breathing conditions like asthma. Meanwhile, unchecked moisture from curing plaster or new plumbing changes creates breeding grounds for mold. Gypsum wallboard and subfloors are highly vulnerable, and the resulting mold spores present serious health risks for children, seniors, and sensitive individuals. Recognizing how quickly your air quality changes is the first step toward guarding your family against these hidden environmental risks.

Containing Dust and Pollutants During Repairs

The first goal during remodeling is to stop contaminants from spreading. This is easier said than done, since tiny particles move quickly and settle slowly. Construction teams often use plastic sheeting or similar barriers to separate one room from another. Polyethylene sheeting, six mils thick or more, is a popular and strong material. Temporary walls or zipper doors also block passage between rooms so contaminants stay near their source.

It is not enough to close a door and hope for the best. Air moves through vents, under thresholds, and along gaps in flooring. Cover each HVAC vent opening in active work areas using plastic or magnetic vent shields. Tape the edges thoroughly so nothing seeps through. Turn off any fans or recirculation settings on your system while work is ongoing. By closing returns and supplies, you prevent dust from reaching ductwork that can later spread debris throughout your home.

For larger projects, consider negative pneganegative-pressuretive-pressureessure setups. This involves placing an exhaust fan in a window or doorway, blowing air out of the work zone, so airborne particles move outdoors rather than toward the rest of your house. Job sites with this system notice dramatically less residue coating surfaces adjacent to the workspace.

Effective HVAC Ventilation Strategies for Remodels

Ventilation supports indoor air by removing dirty air and replacing it with fresh air. During remodeling, pay extra attention to how your system moves air. If your HVAC setup includes a fresh air intake, keep it running to bring outdoor air inside. This method rapidly reduces VOC concentration and prevents dust from lingering.

Open windows, when possible and safe, even for a few hours. Cross-ventilation, achieved by opening two windows on opposite sides of your home, disperses contaminants much faster than a single-source fan. Use exhaust fans in bathrooms and kitchens to push fumes and particles outside. These tools remove ultra-fine particles that escape normal household filters.

Your system may allow for high or low speed circulation. Set blowers to higher speeds to pull air through filters more frequently during and after the project. If you have zoned climate control, turn off heating or cooling in the part of your home undergoing work. This isolates air movement and keeps the rest of the house safe.

Professional HVAC experts help tailor these settings for your space, preventing both over-ventilation, which can waste energy, and under-ventilation, which leaves pollution behind. A well-tuned system shields your air at all times, even when windows cannot remain open due to extreme temperatures or high pollen counts outside.

The Best Filters for Remodeling Dust and Chemicals

Filter selection changes the outcome of every renovation. Standard filters in many homes focus on protecting the HVAC equipment. These basic options trap large particles but miss smaller dust and nearly all VOCs. Consider upgrading to a filter rated MERV 11 or MERV 13 during and after your project. MERV, or Minimum Efficiency Reporting Value, measures how well a filter traps tiny contaminants. Higher numbers remove smaller particles, including much of the airborne matter produced by construction or strong-smelling paints.

Many high-efficiency filters are compatible with modern HVAC systems, but always verify before installation. Some systems cannot handle the extra airflow resistance, so a professional check is wise. Use specialized filters like activated carbon for maximum reduction of chemical fumes. These products are designed to trap odors and gases that slip past paper or fiberglass filters. Change filters frequently, sometimes twice as often during active construction or painting seasons, since they can become saturated and lose effectiveness quickly.

If you use portable air purifiers, select units with both HEPA and charcoal filtering. HEPA handles dust, mold spores, and pollen. Charcoal attacks gases, delivering noticeable relief from VOC-related discomfort. Position purifiers near high-traffic areas or wherever family members spend the most time. Continue use for several weeks post-project, as residual particles and fumes will still linger in lesser-ventilated spots.

Regular HVAC Maintenance Protects Air Quality

No matter how technology advances, dust eventually finds its way into equipment. HVAC maintenance is the unsung hero after every renovation. Schedule a deep system cleaning with us at Livinon Mechanical at the conclusion of your remodel or major repair. Ducts, grilles, and coils collect particles freed during demolition or sanding. Even the best job sites generate dust that passes through filters and settles inside machinery. Without occasional removal, these particles escape when the system restarts, contaminating your newly refreshed living space.

Pay attention to your system’s performance after a project. Listen for new noises, feel for weak airflow, and sniff for musty or chemical smells. These clues point to lingering contamination or moisture issues. Regular inspections spot developing problems well before they harm your equipment or health. During each visit, technicians measure air quality, check filter condition, inspect for hidden leaks, and tune your settings for peak air protection. Cleaning evaporator coils and drain pans also lowers the risk of mold, especially after wet work like tile cutting or pipe replacements.

Routine filter changes provide a reliable first defense. Make them part of your monthly or bimonthly cleaning schedule until air has returned to its pre-renovation state. Keep spare filters on hand throughout remodeling season, so you never wait to replace a clogged or dirty unit.

Controlling Humidity After Remodels Stops Mold

Remodeling projects almost always involve water and moisture. Plaster and mortar need curing. Paint takes time to fully dry. New appliances can leak during installation. Humid air lingers after tile installations or during plumbing changes. Mold grows rapidly under these conditions and becomes a constant threat to clean indoor air.

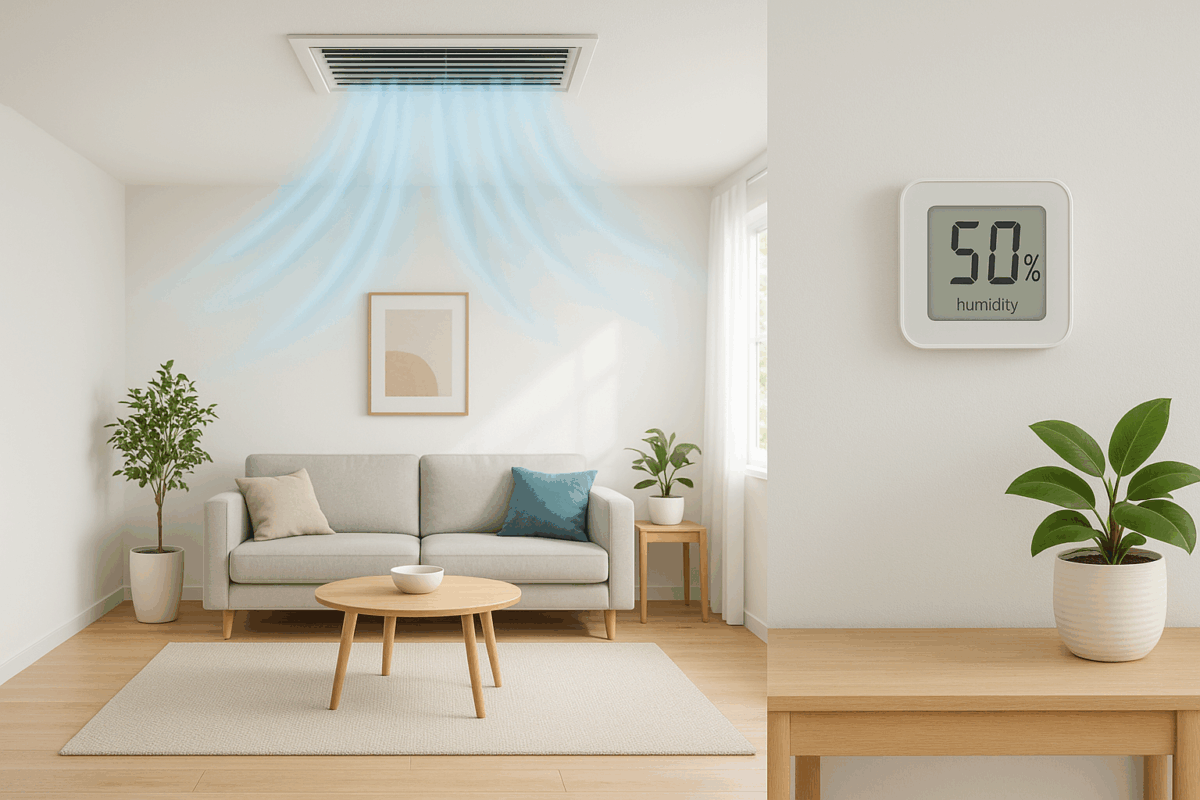
Effective humidity management protects both new finishes and your health. Keep your space between forty and sixty percent relative humidity. Most modern HVAC systems manage this with built-in humidifiers or dehumidifiers. If your equipment does not include this feature, use standalone machines in the wettest rooms. Set your target, and let the thermostat oversee the process day and night. If you live in a damp climate or have a basement remodel, consider additional water sensors and smart controls to alert you to leaks or sustained high humidity.

Watch for signs like musty odors, visible spots on ceilings or walls, or a persistent sticky feeling. Fixing issues early prevents the spread of hidden mold colonies and protects investments in fresh paint, flooring, or cabinetry. Work with HVAC experts for an inspection if signs emerge, since mold often hides inside ducts or under wet insulation.

Why HVAC Professional Help Matters

Homeowners handle many aspects of air protection, but professionals like Livinon Mechanical bring depth and experience. A post-remodel inspection covers far more than a cursory check of vent grilles. Licensed technicians measure airflow, check temperature and humidity patterns, and analyze filtration needs specific to your newly renovated space. They spot shortcuts that might leave your system vulnerable, such as unsealed duct penetrations or missing insulation after moving walls or changing layouts.

Professional duct cleaning extracts stubborn dust and debris left over from heavy demolition. Technicians use specialized brushes and vacuums to reach interior surfaces, restoring optimal flow. They also inspect for microbial growth, helping prevent the onset of mold and mildew in hidden locations. At Livinon Mechanical, technicians provide tailored recommendations for air purifiers, filter upgrades, or even complete equipment replacement if your old setup shows excessive age or struggle after a big project.

Emergency support delivers peace of mind if your system fails while sensitive family members or pets remain at home. Rapid fixes reduce time spent in polluted air and avoid minor issues becoming larger expenses. Visit Livinon Mechanical to schedule a service or review options for continuous home monitoring.

Better Air Quality Creates True Remodeling Success

Home improvement delivers satisfaction and value when the air indoors remains fresh and pleasant. Protecting air with effective containment, advanced filtration, and smart ventilation strategies creates a healthy environment. Upgrade your system as needed to manage unique contaminants from paints, adhesives, and dusty demolition. Focus on ongoing maintenance with timely filter changes and professional cleaning for lasting results. Professional HVAC support from trusted providers like Livinon Mechanical strengthens the results of your labor. Value comfort and long-term health just as much as style and craftsmanship in every remodel project.

Protect Your HVAC System from Storms and Floods

When severe weather strikes, your outdoor HVAC units are on the front lines. Heavy downpours, rising floodwaters, and high-velocity winds can quickly knock out your heating and cooling systems, leaving your home vulnerable when you need it most. Protecting your HVAC from storms and floods requires a mix of thoughtful preparation and immediate, proactive defenses. This guide breaks down exactly how to shield your equipment before the skies darken, what to do during a severe event, and how to safely recover afterward.

The Risks Extreme Weather Poses to Your HVAC

Heat waves can overload compressors and electrical systems. Hurricanes expose outdoor units to wind-driven debris, water, and power surges. Blizzards bury HVAC components in snow and ice, causing mechanical strain and even catastrophic server failure. Every form of extreme weather brings a unique threat. These threats often compound with age and lack of maintenance, making it more likely your HVAC unit will fail when you need it most. Preparation is the most effective way to reduce unexpected outages and expensive replacements.

How Preventative Maintenance Protects Your System

Preventative maintenance acts as the foundation for reliable operation, no matter the conditions. Scheduling tune-ups and inspections allows a technician to catch worn parts, refrigerant leaks, and weak compressors before a storm or heat wave. Professional maintenance also includes tightening electrical connections, lubricating moving components, and cleaning filters, coils, and drains.

A clean and calibrated system is less likely to strain when temperatures spike or drop. Addressing issues before weather emergencies means your HVAC will respond predictably and efficiently, cutting down on surprise failures. Maintenance also improves indoor air quality and lowers utility bills by keeping equipment efficient. Livinon Mechanical’s HVAC Preventative Maintenance services are tailored for these thorough tune-ups. Scheduling service ahead of storm season is an investment in comfort and system longevity.

Physical Protection for Outdoor Units

The outdoor condenser or heat pump faces the brunt of severe weather. Wind, rain, hail, and even airborne trash can damage the delicate fins and electrical parts inside. To guard this equipment, start by anchoring the unit to a solid concrete pad or other secure base. Fasteners and brackets prevent the unit from shifting during gusty conditions.

Clearing away furniture, planters, toys, or loose branches near the condenser further reduces risk. Objects left in the yard can become airborne and slam into the HVAC housing. During projected storms, a weatherproof cover designed for your unit can provide added protection from flying debris and ice. Unlike plastic tarps, these covers are breathable, deterring moisture buildup inside, which helps prevent corrosion. After storms pass, check that nothing is jammed inside the fan or vents before powering it back on.

If your property is prone to flooding, elevating the condenser by several inches or placing it on a raised platform will keep critical components away from pooling water. Even several inches of standing water can cause electrical shorts or corrode internal parts. Elevating equipment is one of the most effective solutions for long-term protection in flood-prone areas. For tips on physical protection, review additional safety information from sources like American Standard Air and HVAC 365.

What To Do Before an Extreme Weather Event

In the hours before a major storm, check your system for visible damage or warning signs of trouble. Clear leaves, branches, and debris from around the outdoor unit. Lower the thermostat a few degrees to pre-cool or pre-heat your home. This helps hold temperatures longer if you lose power. If flooding is likely, shut off the power to the HVAC system at the breaker panel to avoid electrical hazards. Confirm that the unit is anchored securely and outdoor covers are in place.

If you use an automated thermostat or smart control system, double-check backup settings in case of connectivity issues. Always keep access to emergency contact numbers like Livinon Mechanical’s emergency repair line. Storms can arrive faster than anticipated, so having a backup plan is critical.

Actions to Take During a Storm

When the storm begins, limit system use as much as possible. Running your HVAC at full power during unstable grid conditions exposes it to greater risk from brownouts or voltage spikes. If the weather outside involves flooding or high winds, turn off the breaker for your air conditioner or heat pump. This keeps moving parts from running without protection and helps prevent electrical damage in case water enters the unit.

Avoid opening exterior doors or windows to keep conditioned air inside and maintain safe indoor temperatures. If you use portable generators to supply power during an outage, never connect them directly to your HVAC system without proper transfer equipment. Improper connections can result in damage or create unsafe conditions for utility workers.

Wait until the storm passes completely and utility power is stable before restoring normal system operation. This pause allows both the HVAC unit and electrical components to avoid the risk of a repeating on-off cycle that wears out contacts and compressors.

Post-Storm Recovery Steps for HVAC Protection

Once severe weather has subsided, begin by visually inspecting your outdoor equipment. Look for fallen branches, pooling water, or any shifted panels. Check inside the intake and exhaust grilles for debris. Do not attempt to remove major obstructions or straighten bent components yourself. Call a licensed technician. Never restart the system if parts appear damaged, smell burnt, or make unusual noises.

If your area experienced flooding, do not attempt to turn the HVAC system on until a technician has checked for waterlogged components or potential electrical faults. Water damage is not always visible, and trying to operate the system can cause fires, shorts, or even trigger insurance concerns. Even if flooding did not occur, having your system serviced following a severe event can identify problems early. Storm stress can cause slowly developing electrical and mechanical failures.

Livinon Mechanical’s technicians offer emergency repair services with fast response times to restore your system safely. Emergency HVAC service guarantees professional insight into any issues that could become larger problems if ignored.

Electrical Protection During Storms

Power fluctuations during storms leave sensitive HVAC controls exposed to failure. Lightning strikes and grid surges often hit entire neighborhoods at once. While home surge protectors can shield TVs and computers, HVAC systems require specialized units that filter power directly at the main panel or at the system disconnect. Installing a surge protector on your HVAC system absorbs extra voltage before it reaches compressors, relay boards, and thermostats.

Short circuits from power surges can ruin an entire air conditioning unit beyond simple repair. The cost to add surge protection now is far less than replacing an entire system or waiting for an overworked technician during a widespread outage. Trane explains in more detail about the value of HVAC surge protection on their storm-preparation blog.

Long-Term Extreme Weather HVAC Preparation

Defending an HVAC unit is not just about a single episode. Ongoing preparation increases equipment life and comfort level throughout the year. Schedule regular inspections every spring and fall before peak heating or cooling demand. Periodic equipment evaluations catch hidden issues like fan motor wear, weak relays, or low refrigerant levels. Use this opportunity to ask about additional improvements such as protective fencing, permanent surge suppression, or stronger mounting solutions.

Homeowners in storm-prone areas may benefit from specialty add-ons. Some properties need hurricane-rated unit cages, which keep flying objects or animals from entering the condenser during storms. Others might consider remote monitoring solutions to check on system health even if not present at home. Investing in the right infrastructure for your climate supports comfort even during unpredictable and severe patterns.

Landscaping also plays a subtle protective role. Trees provide shade that reduces summer HVAC workload, but must be pruned away from cables and outdoor equipment. Deep-rooting shrubs can interfere with buried pipes or wiring. Evaluate the area surrounding your system with a technician to minimize risks while maximizing benefits.

Common Signs Your System Needs Attention After a Storm

Unusual mechanical sounds or persistent running without obvious results suggest internal damage after a weather event. Sudden increases in energy bills can signal that your system is compensating for hidden damage. Poor airflow, musty odors, and uneven temperatures throughout the house further confirm the need for immediate service. All of these are signs your HVAC system may struggle or potentially fail during future storms if not addressed.

Contacting a professional as soon as you observe a problem prevents further breakdown. Livinon Mechanical’s experts can pinpoint the root cause and make targeted repairs that restore full function without extensive delays. Their experience with post-storm assessments ensures that every part of your system works properly before the next season arrives.

Planning Ahead for Better Peace of Mind

Protecting your HVAC from storms is a year-round process. Using best practices for routine maintenance, monitoring for warning signs, and taking specific steps before and after weather events shields your investment. Strengthening your system’s defenses means fewer disruptions, lower repair costs, and greater comfort in every season. Livinon Mechanical offers the specialized services needed to prepare, repair, and recover. Choose proactive action, and your HVAC will be ready for whatever nature delivers next.

Window Treatments for Better HVAC Efficiency

Passive solar design has changed how homeowners think about energy efficiency. Window treatments and proper window orientation work together to influence indoor temperatures, manage solar gain, and contribute to lower heating and cooling demands. By choosing and using window coverings with an understanding of where your windows face, you can get more from your HVAC system without the need for major upgrades. This article breaks down the science behind solar gain and shares actionable tips to help you control heat, protect comfort, and get tangible energy savings all year. Whether you want lower bills or better home comfort, understanding passive solar design puts you in control.

Understanding Solar Gain and Its Effects on Homes

Solar gain is a process that directly impacts your comfort and costs. When sunlight comes through your windows, it raises the temperature of interior surfaces. These warmed surfaces then radiate heat back into the room. In winter, this can be a free source of warmth. During summer, uncontrolled solar gain can quickly make a home uncomfortably hot, leading to higher use of air conditioning and increased energy costs. Managing the way sunlight enters your home stands as a key passive solar design strategy.

The process works through two main types: direct and indirect solar gain. Direct gain happens when sunlight pours through your windows and strikes walls or floors. Indirect gain can occur as heat is collected elsewhere and then radiates throughout the space. Both forms increase the heat load on your HVAC system. Understanding how window orientation and window coverings’ efficiency work together helps you balance the need for winter warmth and summer shade, keeping utility bills predictable.

Solar gain varies throughout the day and year, depending on sun angle, cloud cover, and the layout of your home. In the morning and late afternoon, east and west-facing windows accept intense, low-angle sunlight. At midday, south-facing windows receive steady sun, especially in colder months when the sun sits lower in the sky. Each exposure calls for a unique approach to window coverings and treatments so you get the benefits of solar gain where and when you need it while limiting unwanted spikes in temperature.

Why Window Orientation Matters

The orientation of your windows shapes how much solar gain your home receives. South-facing windows serve as the workhorses of passive solar design. In the Northern Hemisphere, these windows receive high levels of sun in the winter, when it’s most beneficial. With proper shading or overhangs, they can admit needed warmth during colder months and still block the higher summer sun, which tracks a steeper path across the sky.

Windows facing east and west receive sunlight at the start and close of the day. These times often bring harsh, direct light that quickly penetrates living spaces, potentially causing quick heat spikes and discomfort. Window coverings must work especially hard on these exposures to prevent overheating during warm months.

North-facing windows, by contrast, typically avoid intense sunlight. They admit steady, soft, indirect light. While they do not contribute much to solar gain, these windows can benefit from coverings that help with insulation, especially in winter, preventing cold air infiltration and maintaining even temperatures inside.

Getting the orientation right forms the backbone of passive solar design, but even the best window placement cannot work alone. Smart window coverings act as the final control layer, allowing homeowners to shape the interaction between sun, glass, and HVAC systems to match seasonal needs.

Types of Window Coverings That Improve Efficiency

Window coverings come in a range of options, each offering different benefits for managing heat, light, and privacy. Picking the right type depends on your climate, specific window orientation, and the balance you want between function and aesthetics. The best window coverings combine style with high efficiency so you can adjust comfort on your own terms.

Cellular or honeycomb shades stand out as top performers. These treatments trap air within their pockets, creating a layer of insulation between your interior and the glass. In colder months, they help keep warmth inside, while in summer, they block out a significant portion of incoming solar radiation. Their soft fabric design fits most interior schemes, and they often come in blackout or light-filtering options, giving you control over privacy and sunlight.

Drapes and curtains offer strong performance for energy management as well. Medium-colored drapes, especially with white-plastic backing, can reflect some sunlight while still softening the look of a window. Selecting tightly-fitted drapes that overlap at the center maximizes the air-sealing effect, reducing gaps where hot or cold air could flow. Floor-length designs work best. If possible, choose hardware that holds the top of the curtains close to the wall, trapping a small pocket of air for extra insulation.

Exterior awnings can be an excellent way to protect south, east, or west-facing windows from high sun during summer. Awnings block direct sunlight before it reaches the glass, lowering the cooling load for your HVAC system inside. Fabric awnings come in a range of patterns and materials, with retractable options available to fit seasonal shifts. Lightweight metal awnings also offer durability with minimal maintenance.

Window films present a modern solution for solar control. Applied directly to the glass, films reflect a portion of the sun’s heat while still admitting visible light. These are especially useful if you want to maintain an unobstructed view outdoors without the bulk of traditional curtains or blinds. Films are available in a variety of tints and reflectivities, so you can fine-tune the balance between blocking heat and letting in natural light for a tailored result.

Blinds, especially those with wide slats, can be tilted to direct sunlight up toward ceilings, where it disperses without creating hot spots. This allows for daylighting while protecting privacy and comfort. While not as insulating as honeycomb shades, combining blinds with drapes boosts overall efficiency, especially on large windows or glass doors.

Maximizing Your Efficiency: Practical Tips & Seasonal Habits

Passive solar design rests on making the best use of natural heat and daylight to shift your home’s energy flows in your favor. Strategic use of window treatments lets you control these flows with little cost. By combining smart physical installations with mindful seasonal habits, you can significantly reduce reliance on artificial heating and cooling.

Smart Seasonal Habits

  • Winter: Open window coverings during sunny hours to let warmth flow into your home, reducing the need to run the furnace during daylight hours. Once the sun sets or during cloudy stretches, close all window treatments—especially thick, layered curtains or cellular shades—to sharply reduce nighttime heat loss through the glass.
  • Summer: Reverse the habit by keeping coverings closed during peak sunlight hours, especially on east and west-facing windows. This controls indoor temperatures naturally and lessens air conditioning demand.

Optimizing Your Setup

  • Layer Your Treatments: Layering multiplies your insulating power. For example, pairing horizontal blinds with curtains allows for very fine control. Adjust the blinds to admit or block the sun, then close the curtains to reinforce the barrier against temperature swings. In rooms with large glass areas, combining window films with fabric coverings creates a powerful shield.
  • Eliminate Gaps: Install curtain rods or tracks as close to the wall as possible. Reducing the gap between the fabric and the window blocks air movement, keeping conditioned air inside and drafts outside. For the best effect, choose floor-length designs and fasten drapes so they overlap tightly at the center.
  • Consider Automation: If your daily routine or mobility makes manual adjustments difficult, consider automated shades. These can be programmed to raise or lower in response to sunlight, room temperature, or the time of day, optimizing your comfort automatically.

Damaged or heavily soiled shades cannot offer peak performance. Clean your window glass frequently to let winter sunlight pass through effectively, and regularly inspect curtain rods, mounting brackets, and moving parts for smooth operation.

Exterior solutions like awnings also benefit from seasonal care. Be sure to retract or remove fabric awnings before heavy winter weather arrives, clean them with a UV protectant if recommended by the manufacturer, and check the mechanical parts in the spring so they open smoothly as temperatures rise.

Practical Steps for Every Homeowner

Improving passive solar design does not require starting from scratch. Curtains, blinds, shades, and films come in options to fit both modern and older homes, making upgrades straightforward. Start by evaluating your windows’ exposure and the current treatments in use. In many cases, adding a new layer or updating old fabric makes a measurable impact on home comfort.

If windows remain bare or covered only by decorative treatments, upgrading to energy-focused options can shift heating and cooling loads in your favor. Look for honeycomb shades with high R-values or drapery liners with thermal backings. Switch out thin curtains for thicker materials in rooms with challenging sun exposures.

Consult with professionals if you have questions about applying window film or choosing the right combination of coverings for your setup. Many hardware or window treatment retailers offer measurement services and support with installation. You often see benefits within one heating or cooling season.

Beyond managing solar gain, effective window treatments create privacy and soften indoor acoustics. They also extend the lifespan of flooring, furniture, and artwork by blocking harsh ultraviolet rays. This makes window coverings one of the lowest-cost, highest-impact upgrades for any household focused on both savings and comfort over time.

Track energy usage before and after making changes to see the difference in action. Many smart thermostats allow you to review daily and weekly patterns for HVAC use. Homeowners frequently report steadier temperatures and quieter systems, as the HVAC unit does not have to work as hard counteracting heat loss or gain through glass.

Getting the Most from Passive Solar Comfort Year-Round

Passive solar design empowers you to use sunlight to your advantage. It contributes to reliable comfort and savings across every season. As you integrate new window coverings and adjust your habits based on window orientation, you lock in benefits without needing massive renovations or disruptions.

South-facing windows supply valuable winter warmth when managed with the right treatments. East and west windows require coverings that help block harsh sun and protect against rapid indoor heat spikes. North-facing windows benefit from insulation during cold snaps.

Select materials with care. Combine layers where needed for maximum temperature control, and update coverings as styles and technology improve. Maintenance, seasonal habit changes, and careful product selection maximize window covering efficiency. Passive solar design remains one of the most practical ways to reduce your home’s energy footprint and achieve lasting comfort.

For more advice on home comfort and mechanical upgrades, visit Livinon Mechanical for professional insight. By taking smart, straightforward steps, you support your HVAC system, cut energy waste, and give your home the comfort and savings it deserves.

Pet Friendly HVAC Tips for a Healthier Home

Our pets bring so much joy into our lives, but they also introduce unique challenges in the home, especially regarding indoor air quality and HVAC system maintenance. The extra debris pets naturally produce, such as hair and dander, doesn’t just collect on floors and furniture. These airborne particles float toward intake vents and settle deep within your ductwork, which can clog filters, restrict airflow, force the system to work harder, and ultimately reduce its overall operational longevity.

Beyond physical debris, fur, natural oils, and litter boxes also contribute to lingering odors that your HVAC system can easily recirculate throughout the house. A pet’s presence can even elevate indoor humidity levels through simple breathing and open water bowls, creating an environment that invites mold growth within filters and ducts. Recognizing these underlying effects is the first step toward establishing a healthier, pet-friendly home where everyone can breathe a little easier.

Regular Air Filter Changes for Pet Owners

Air filters serve as the first line of defense against airborne contaminants. When you share your home with animals, these filters fill up faster due to extra hair and pet dander. Most manufacturers suggest changing standard filters every three months, but with pets, this routine is not enough.

Visually inspect filters each month. If you notice discoloration, visible hair, or a thinner airflow, replace it immediately. Routine checks are the only way to prevent blockages that force the HVAC blower to overwork. Systems working under strain consume more energy and break down more frequently.

For better air quality and system lifespan, consider using pet-friendly air filters. Look for filters labeled with a MERV rating between 10 and 13. These catch much smaller particles than standard filters without unduly restricting airflow. HEPA filters also perform well if your HVAC unit supports them, but consult your system’s manual before making the switch. The difference in air freshness, visible dust, and allergy symptoms can be impressive when using filters tailored to pet households.

Cleaning Vents and Ducts in Homes with Pets

Vents and ductwork act as highways for pet hair and dander inside your home. Over time, debris sticks to inner duct walls or settles inside floor and wall registers. This lessens the effectiveness of air distribution while providing more surfaces for odors and allergens to linger.

Start by removing vent covers and vacuuming around visible openings. Use a long vacuum attachment to reach further into the ducts. Wipe vent grates with a damp cloth to clear away fur buildup and dust. For hard-to-reach areas or persistent debris, schedule a professional cleaning every few years. Households with long-haired, heavy-shedding, or multiple pets benefit from this extra service.

During cleaning, look for signs of mold or musty smells. These indicate moisture issues inside ducts, sometimes caused by pet-related humidity or spills near vents. Address these problems promptly to prevent health risks.

Habits to Protect Indoor Air Quality

Every stroke of the brush lifts hair and dander before it settles inside your HVAC system. Regular grooming works hand-in-hand with filter maintenance to keep the air cleaner. Aim to brush pets outdoors if possible, especially during seasonal sheds. For indoor grooming, use mats or towels to contain loose fur. Bathing also helps minimize airborne allergens. Use a gentle, pet-safe shampoo to avoid drying skin, which contributes to more shedding.  If your pets spend time outdoors, wipe their paws before they come inside. This step limits the spread of pollen, yard debris, and moisture. The more pet-related debris kept off floors and out of your vents, the less your HVAC system needs to handle

Simple routines support healthy air and a longer-lasting HVAC system. Sweep and vacuum floors often to reduce pet hair before it enters vents. Mop with allergen-neutralizing solutions when possible. Launder pet beds and blankets at least once a week to lower dander and bacteria. Empty and clean litter boxes daily to keep odors under control. Store food dishes away from vents to avoid attracting pests or causing spills that can feed mold. Check for puddles or wet areas near water bowls to limit humidity. Regularly check your thermostat and system settings to match household needs as seasons change.

Safeguarding HVAC Equipment from Pet Damage

Pets sometimes chew, scratch, or rub against household systems out of curiosity. Outdoor condensing units are especially prone to territory marking or accidental digging. Secure these units with a protective barrier, such as a short fence or wire mesh. Leave a clearance on all sides to keep airflow unrestricted.

Inspect areas around air handlers, furnaces, and exposed wiring. Bundle wires in sturdy sheaths or tubing to prevent chewing. If you notice frequent attempts at scratching or digging, place a deterrent such as double-sided tape or a safe repellent nearby.

Addressing these risks early reduces repair costs and prolongs equipment life. Many technicians can provide advice or install protections tailored to pet owners during routine service visits.

Scheduling Regular HVAC Maintenance

Even with the best habits, HVAC systems need professional care. Annual or biannual tune-ups catch issues like clogged coils or debris-filled blower assemblies before they affect comfort. Always notify the HVAC technician about your pets before each appointment. This detail allows the technician to inspect filters, ducts, and equipment for pet-specific concerns. Technicians will clean coils, lubricate moving parts, and vacuum out pet hair from critical components.

Routine inspections help avoid costly breakdowns and keep air distribution balanced across all rooms. A well-serviced system returns better energy ratings, comfort, and air quality. Our licensed technicians at Livinon Mechanical are well-experienced in homes with pets and are happy to answer any questions you may have. Get your free quote here.

Thermostat Options to Keep Pets Comfy

Animals tolerate temperature changes differently than humans. With many pets spending long hours at home, comfort requires more than just safe shelter and water. Adjusting thermostat settings when humans leave for work or errands is a simple way to save energy without sacrificing pet well-being.

For most dogs and cats, sixty-five degrees in winter and seventy-eight degrees in summer fall into a safe comfort zone. Consider installing a smart thermostat to manage daily settings automatically. Some smart HVAC systems automatically increase fan speed or start an air purifier when sensors detect high dander or odor levels. Many modern systems can be set to circulate air more frequently during high shedding periods, improving comfort for both pets and humans. As technology advances, more affordable options appear, making them accessible to a wider range of homes.

Avoid drastic swings in temperature. Gradual changes are easier for both HVAC equipment and sensitive pets. Monitor your pet’s behavior for shivering, panting, or seeking new places to nap, as these may indicate discomfort.

Creating Harmony for Pets, People, and HVAC

Living with pets does not have to mean sacrificing indoor air quality or system performance. Proper filter choices, diligent cleaning, and regular maintenance can dramatically change the way your HVAC system functions. Small upgrades, like smart air purifiers or programmable thermostats, bring an added level of control, comfort, and security for all family members.

For support and expert service tailored to pet owners, reach out to us at Livinon Mechanical.

Breathe easier knowing your home and your furry friends are both protected by the right HVAC practices.

Green HVAC Practices for a Sustainable Home

Creating a greener home starts with how you heat and cool your space. While eco-conscious choices in lighting and appliances are often top of mind, HVAC systems have a significant impact on both energy use and the environment. Making a switch to an eco-friendly HVAC system can dramatically reduce your home’s carbon footprint. Whether you’re upgrading your system, considering new technologies like geothermal heating, or adjusting your maintenance habits, you can make choices that help your home become more efficient and less harmful to the environment.

Why HVAC Efficiency Matters

Your home’s heating and cooling system is one of the largest energy consumers in your household. HVAC systems that are outdated or poorly maintained use more energy than necessary, often relying on older equipment and outdated refrigerants that release greenhouse gases into the atmosphere. This results in higher operational costs, stronger demands on the electrical grid during peak seasons, and increased environmental harm over time.

More efficient systems reduce the amount of electricity or fuel needed to maintain your indoor climate. That translates into lower emissions and smaller utility bills. While the initial cost of upgrading can sometimes seem high, the savings realized over time can make a big difference. Not just financially, but environmentally as well.

Choosing Energy-Efficient HVAC Systems

Modern HVAC systems are designed with energy conservation in mind. When selecting a new unit, look for systems certified under programs like Energy Star. These certifications mean the units meet stricter efficiency guidelines than standard models, using less energy to perform the same tasks.

Another key feature is the Seasonal Energy Efficiency Ratio (SEER). The higher the SEER rating, the more efficient the unit operates. Systems with a high SEER rating can cool a home using significantly less electricity than older models, especially during high temperatures. As technology continues to improve, newer systems increasingly reach SEER values that were unheard of in past years, meaning even greater savings and lower environmental burdens.

Don’t overlook variable speed motors and compressors. Unlike single-speed components that are either all on or all off, these adapt their performance to the precise demand of your home. That means less energy waste and a system that runs quieter and lasts longer.

Using Eco-Friendly Refrigerants

Older HVAC systems still rely on refrigerants such as R-22, which are harmful to the ozone layer. Modern systems use alternatives like R-410A and R-32, which offer improved cooling performance and are less environmentally toxic. While still not zero-impact, these newer refrigerants release fewer greenhouse gases when compared to their predecessors.

Transitioning to an eco-friendly refrigerant might mean replacing your HVAC equipment, but in many cases, it’s a necessary step for reducing harmful emissions. The global HVAC industry is moving toward even safer solutions, such as hydrofluoroolefins (HFOs), intended to further reduce global warming potential. Staying ahead and installing a compliant system today can help you avoid replacement rushes as regulations continue to evolve.

Upgrading to a Geothermal Heating System

Geothermal heating provides one of the lowest-impact solutions for home climate control. Rather than generating heat through combustion or electrical resistance, geothermal systems use the constant temperature of the earth below your home to move heat in and out.

During the winter, heat is absorbed from the ground and transferred into your home. In the summer, the process is reversed, pulling heat from your home and moving it underground. This process uses far less electricity than traditional cooling methods and eliminates the need for fossil fuels entirely.

Geothermal systems are buried underground, often lasting up to 50 years with minimal maintenance. While the upfront investment can be higher than conventional systems, federal and local tax credits can reduce these costs significantly. Plus, the long-term savings on energy bills are hard to ignore. These systems are quiet, reliable, and produce fewer emissions than even some of the cleanest electric systems available today.

Improving Airflow and Insulation

Even a highly efficient HVAC system won’t perform well if your home is poorly insulated. Energy escapes through windows, rooflines, and door gaps. Improving your home’s insulation and sealing leaks can reduce the workload on your HVAC unit, keeping your home comfortable with significantly less energy.

Upgrading insulation in attics, crawl spaces, and walls slows down the transfer of heat. When combined with energy-efficient windows and well-maintained ductwork, this can dramatically cut heating and cooling requirements throughout all seasons of the year.

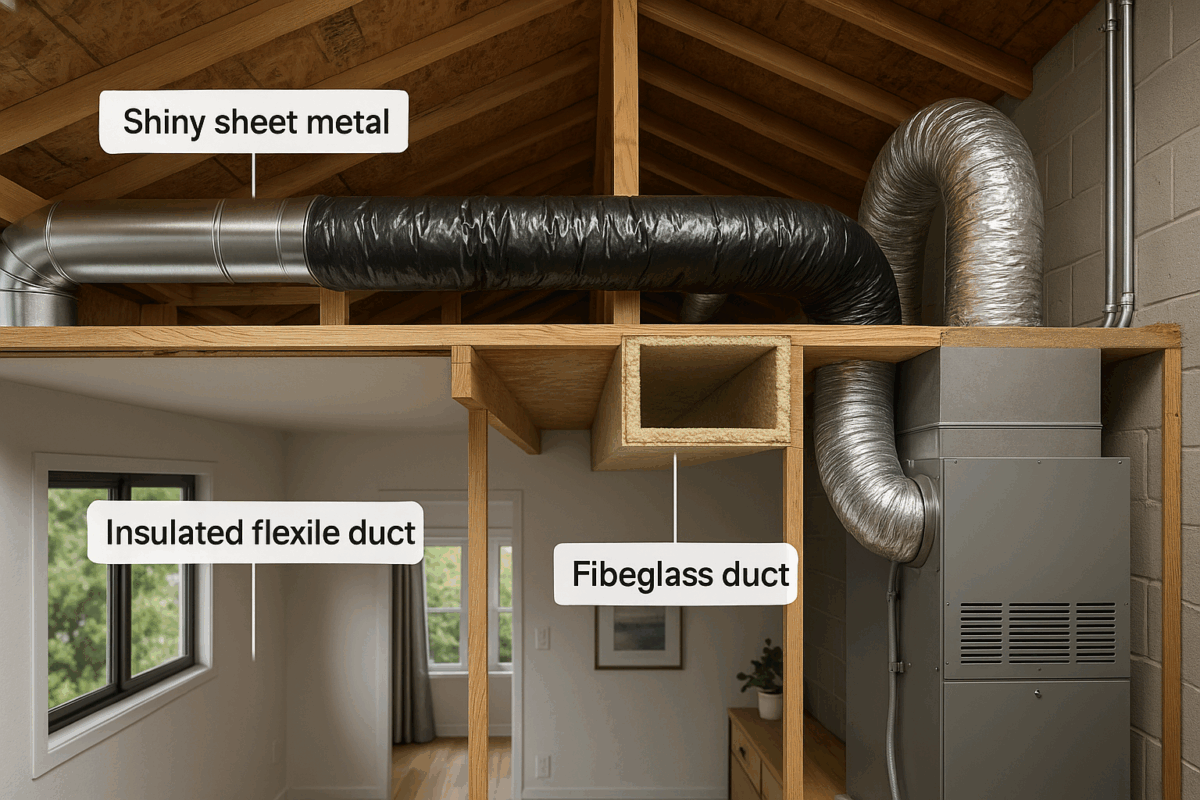
Proper airflow also plays a part. When air isn’t circulating well, your system runs longer than it should. Make sure furniture isn’t blocking vents and that registers are fully opened. Have a technician inspect your duct system for cracks and blockages that can waste cooled or heated air before it reaches the living spaces.

Smart Thermostats for Greater Control

Heating and cooling systems don’t need to run at full power when no one is home. Smart thermostats allow homeowners to schedule temperature settings based on time of day or occupancy status. Over time, many learn your living patterns and can adjust settings automatically, preventing unnecessary energy usage.

These devices often provide consumption data, which helps you recognize when adjustments are needed. Being able to monitor and manage your system from a mobile device or voice assistant adds a level of convenience that encourages more consistent energy-conscious decisions.

Rethinking the Size of Your System

Bigger isn’t always better when it comes to HVAC equipment. A system that is too large for a space doesn’t heat or cool more effectively. In fact, it often leads to short cycling, which wastes energy and wears out parts faster. On the other extreme, a unit that’s too small will work harder than it should, leading to premature failure and high utility costs.

An HVAC professional can perform a proper load calculation to determine what size unit is ideal for your home. This calculation considers square footage, ceiling height, insulation types, and other factors that influence demand. Right-sizing your system helps make the most of any eco-friendly upgrades you choose and ensures smoother year-round comfort.

Energy Recovery Ventilators

Indoor air quality and HVAC efficiency often work against each other in traditional homes. Opening windows for fresh air raises indoor humidity and temperature levels, adding to your system’s load. But keeping windows closed leads to stale air and indoor pollution buildup.

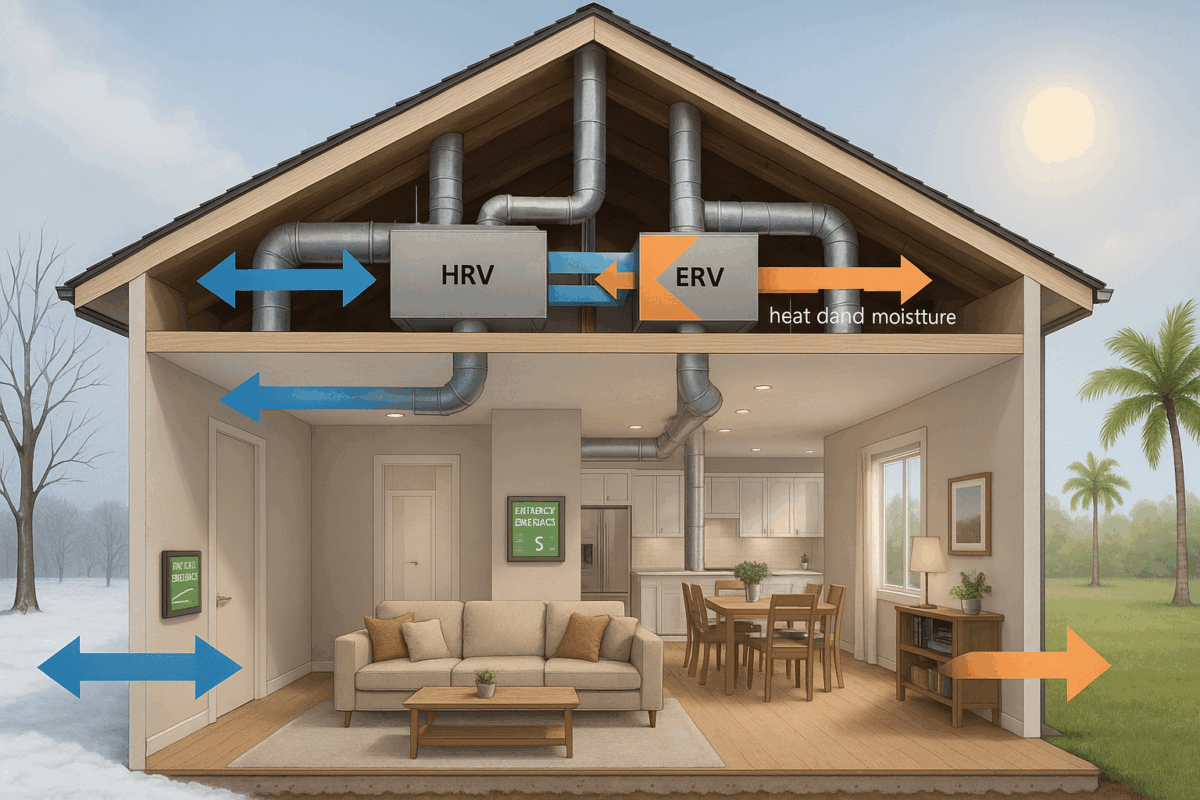
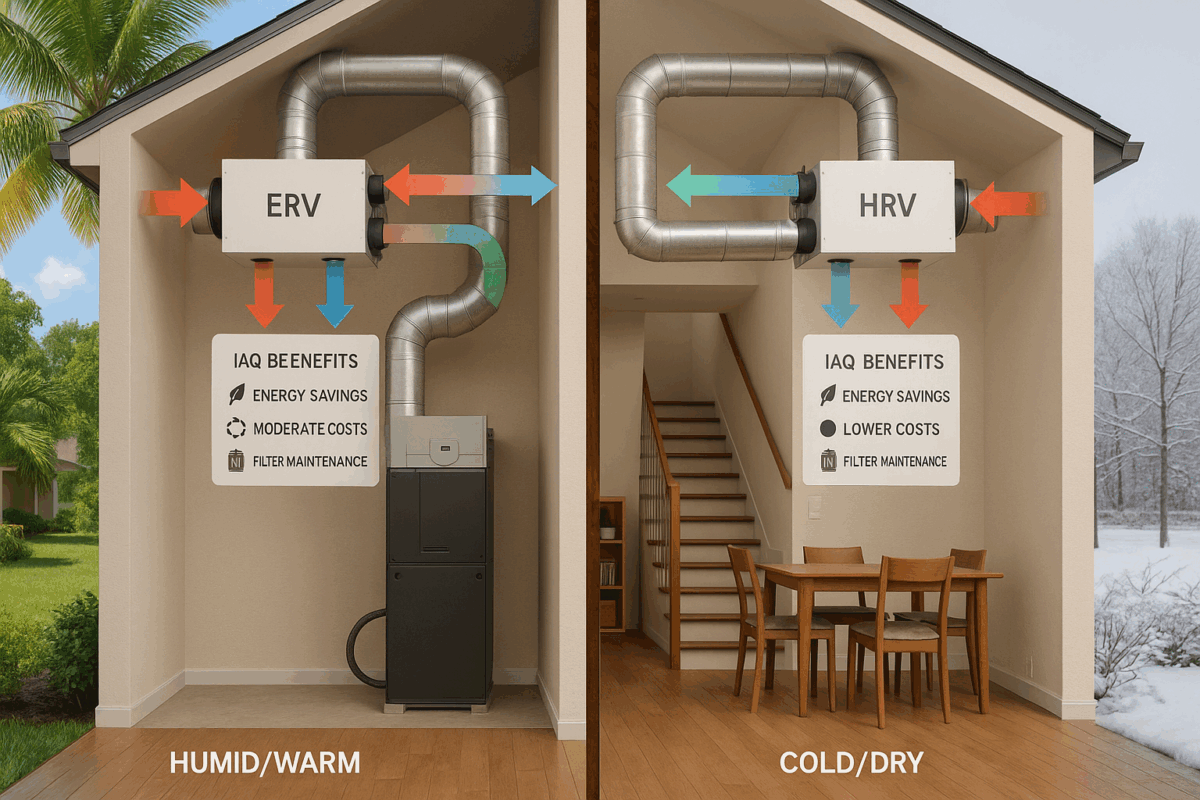
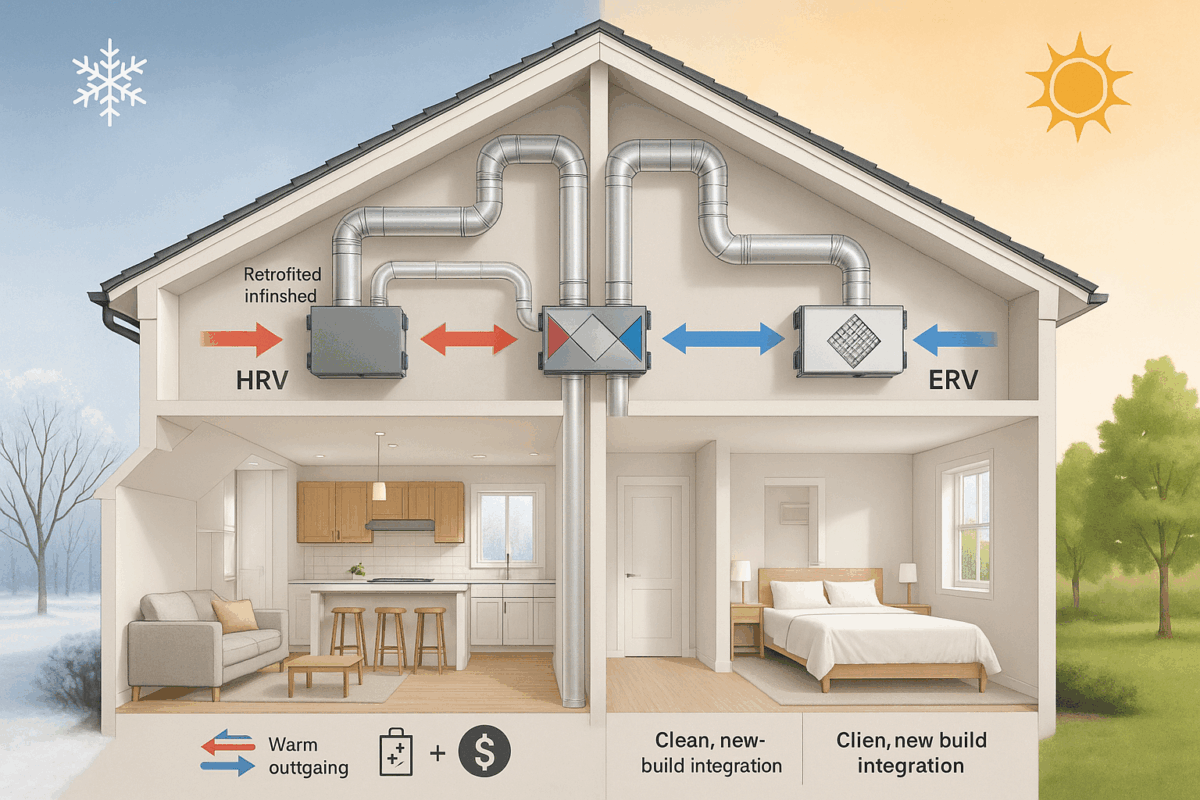
Energy Recovery Ventilators (ERVs) offer a balance. These systems allow fresh air into your home while transferring heat and moisture between incoming and outgoing air streams. During winter, heat from outgoing air warms the incoming air. During summer, the opposite happens. This process reduces the shock load on your HVAC system and gives indoor air a boost in freshness with less energy consumption.

Incentives for Green HVAC Choices

Municipal and federal programs often offer incentives for homeowners who switch to eco-friendly HVAC options. Whether in the form of tax rebates, cash-back incentives, or zero-interest loans, these programs can make the investment more appealing.

Always check for available programs before purchasing equipment. Utility companies and state agencies may offer perks for upgrading to a high-efficiency unit or switching to geothermal heating. These incentives can reduce costs significantly, making green choices even more financially wise in the long run.

Regular Maintenance and Long-Term Habits

Seasonal maintenance keeps your system in top working condition while supporting long-term environmental sustainability. Simple, consistent habits—paired with professional care—prevent prolonged high energy use and avoid expensive repairs due to unnoticed inefficiencies.

Professional Care

By contacting a certified HVAC technician once or twice a year, you ensure your system runs optimally. A professional can inspect your duct system for cracks or blockages that waste conditioned air, check for refrigerant leaks, and deep-clean internal components like coils to keep the overall workload on your unit low.

Daily and Seasonal Habits

You can handle several high-impact maintenance tasks and behavioral shifts right at home:

Filter Care: Change your air filters on a regular basis to ensure unrestricted airflow.

Clear the Perimeter: Clear out debris, leaves, and weeds from around your outdoor unit, and make sure indoor vents are free from furniture or obstructions.

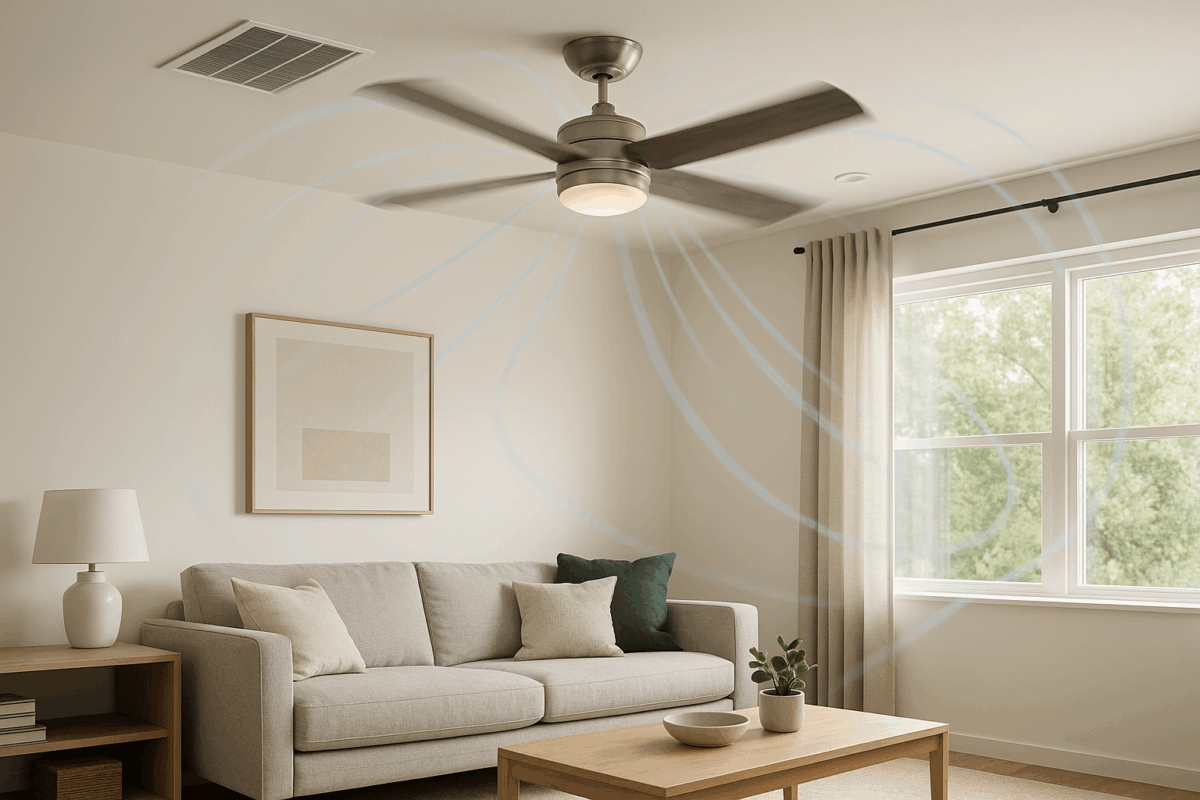
Thermostat Consistency: Avoid excessive or sudden adjustments to your heating and cooling settings. Keep temperatures consistent, and adjust blinds seasonally or use ceiling fans to naturally assist with air circulation.

Taking charge of these small efforts minimizes unnecessary strain on your equipment, extends its lifespan, and ensures smoother, more eco-friendly comfort year-round.

Natural Ways to Improve Air Quality with Houseplants

With rising awareness around indoor air quality, many are searching for ways to create cleaner, healthier environments at home and work. While HVAC systems remain a cornerstone of proper air circulation and pollutant control, integrating plant-based air purification methods offers a practical and sustainable boost. Certain houseplants are capable of filtering toxins and pollutants that commonly accumulate indoors. Incorporating these plants not only improves air quality but also brings several wellness and psychological benefits. Using plants combined with existing mechanical systems can create a more balanced approach to maintaining a purer indoor atmosphere. This article focuses on natural ways to improve air quality with houseplants, shedding light on effective methods, plant species, placement techniques, and maintenance tips to help supplement traditional air purification systems.

How indoor air becomes polluted

Indoor spaces trap a range of pollutants that stem from household products, furniture materials, cleaning agents, and outdoor contaminants that make their way inside. Common airborne toxins include formaldehyde, benzene, trichloroethylene, toluene, carbon monoxide, and xylene. These pollutants often originate from paint, carpets, glues, upholstery, and synthetic materials. Everyday activities like cooking on gas stoves or smoking indoors intensify the concentration of harmful particles.

Unlike outdoor environments where wind and natural elements disperse pollutants, homes and buildings can become closed systems that gradually build pollutant density. This makes consistent air exchange important. HVAC systems work to control airflow and particulate matter, but alone they may not handle gaseous toxins or the smallest micro-particles. This is where a natural, plant-based method can offer added air filtering support.

How plants support natural air purification

Plants absorb gases through their leaves during photosynthesis. Some houseplants go beyond removing carbon dioxide and are capable of filtering volatile organic compounds. These substances are pulled into the plant’s stomata and then broken down by soil-based microorganisms around the roots. It’s a biological filtration system that works continuously and quietly as long as the plant is healthy and well-maintained.

NASA conducted a now-famous study examining the ability of plants to purify air within enclosed environments, originally for space station use. While the experiment involved controlled conditions, its results inspired interest in the potential of plant-based air purification for homes and offices. While it’s true that plants alone cannot completely replace mechanical filtration in rooms with poor ventilation, they offer measurable benefits as long as species selection and care are considered carefully.

Top-performing houseplants for air purification

Some houseplants are more effective than others when it comes to removing indoor air pollutants. Species with a high leaf surface area, adaptability to indoor lighting, and tolerance to occasional neglect are top choices. Among the most recommended are:

Spider Plant (Chlorophytum comosum): Known for its ability to eliminate pollutants like formaldehyde and carbon monoxide, it’s also low-maintenance and thrives under indirect light.

Snake Plant (Sansevieria trifasciata): Excellent at improving air quality by filtering formaldehyde, xylene, and nitrogen oxides. It also continues to release oxygen at night, unlike many plants, which makes it ideal for bedrooms.

Peace Lily (Spathiphyllum): Recognized for its bright blooms and broad leaves, this plant helps remove toxins such as ammonia, benzene, and formaldehyde. Though it needs slightly more care, the air quality benefits are worth the effort.

English Ivy (Hedera helix): Often used in hanging pots or vertical walls, this fast-growing plant helps filter airborne mold and fecal particles. Useful in bathrooms or areas with moisture buildup.

Aloe Vera: While famous for its healing sap, aloe vera also removes airborne benzene and formaldehyde. Requires a sunny spot and minimal watering, making it both practical and decorative.

Other options include Bamboo Palm, Boston Fern, Chinese Evergreen, and Rubber Plant. Each plant brings particular strengths in filtering out certain types of chemicals, so combining a small variety may yield better results than sticking to a single type.

Where and how to place air purifying plants

Placement plays a key role in reaping the benefits of air-cleaning plants. High-traffic and high-use areas such as living rooms, bedrooms, kitchens, and workspaces are ideal locations to focus on. Kitchens where gas appliances are in use are one of the most pollutant-prone spots. Bedrooms where people spend extended hours asleep also benefit from plants that filter toxins over time and support oxygen levels.

The goal should not be to place a plant in every corner, but to strategically locate them where air stagnates or pollutants are likely to settle. Windowsills, desk sides, bookshelves, and high ledges serve well for pot placement as long as the species receives adequate light. Hanging planters and vertical gardens also make use of space without creating clutter on surfaces.

Pay attention to overall humidity and plant care. Too many plants in a small room can lead to mold problems and oxygen drops if photosynthesis is not maintained effectively. Keep the numbers rated appropriately for the square footage; roughly one medium plant per every hundred square feet is a manageable starting point. Rotate or shift plants periodically to ensure even light exposure and air movement.

Ways plants work with HVAC systems

When houseplants are used together with HVAC systems, the result can be improved air movement and pollutant control. Forced air from HVAC ducts can distribute oxygen created by plants while plants absorb lingering gases that filters may not catch. Some HVAC systems recirculate air and rely on HEPA filters or UV treatments to trap particles. These functions complement plant-based air purification rather than replace it.

An overlooked function of houseplants is their ability to stabilize humidity levels. Plants release moisture vapor during transpiration, which can support a room’s balance, especially in winter when HVAC heating dries out the air. Balanced humidity helps lungs filter better and can reduce nose and throat irritation often caused by overly dry indoor climates.

On the flip side, certain HVAC functions, like strong directional airflow, can damage delicate plant leaves. It’s a balancing act. Keeping plants positioned near vents should be avoided. Use natural gaps where airflow spreads more gently. Pairing moderate HVAC settings with a modest number of plants enhances comfort while keeping pollutants under control. A monitored and maintained system increases the effectiveness of both components.

Caring for your air-purifying plants

For plant-based air purification to work well, keeping plants in good condition plays an essential role. Poorly maintained plants can turn into dust traps or mold sources. Healthy leaves actively filter, while damaged or yellowing leaves lose their function and can degrade overall air quality.

Choose indoor soil that drains properly to avoid root rot. Water most species when the top inch of soil begins to dry, but avoid overwatering. Clean leaves regularly with a gentle cloth to keep them free of dust build-up, as this clogs the pores and reduces their ability to transpire.

Use natural soil agents and minimal artificial fertilizers. Many chemical treatments contain compounds that defeat the air purifying process. Rely on compost-based fertilizers with low salt content. Keep pot sizes appropriate to the plant’s root growth so that their filtration remains active.

Monitoring for pests is also important. Mealybugs, spider mites, or mold infestations can compromise plant health and degrade the air rather than supporting it. Spot treatment with neem oil or gentle insecticidal soaps can handle most issues fast without disrupting the indoor environment.

Combining natural and mechanical filtration

The air in most homes is a mix of chemical and organic particles. While mechanical systems efficiently trap fine particles and pollens using filters, gaseous pollutants often float through unless special activated carbon layers are installed. Houseplants pick up that gap by soaking in airborne VOCs and breaking them down over time.

The combination of plants and mechanical systems removes a broader range of contaminants than either method alone. A hybrid approach allows reduced reliance on chemical air fresheners or deodorizers. Houseplants bring visual calmness and have been linked to lower stress hormone levels, while well-maintained HVAC systems handle mold spores, dander, and dust.

Investing in both natural and mechanical methods extends the functionality of each system. The air feels fresher even without open windows because both sources are active. For homes with children or pets, choosing non-toxic plants is advised. Systems should be inspected every six months for mechanical integrity, while plants should be checked weekly for condition and care.

Quiet strength of green filtration

Combining the steady filtration of ventilation systems with the quiet resilience of plants contributes to better air over prolonged periods. It makes environments more comfortable, not through overpowering intervention but steady care. Plants offer rhythm. They work slowly but persistently, provided they get the light and water they need.

A life surrounded by greenery influences more than air quality. It alters the feel of a space, affects mood, improves focus, and quietly absorbs what mechanical fans might leave behind. Matching smart technology with natural presence can form the foundation for spaces that breathe better for everyone who enters them.