Livinon Mechanical

Ductless mini split older homes retrofit without ductwork

Thinking about air conditioning or heat for an older house without ductwork can feel like a major project. A ductless mini split system offers efficient comfort without tearing into walls for new ducts. This guide explains when a mini split retrofit without ductwork makes the most sense, how to size it, where to place the equipment, what to expect for electrical and structural needs, typical costs, and how to keep it running clean. It draws on guidance from the U S Department of Energy and ENERGY STAR so you can make smart choices with confidence. For homeowners comparing options for additions, single rooms, whole home retrofits, or persistent hot and cold spots, this is a practical roadmap that puts comfort, efficiency, and historic character first.

Why mini splits suit older homes

Many homes built before central air relied on radiators, baseboards, or gravity ducts. Running new sheet metal through finished walls and ceilings can be expensive and disruptive. A ductless mini split pairs a quiet outdoor unit with one or more compact indoor heads. Refrigerant lines, a control cable, and a small condensate drain connect the two through a neat wall penetration that is typically only a few inches across. You get zoned heating and cooling without a maze of ducts. The U S Department of Energy highlights mini splits as a strong retrofit choice for houses without existing ductwork, for room additions, and for targeted comfort in problem rooms that never seem to feel right in summer or winter. The system delivers both heating and cooling with high efficiency in a compact package that avoids large remodeling work. See the Energy Saver overview for a clear summary of benefits and retrofit details including the small wall opening and line set run options at energy.gov.

Older homes are unique. Many have thick plaster walls, limited attic access, and trim you want to preserve. Mini split equipment keeps most of the work outside or in a single room. The indoor head mounts high on a wall or in a ceiling cassette, leaving floors and windows open. A narrow line cover can be painted to match exterior siding so the retrofit looks tidy on historic facades. Because the system serves specific zones, you condition only the rooms you use which can reduce energy use compared with running a larger central system. ENERGY STAR stresses that certified ductless heat pumps can deliver strong performance in cold climate regions when you choose the right model, and also notes that professional sizing with a Manual J load calculation gives the best outcome for comfort and efficiency. Read more at energystar.gov.

Good use cases include a finished attic or dormer that bakes in summer, a new sunroom or accessory space that would be costly to tie into existing ducts, a garage turned studio, or a back bedroom that never matches the thermostat. For whole home projects, a multi zone system can serve several rooms with one outdoor unit while preserving yard space and limiting exterior equipment.

Single zone or multi zone

Choosing the right layout starts with how you plan to use the space. A single zone mini split pairs one indoor head with one outdoor unit. This is a smart choice when you want to serve a single bedroom, a home office, a studio, or a small addition. The installation is straightforward with a short line set and a simple control setup. Upfront cost is usually lower. Maintenance is easy because there is only one indoor head to clean and service.

A multi zone configuration uses one outdoor unit connected to two or more indoor heads. It is a popular choice for older homes that need comfort in multiple rooms without running ducts through the structure. The outdoor footprint stays small which helps on tight lots. Each indoor head runs independently so you can set different temperatures in different rooms. This can deliver energy savings when parts of the home sit unused during the day. One outdoor unit can also simplify service. You will still want regular cleaning of each indoor filter and coil to maintain performance.

Budget planning matters. Consumer price guides report that a typical installed single zone mini split can fall in a range that begins around the lower thousands of dollars and can extend into the mid range depending on equipment, line set length, electrical work, and local labor. Multi zone projects often start in the mid range and can climb into five figures when you add zones or use high capacity or cold climate models. See current consumer ranges at HomeGuide and broad market context at EnergySage. Real projects vary. Older homes can carry additional costs for electrical upgrades, line hide work, or structural blocking for mounting. A Manual J and an on site visit will produce a more precise proposal than any online calculator. ENERGY STAR explains the value of Manual J and certified models at energystar.gov.

As a general rule, choose a single zone unit for one room that runs hotter or colder than the rest of the house or for a new addition that sits away from existing equipment. Choose a multi zone system when several rooms need comfort and when you want one outdoor compressor to keep the yard clean. If you already own a central system that serves most rooms, it may still make sense to add a single zone mini split for a tough space like a third floor or sun porch while leaving the rest of the home on the existing equipment.

Sizing with Manual J and BTU basics

Proper sizing decides how well a mini split will heat and cool an older home. Sizing too large can cause short cycling which leads to temperature swings, wasted energy, and unnecessary wear. Sizing too small can leave rooms uncomfortable on the hottest or coldest days. The industry standard method for sizing is a Manual J load calculation that considers square footage, window area and type, insulation levels, air leakage, ceiling height, orientation, and local weather data. ENERGY STAR recommends a Manual J for ductless systems to achieve the right capacity for each zone. Learn more at energystar.gov.

Homeowners often ask for a quick way to think about size before a technician visits. A rough square footage to BTU guide can help you start the conversation. Carrier provides general context for capacity selection and reminds buyers that these numbers are estimates. The best practice is to treat this table as a starting point, then rely on a Manual J for the final choice. Carrier placement and selection guidance is available at carrier.com.

Approximate room size to BTU guide
Room or zone size Typical BTU range Notes
Small room such as office or nursery Six thousand to nine thousand Higher ceilings, sun exposure, or poor insulation may push higher
Medium room such as bedroom or den Nine thousand to twelve thousand Corner rooms or large window walls may need more capacity
Large family room or open plan area Twelve thousand to eighteen thousand Sunrooms and high volume spaces often need a larger unit

Older homes vary widely. A plaster and brick house with original single pane windows may need more capacity for the same floor area than a similar size room in a house with modern air sealing and insulation. Part of a good assessment looks at envelope improvements that reduce the load so you can install a smaller and more efficient unit. For a helpful primer on insulation, air sealing, and ENERGY STAR choices that support lower energy use, see our guide to green HVAC best practices.

Smart placement for indoor and outdoor units

A mini split works best when air can move freely. Mount the indoor head high on an interior wall so cool or warm air washes the room without obstruction. Carrier suggests placing the unit about six to eight feet above the floor with a few inches of clearance from the ceiling for proper intake and discharge. Keep the front of the unit clear so air can reach the whole room. Avoid mounting above a stove, near strong steam sources, or where direct sun hits the unit for long periods. Do not hide the head behind tall shelves or drapery. When you want a more discreet look, a ceiling cassette or floor console may fit the room better. Placement guidance from Carrier is available at carrier.com.

For the outdoor unit, choose a level surface with good airflow. A small pad, wall bracket, or stand above snow line in colder regions can work. Keep shrubs and debris away from the coil. Leave clearance on all sides for service access and airflow. Think about sound as well. Position the unit where it will not point directly at a bedroom window or neighbor yard if possible. Confirm local codes and permitting needs before work starts. The Energy Saver page at energy.gov covers retrofit friendly installation features that help on older houses such as small penetrations and flexible line routes.

The connection between indoor and outdoor equipment uses a line set that carries refrigerant along with a control cable and a small condensate drain. A single neat wall opening often handles the bundle. The opening can be as small as a few inches across. A line cover matched to the siding keeps the exterior tidy. Manufacturers publish maximum line set lengths and vertical separation limits for each model. Many brands allow runs from roughly fifty feet up to one hundred feet or more depending on model and line size. Always follow the specification sheet for the exact unit. A summary of line set length considerations by brand is compiled by PickHVAC at pickhvac.com.

Every indoor unit needs to drain condensate during cooling. When a gravity drain is possible, the installer routes a small tube to a safe discharge point outdoors or to a proper drain connection. If gravity is not possible, such as for some basement or interior wall locations, a compact condensate pump moves water to a drain. These pumps are small and quiet with ratings for flow and lift height. You can review a typical mini split condensate pump example at Little Giant to see what these devices look like and how they mount near the indoor unit at littlegiant.com. For a homeowner friendly explanation of when a pump is needed, see this overview.

Electrical and structural checklist

Many mini splits require a dedicated electrical circuit. Smaller single zone models may run on a common household voltage while larger or multi zone systems typically call for 208 to 230 volts. The correct breaker size and wire gauge depend on the model and the length of the run. A licensed electrician should review your existing panel and available spaces, then size the circuit in line with the equipment nameplate. Older homes with original fuse boxes or smaller breaker panels sometimes need a service upgrade before the new circuit can be added. A current market overview for panel replacement cost ranges can be found at The Spruce at thespruce.com. Wiring size recommendations by common mini split capacities are summarized by the manufacturer MRCOOL and by PickHVAC, which gives a helpful sense of typical breaker and wire choices. Review those references at support.mrcool.com and pickhvac.com.

Think through structural support for mounting. The indoor head weighs far less than a traditional air handler, yet it still needs solid backing. On plaster walls or in rooms with irregular stud layouts, we may add blocking to prevent vibration and to provide a lasting anchor. For outdoor units, a stable pad or wall brackets keep the cabinet level year round. In snow country, a raised stand protects the coil and speeds winter drainage. For sound control, rubber isolation feet or pads help. Talk with your installer about the best location based on your home construction, lot layout, and where you spend time both indoors and out.

Permits and local inspections often apply to both electrical and mechanical work. Your contractor should coordinate permit submittals and scheduling, then walk you through any inspection findings. In older neighborhoods, historical review may apply to exterior changes on street facing walls. A tasteful line cover, thoughtful placement, and paint matching usually meet those requirements. If questions remain, we can propose routing that keeps most of the visible work in less prominent areas of the property.

Costs, incentives, and accurate quotes

Homeowners want honest ranges for planning. As of the current market cycle, consumer sources report a typical single zone mini split installation can start in the lower thousands and reach six thousand dollars or more depending on capacity, accessories, electrical work, and the difficulty of the line set run. Multi zone projects commonly start around the low to mid thousands and can reach into the teens when several indoor heads, long line sets, and cold climate equipment are included. See the current HomeGuide breakdown at homeguide.com and EnergySage for broad context at energysage.com. Actual pricing is local. The best step is to request three itemized bids that spell out equipment model numbers, capacities, accessories, electrical work, line hide work, permit fees, and a maintenance plan for year one.

Rebates and credits can improve the payback. ENERGY STAR maintains a directory of certified ductless heat pumps plus links to incentives and tax credits where available. This can include federal credits for qualifying air source heat pumps and state or utility programs for high efficiency equipment. Start at energystar.gov. We also cover how incentives interact with other upgrades such as smart controls and insulation in our post on energy saving HVAC upgrades. A quick call with our team can confirm which programs apply to your home and what documentation is needed for submission.

When you review quotes, look for a Manual J summary and a room by room capacity plan. Ask how line sets will be routed and how condensate will drain. Confirm that the electrical work is included or quoted separately. Request warranty details for the equipment and for labor. Clarify what is covered in the first year maintenance visit. A careful scope reduces surprises after install day.

Maintenance and simple ownership tips

Mini splits are reliable when kept clean. Filters inside each indoor head need regular attention because the coil is compact and the fan moves a lot of air for its size. A monthly check is a good habit during peak seasons. Wash or replace the filters per the manufacturer guidance. Keep the face of the indoor unit clean and free of dust. Inspect the outdoor coil and clear leaves or lint that could block airflow. Verify that the condensate drain is flowing in cooling season. Schedule professional service once a year or twice a year for homes with heavy use, pets, or construction dust. A routine visit typically includes coil cleaning, electrical checks, drain cleaning, refrigerant checks, and a control test. Typical service pricing falls into a modest range for a single system, with added cost for multi zone setups. For a seasonal checklist and tune up details, see our pre season tune up tips.

With proper care, a mini split can deliver a service life in the mid to high teens. Some units run longer when coils stay clean, drains stay clear, and voltage is stable. A maintenance plan can spread out the cost and keep reminders on schedule. We offer installation clients a first year service that includes filter refresh and coil inspection, then a discounted plan for ongoing care. Ask for details during your estimate visit.

Quick decision guide and FAQs

Is a mini split right for a 1920s bungalow with radiator heat and no ducts. Very often yes. A single zone unit can solve a hot bedroom on the second floor. A multi zone system can add cooling and shoulder season heating to the main living areas without touching the historic radiators. The small wall opening and discreet line cover maintain the character of the house while giving modern comfort. The Energy Saver resource explains why this retrofit is so friendly to older construction at energy.gov.

Will a mini split heat well in a cold climate. Many modern ductless heat pumps maintain strong output at low outdoor temperatures. Look for models listed as cold climate by ENERGY STAR and check the heating capacity table at your design temperature. A Manual J that uses local weather data keeps expectations realistic in winter. See the ENERGY STAR guidance on certified ductless heat pumps at energystar.gov.

What about the look of the indoor head. Wall mounted heads are slim with clean lines. In rooms where a wall head feels out of place, a ceiling cassette or a floor console can blend better with the architecture. Line covers outside can be painted to match trim. On many older homes, careful placement makes the installation nearly invisible from the street.

How long can the line set be. Manufacturers publish limits for each model. Many allow runs that approach fifty to one hundred feet with guidelines for vertical rise and additional refrigerant for longer runs. Exceeding those limits can hurt performance. Your installer will measure the planned path and select a model that supports it. See a summary of brand limits at pickhvac.com.

Do I need a new electrical panel. Sometimes. Many single zone units that run on common household voltage can fit on an available breaker. Larger and multi zone systems often require 208 to 230 volts and a dedicated breaker. If your panel is old, full, or uses fuses, an electrician should evaluate it. Replacement cost ranges are linked above from The Spruce at thespruce.com. For typical breaker and wire size guidance by model capacity, see MRCOOL and PickHVAC at the links above.

What if gravity drainage for condensate is not possible. A small condensate pump can be installed near the indoor head to move water to a suitable drain. These pumps are quiet and reliable when installed correctly. Little Giant provides a helpful overview of pump choices at littlegiant.com.

Can a mini split work with my current central system. Yes. Many owners keep the existing central system for most rooms then add a single zone mini split for a home office, third floor, or addition. This targeted approach gives comfort where it is needed while avoiding duct extensions that may be impractical or costly. Energy use can drop because you do not need to run the central system as often for that one problem room.

How do I get an accurate quote. Start with a site visit that includes a Manual J, a room by room plan, and a discussion of placement, line routes, and electrical needs. Ask for an itemized proposal. Request model numbers and performance data. Confirm rebate eligibility for the selected equipment. Our team offers a free in home assessment with a Manual J and a written estimate. You can also study related topics on our blog before we meet.

Your next step

If your older home needs comfort without new ducts, a ductless mini split offers a clean path forward. Start with a qualified assessment that respects the character of your house, confirms the load with a Manual J, and selects certified equipment that fits your rooms and your climate. Ask about current incentives. Plan for maintenance at the time of purchase. The result is year round comfort with smart energy use and minimal disruption to finishes.

Book a free Manual J and in home estimate to compare options, confirm sizing, and see how a retrofit can work in your specific rooms. We can outline costs, available rebates, and a maintenance plan that keeps your new system running clean from day one.

Sources for further reading

U S Department of Energy Energy Saver overview of ductless systems:
energy.gov
ENERGY STAR guidance for ductless heat pumps and Manual J:
energystar.gov
Typical installed cost ranges and zone pricing context:
HomeGuide,
EnergySage
Placement heights and clearances:
Carrier
Electrical circuit and wiring references:
PickHVAC,
MRCOOL
Condensate pump overview:
Little Giant

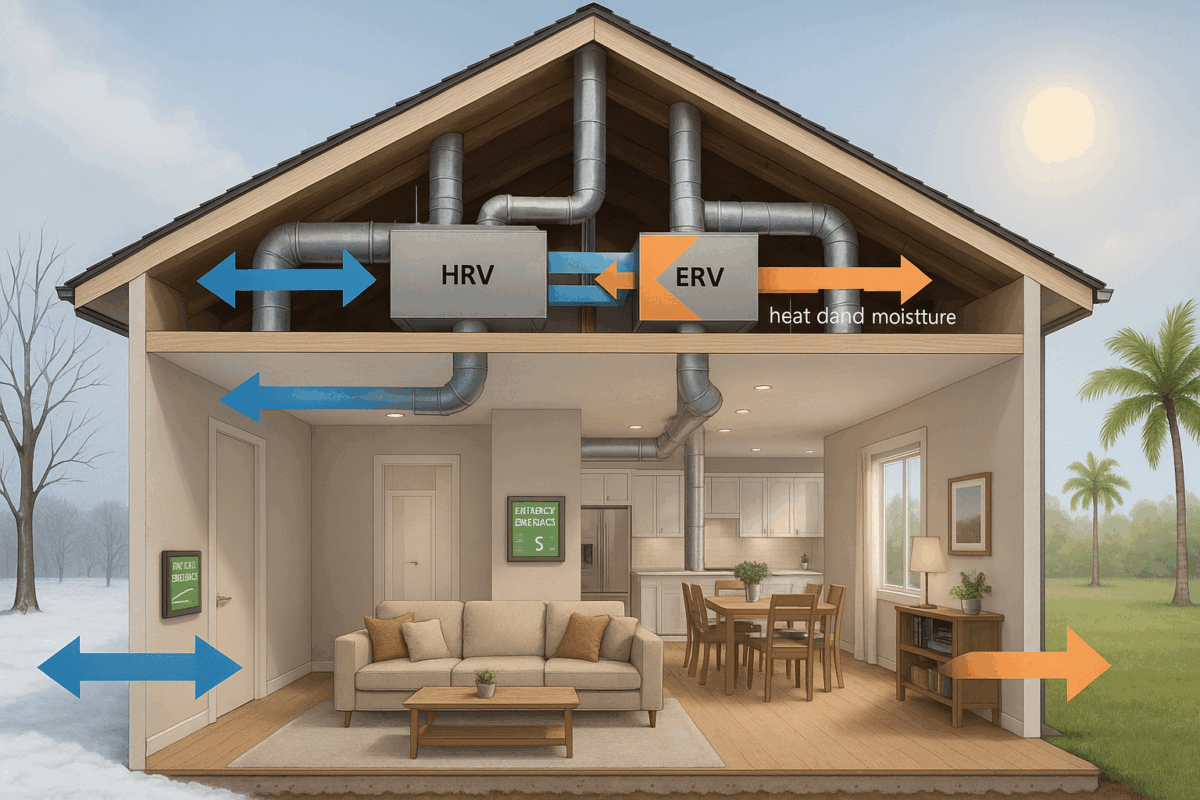
HRV vs ERV Benefits for Cold and Humid Climates

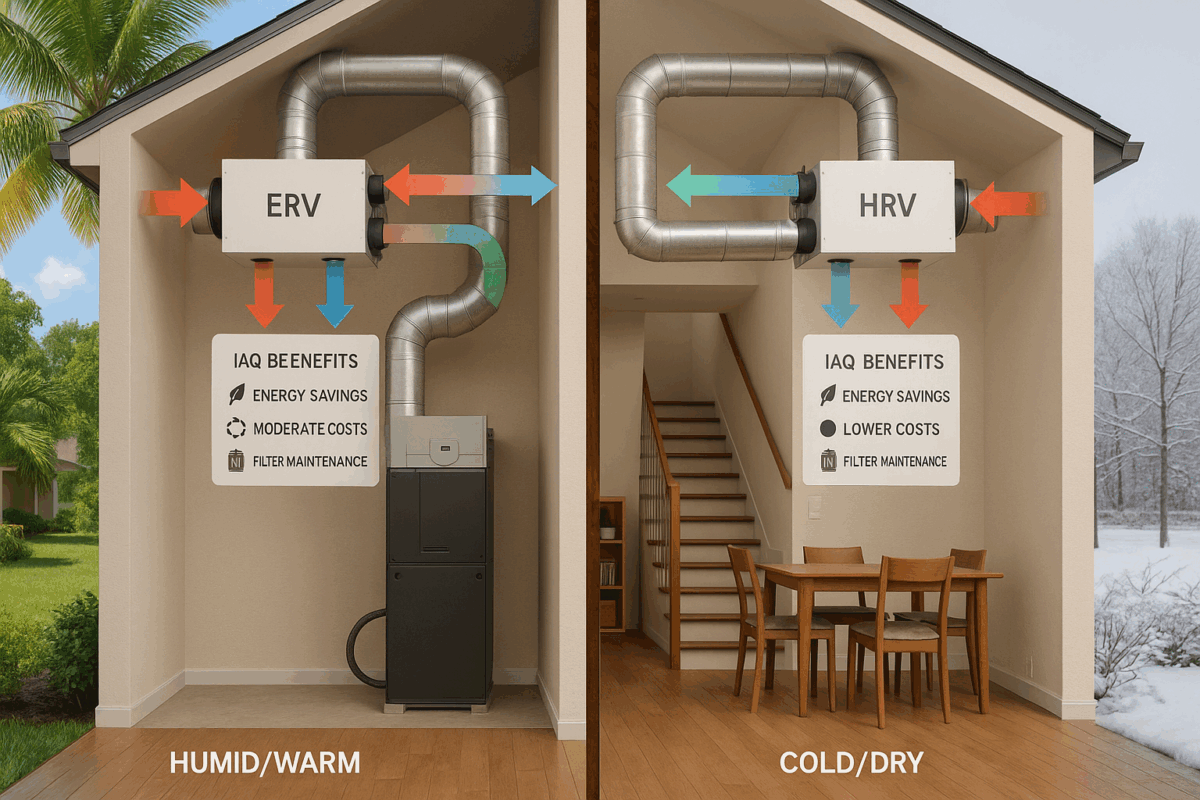
Fresh air should not spike your bills or your indoor humidity. Heat recovery ventilators and energy recovery ventilators give you continuous fresh air with far less energy loss than window airing or simple exhaust fans. The right pick depends on climate, home tightness, and moisture loads. This guide explains how HRVs and ERVs work, the real differences, climate based choices for cold and humid regions, and practical ways to connect a unit to your current HVAC for cleaner air and lower costs.

What HRVs and ERVs do

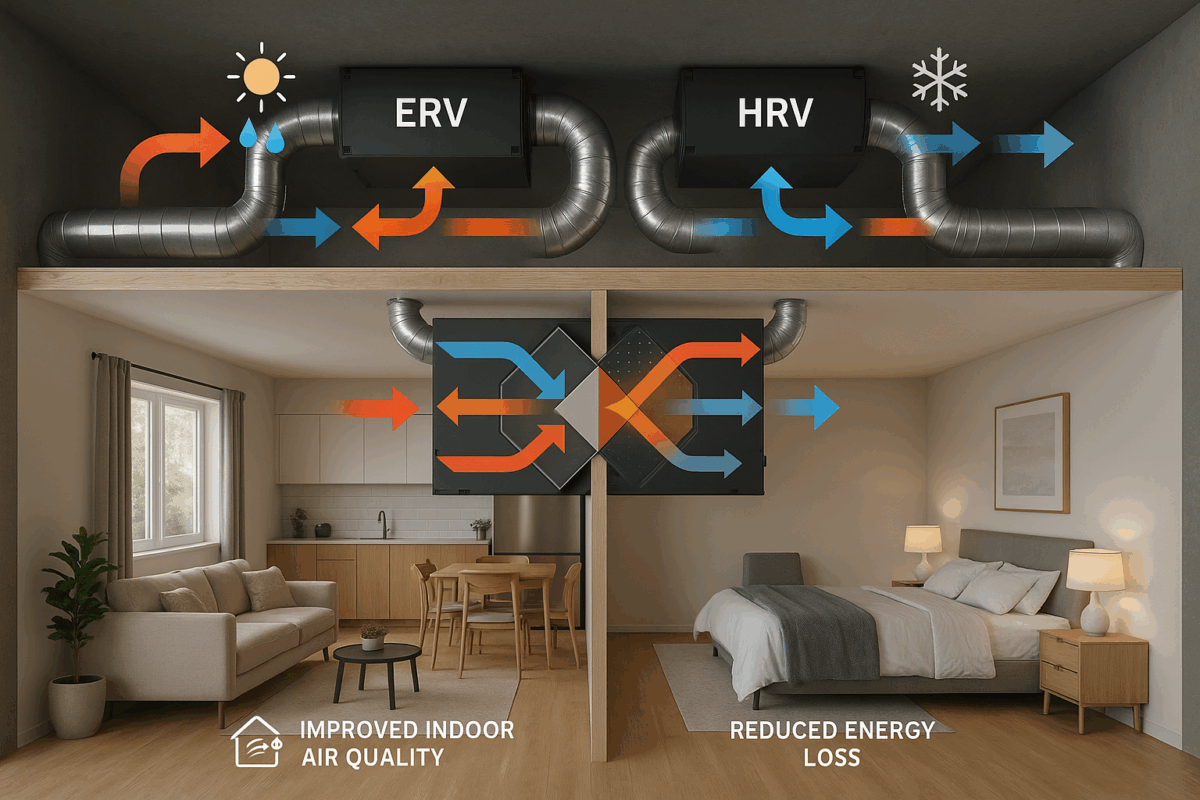
A balanced ventilation system brings in outdoor air while exhausting stale indoor air at roughly the same rate. That balance helps control pressures so your home does not pull unwanted air through leaks. HRVs and ERVs add a heat or energy exchange core between the two air streams. The core lets outgoing air temper the incoming air without mixing the two streams. The result is fresh air that is closer to room temperature before it enters your ducts or living space.

Both HRVs and ERVs reduce the heating or cooling energy needed to condition outside air. The U.S. Department of Energy explains that whole house ventilation with heat or energy recovery can be cost effective in climates with severe winters or summers. Recovery ventilators offer cleaner air with lower load on your furnace or air conditioner. See DOE guidance on whole house ventilation for a clear overview of system types and benefits at energy.gov.

The Home Ventilating Institute provides a helpful summary as well. HRVs recover sensible heat only. ERVs recover heat and also transfer some moisture across a special membrane. That moisture transfer reduces how much humidity tags along with fresh air. Review HVI mechanical ventilation types at hvi.org.

Key differences

Think of an HRV as a heat exchanger for ventilation air. It tempers incoming fresh air using heat from the exhaust stream during winter. It does the reverse in summer when the indoor air is cooler than outdoor air. An ERV does the same but also passes a portion of moisture in the direction that helps stabilize indoor relative humidity. In summer that means less outdoor moisture enters. In winter that means some indoor moisture stays inside rather than drying out the house too much.

Many respected sources note typical heat or energy recovery efficiencies in the range seen in HVI directories for certified products. Look for HVI certified data rather than only brochure values. HVI rates units using Adjusted Sensible Recovery Efficiency and Adjusted Total Recovery Efficiency. These ASRE and ATRE values reflect more realistic field conditions than legacy SRE and TRE lab metrics. HVI explains these ratings at hvi.org and offers a consumer buying guide at this page.

Quick definition you can use

An HRV recovers heat from outgoing air to pre condition incoming fresh air. An ERV does the same but also transfers some moisture, which helps stabilize indoor humidity. ERVs can lower the air conditioners moisture load during humid weather but they are not dehumidifiers. See HVI and Building Science Corporation.

Many homeowners ask whether an ERV will dry a house. It will not. It reduces the moisture that arrives with outdoor air. If your indoor humidity is already high, plan for dedicated dehumidification as needed. Building Science Corporation provides clear guidance on this point in its balanced ventilation brief at buildingscience.com.

Climate picks that work

Climate drives the best first choice. Occupancy, home size, infiltration, and indoor activities still matter. Use these picks as a smart starting point then fine tune with a pro.

  • Cold dry or heating dominated. HRV is the common pick. It exports excess indoor moisture during winter. That helps reduce window condensation and frost. Some homes get too dry with an HRV. An ERV can help retain comfort moisture if the house is leaky or occupancy is low. The nuanced view is explained by Building Science Corporation at this link.
  • Hot humid. ERV is the clear leader. It cuts how much outdoor moisture enters with fresh air. That reduces the latent load on the air conditioner. During spring and fall the temperature may be mild yet humidity stays high. Pair an ERV with dedicated dehumidification or smart controls to hold indoor RH in the comfort range. See DOE ventilation guidance at energy.gov.
  • Mixed humid. ERV often delivers steadier indoor RH across seasons. It moderates moisture during muggy months. It avoids excessive drying during cold snaps. You may still need dehumidification if indoor RH runs high. Building Science Corporation covers this choice at this resource.
  • Hot dry. Either HRV or ERV can work. The goal is efficient balanced ventilation. In very dry regions an ERV can help retain some moisture indoors. During mild periods simple ventilation strategies can be enough. DOE covers these basics at energy.gov.

Humid climate tip you can trust

In hot humid climates choose an ERV. It limits the outdoor moisture that rides in with fresh air which eases your air conditioners workload. During spring and fall add dehumidification or smart ERV controls to keep indoor RH steady. Source: DOE Energy Saver.

Recent Building America research shows that smarter ERV control strategies can cut ventilation related latent loads by roughly half compared to supply or exhaust only strategies in humid regions. See the U.S. DOE summary at this link.

Cold climate nuance that saves comfort

In cold dry regions an HRV often helps by flushing moisture to curb window condensation. Some homes still feel too dry in mid winter. If your house is leaky or the family spends long periods away an ERV can help retain comfort moisture. Small tight homes with many occupants may still need HRV to shed winter humidity. See the Building Science Corporation brief at buildingscience.com.

Austin and Gulf Coast context

Austin sits in a hot humid climate for long stretches of the year. Outdoor dew points often exceed typical indoor setpoints. An ERV reduces the moisture that would otherwise enter with required fresh air which lowers the latent load on your AC. During shoulder seasons when temps feel pleasant but RH stays high, many homes still need moisture control. An ERV plus a whole home dehumidifier and smart control logic keeps indoor RH in a healthy band. DOE offers more guidance on humid climate ventilation at energy.gov. Talk to our team about the right ERV setup for Austin’s humidity. We can guide professional installation and duct integration.

If you fight sticky rooms or musty smells, review our quick read on indoor humidity and comfort issues. It shows why RH control pairs so well with ERVs in our region.

Integrate with existing HVAC

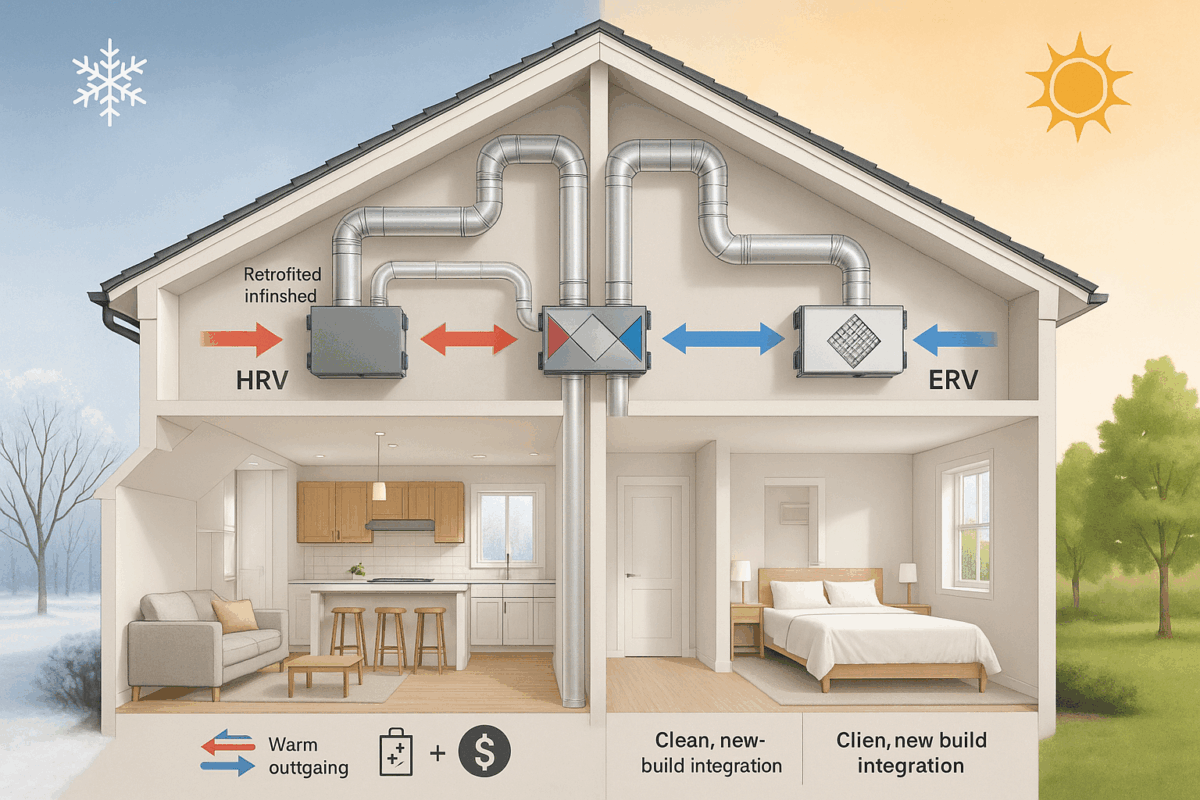
The cleanest path is dedicated supply and exhaust ducting. That gives you accurate balance at the unit. It also gives you freedom to place fresh air supply grilles where people spend time. Bedrooms and living zones see the most benefit. Dedicated ducts often cost a bit more upfront. The payoff is strong comfort and easy commissioning.

Many homes tie the ERV or HRV into central ductwork. This can work well with a clear plan. Building Science Corporation offers diagrams and cautions that we use on projects. The supply from the HRV or ERV should enter the return side of the air handler. Keep the connection point a few feet downstream from the exhaust pickup to avoid short circuiting. A motorized damper on the outside air leg stops uncontrolled flow when the unit is off. Interlock the central fan so mixing happens during ventilation calls. See the full guidance at buildingscience.com.

Do not route a kitchen range hood through the HRV or ERV. Grease and cooking contaminants will foul the core. Keep bath and kitchen fans as dedicated spot exhaust. Use the recovery ventilator for steady background fresh air. DOE also notes the value of filtering outside air and keeping ducts short and sealed in unconditioned spaces. Read more on whole house ventilation at energy.gov.

Filtration matters. Use a good filter on the outdoor air side to protect the core. Choose MERV levels that fit your system and local air quality. Seal and insulate any ducts that run through attics or garages to avoid heat gain and condensation.

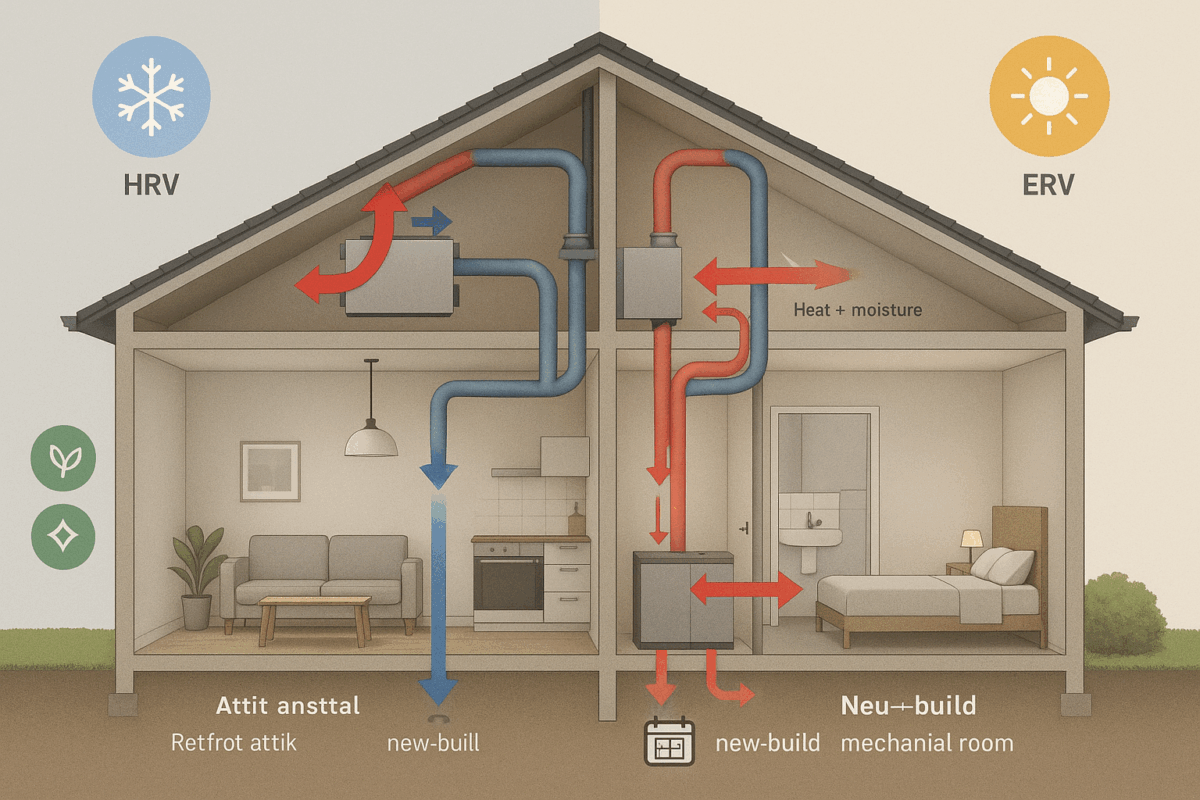
Looking to plan a retrofit in a tight closet or attic. We can help design the routing and the controls for your home. See how we handle professional installation and duct integration.

Sizing and performance

Start with ventilation rates from ASHRAE 62.2 2022 for residential design. That standard sets the baseline for continuous whole home airflow and acknowledges credit for spot exhaust. It also guides intermittent control strategies. You do not need to memorize formulas. A qualified designer can calculate your target flow and duty cycle. See the ASHRAE overview at ashrae.org.

Pick models using HVI certified data. The HVI directory lists ASRE and ATRE which adjust for frost and fan energy. These metrics let you compare real world performance across brands. The consumer guide at hvi.org explains the ratings and links to hvicertified dot org for model searches. When you compare units, match rated airflow to your design rate with some headroom. Avoid oversizing since that can raise fan energy or complicate balancing.

Specify features that match your climate. Cold regions call for reliable frost control and easy core access. Humid regions benefit from controls that reduce ventilation during peak moisture events while still meeting daily targets. Smart ERV strategies can further trim latent load as shown in DOE research at this page.

Compliance and quality check. Have your designer size and set ventilation to ASHRAE 62.2 2022 and choose an HVI certified unit with strong ASRE and ATRE ratings. See ASHRAE and HVI for reference.

Energy and health gains

The energy story is simple. Conditioning outdoor air costs money. HRVs and ERVs reclaim a large share of the heat or cool that would otherwise leave your house with stale air. The Department of Energy states that balanced ventilation with recovery can be the most cost effective approach in extreme climates. Proper design avoids high fan power. Clean filters and tuned controls preserve those savings. Learn more at energy.gov.

The health story is strong as well. Ventilation dilutes indoor pollutants from cooking, cleaning products, off gassing, and normal human activity. The U.S. EPA explains that better ventilation reduces exposure to airborne respiratory viruses when paired with filtration and source control. Read the EPA page on ventilation and respiratory viruses at epa.gov. Fresh air also helps with odors and sleep quality. Many clients report clearer air during gatherings when an ERV runs continuously in the background.

ERV humid climate benefits often show up in comfort. Lower indoor RH during muggy spells makes rooms feel cooler at the same thermostat setting. HRV cold climate benefits often show up on windows and walls. Less condensation and better winter comfort without stuffy rooms.

If you want the sustainability angle, see our quick guide to energy recovery ventilators for fresh air with less waste. It sums up why recovery ventilation is a smart piece of an efficient home.

Cold climate operation

Very cold air can frost an HRV core during winter. Quality units include frost control strategies such as periodic recirculation, preheat, or exhaust only cycles. These methods keep the core from freezing and protect airflow balance. DOE covers frost control and maintenance in its whole house ventilation page at energy.gov.

Duct work matters. Insulate and air seal any outside air or exhaust ducts that pass through attics or crawlspaces. Keep runs as short and straight as possible to limit pressure drop. Use smooth metal or high quality flex with large radius elbows. Sloped exterior runs prevent water from pooling in the duct. Seal all joints with mastic or listed tape. Good duct practice reduces fan energy and noise.

Maintenance is simple yet powerful. Change or wash filters on the outdoor air and exhaust legs. Clean the core on the schedule in your manual. Wipe down the drain pan and check the condensate path. These steps protect airflow and recovery efficiency. Protect performance with yearly filter and core cleaning. Book your annual filter and core cleaning and tune ups.

Real home scenarios

Small tight home in a cold region with four occupants. Moisture generation per square foot runs high. Showers, cooking, and human respiration add up. An HRV often fits best to shed that moisture during winter. Look for strong frost control. Keep bath fans for spot loads.

Large leaky home in a cold region with two occupants. Infiltration may already dry the house. An HRV could push the RH too low in winter. An ERV can help retain comfort moisture while still delivering fresh air and heat recovery. Measure leakage and monitor RH before you pick.

Modern tight home in Austin with typical family schedule. AC latent load peaks when fresh air brings in humidity. An ERV reduces that moisture entry. Pair it with a smart thermostat or controller that runs the air handler fan during ventilation calls for better mixing. Add a whole home dehumidifier for spring and fall when cooling run time is low yet RH climbs.

Hot dry climate with mild winters. Either HRV or ERV can work. Many pick ERV to avoid overly dry indoor air during shoulder seasons. The key is correct airflow and distribution. Dedicated ducts offer top performance. A tie into the air handler can work with careful design.

Mixed humid climate with basement. Basements can run humid even when upper floors feel fine. An ERV provides steady fresh air with moderated moisture transfer. A dehumidifier might still be required for the basement zone. Use spot exhaust in baths and kitchen regardless of which recovery ventilator you choose.

FAQs

Will an ERV dehumidify my home

An ERV lowers the amount of outdoor moisture that comes in with fresh air. It will not dry a wet house. If indoor RH is high, add a dehumidifier or adjust controls. See Building Science Corporation guidance at this page.

Do ERVs work below freezing

Yes. Pick models with proven frost control and keep ducts insulated and sealed. Follow cold climate best practices for exterior hoods and drain paths. DOE covers the details at energy.gov.

Can I connect an ERV to existing ducts

Yes. Tie the fresh air from the ERV into the return side. Keep the connections spaced to avoid short circuiting. Interlock the central fan and use a motorized outside air damper. Building Science diagrams show this layout at buildingscience.com. We handle the details in our professional installation and duct integration.

How do I compare HRV or ERV efficiency

Use HVI certified ASRE and ATRE ratings for apples to apples comparisons. These reflect adjusted performance rather than ideal lab numbers. See the HVI buying guide and directory at hvi.org.

What standard sets the minimum ventilation rate

ASHRAE 62.2 2022 is the current residential ventilation standard used by many programs and codes. Your designer will size the system to that standard. Read the overview at ashrae.org.

Do I still need bath or kitchen exhaust

Yes. Keep spot exhaust for baths and the kitchen. Do not run a range hood through an HRV or ERV. Use the recovery ventilator for steady background fresh air. This combination delivers clean air with better moisture control.

Pro tips that pay off

Commissioning matters. Balance supply and exhaust flows with a flow hood. Confirm airflow meets the ASHRAE 62.2 target. Verify outside air damper position during calls. Check fan cycling if the unit ties into your air handler. These steps lock in performance that the ratings promise.

Choose quiet. A quiet system runs more often which improves air quality. Use vibration isolation and proper diffuser placement. Select fan speeds that match the design rate rather than max speed. Keep bends gentle. Keep flex short. A quiet ERV or HRV disappears into the background while it works for you.

Protect the core. Change filters on schedule. Clean the core before the heating season. Check exterior hoods for leaves and nests. These simple steps keep airflow steady and energy savings intact. Our service team can help with annual filter and core cleaning and tune ups.

Think distribution. If you use dedicated ducts, place supply grilles in bedrooms and living spaces. Place returns in common areas or in hallways near baths. If you tie into the air handler, set up periodic mixing cycles to pull fresh air through the supply registers. This avoids rooms that never see the benefit.

Plan for humidity. In hot humid zones pair the ERV with a whole home dehumidifier or controls that increase run time when RH rises above setpoint. In cold zones pick a unit with frost control and set a target RH to avoid window condensation. Our article on indoor humidity and comfort issues explains why 40 to 50 percent RH often feels best.

Why a pro design matters

Balanced ventilation looks simple on paper. Real homes vary. A pro will measure leakage, check duct routes, and right size the airflow. A pro will also select quiet diffusers and controls that match your life. The result is clean air that saves energy over time.

We install HVI certified HRVs and ERVs that fit the climate and your budget. We commission every unit with a balometer or anemometer. We set controls to meet ASHRAE 62.2 targets. We train you on filter care. Then we offer a maintenance plan so the system keeps performing. If you value fresh air with lower waste, see our piece on energy recovery ventilators for fresh air with less waste and ask for a proposal.

Closing thoughts

Pick an HRV if you live in a cold dry climate and winter moisture is a concern. Pick an ERV if you live in a humid climate and want to reduce the moisture that comes in with fresh air. Mixed humid regions often favor ERV for steadier RH across the year. Hot dry regions can use either option with a focus on correct airflow and distribution. Use ASHRAE 62.2 for sizing. Use HVI ASRE and ATRE for model comparisons. Keep bath and kitchen exhausts as separate spot systems. Balance flows during commissioning. Clean filters and the core on schedule. These steps deliver fresher air with lower energy use.

If you want help choosing a model or planning a retrofit, reach out for professional installation and duct integration. We will size it right, set it up cleanly, and keep it running with annual filter and core cleaning and tune ups.

ERV for humid climates HRV for cold climates

Fresh air should not spike your utility bill or dry out your home. Energy recovery ventilators and heat recovery ventilators give you steady, filtered ventilation while they recycle energy that would otherwise be wasted. The trick is picking the right core for your climate and for how your home behaves. This guide compares ERV for humid climates and HRV for cold climates, explains how each works, shows how to connect them to your current HVAC, and maps out realistic costs and upkeep. You will see how continuous ventilation lifts indoor air quality while easing the load on your furnace or air conditioner. Energy recovery ventilators now allow for air renewal without sacrificing climate control, as we cover in our feature on Future HVAC eco friendly tech for sustainable comfort.

ERV for humid climates, HRV for cold climates

If you live where summers feel sticky, start with an ERV. If you live where winters are long and dry, start with an HRV. That simple rule serves most homes well. An ERV transfers sensible heat plus some moisture through an enthalpy core, so the air it brings in feels less muggy in summer and less bone dry in winter. An HRV transfers sensible heat only. It excels at purging excess winter humidity in cold regions while recycling heat you already paid for. Guidance from Building Science Corporation supports this climate first choice for a balanced ventilation system that tempers incoming air while exhausting stale indoor air. See their overview of balanced ventilation strategies at Building Science Corporation Info 611.

Climate is a strong signal. House behavior also matters. A small, tight home with many people can hold a lot of moisture in winter. That house may favor an HRV even in a mixed climate because it needs to shed indoor humidity. A leaky or low occupancy home can dry out in winter. That home can prefer an ERV to retain some moisture for comfort. Many modern ERVs can run in cold regions with reliable frost control. Some even frost at lower outdoor temperatures than comparable HRVs. Energy Vanguard offers plain language guidance on these edge cases at Energy Vanguard.

How ERVs and HRVs work

Both systems are balanced. They pull in outdoor air through a duct. They exhaust indoor air through a separate duct. The two airstreams pass through a heat exchanger. The unit recovers energy from the outgoing airstream to temper the incoming air before it reaches your living space. That means your furnace or air conditioner has less work to do. The U.S. Department of Energy notes that many products recover roughly seventy to eighty percent of the energy in the exhaust air, which can have a meaningful impact on comfort and load in both summer and winter. See the Energy Saver guide at energy.gov.

An HRV transfers sensible heat only. Warmth shifts across the core, yet water vapor does not cross over. This cuts the chill of incoming air in winter. It also lets the system remove indoor moisture more effectively during the heating season. An ERV uses an enthalpy core that transfers sensible heat plus some latent energy. In practice this means the ERV can reduce the moisture load of incoming summer air and can keep indoor humidity steadier year round. ERVs do not function as dehumidifiers. They reduce the burden on your cooling system by keeping a portion of outdoor moisture out of the house during ventilation. Indoor humidity in winter also tends to track steadier with an ERV, which helps with dry air complaints in many homes.

When you compare products, look for HVI certified ratings. Two metrics matter a lot. ASRE means Adjusted Sensible Recovery Efficiency. ATRE means Adjusted Total Recovery Efficiency. ASRE focuses on sensible heat transfer. ATRE reflects total energy transfer, which includes latent transfer for ERVs. You will also want to look at rated airflow, watt draw, sound, filter options, and frost control method. The Home Ventilating Institute explains these ratings and maintains a directory for apples to apples comparisons at HVI consumer guide.

DOE: Most ERV and HRV systems recover about 70 to 80 percent of exhaust air energy.

U.S. Department of Energy

EPA: Some indoor pollutants measure two to five times higher indoors than outdoors. Balanced ventilation helps dilute them.

EPA Indoor Air Quality

ERV vs HRV comparison

Feature ERV HRV
Energy transfer Heat plus some moisture via enthalpy core Heat only via sensible core
Best climate fit Hot humid or mixed humid regions Cold dry regions with long heating seasons
Summer effect Reduces incoming moisture load for AC Does not reduce incoming moisture load
Winter effect Helps avoid over drying in many homes Purges indoor humidity more aggressively
Frost control Frost control on most models. Many frost at lower temps than HRV Frost control needed in many cold regions
Drain needs Some designs avoid a drain. Check model Often needs a condensate drain in winter
Maintenance Filters quarterly. Many cores are not washable Filters quarterly. Many cores can be rinsed during warm weather
Common use cases Humid summers. Homes that get too dry in winter Cold winters. Tight or high occupancy homes that run humid in winter

Climate guide

Use climate first as your path to a good fit. Hot humid regions benefit from an ERV because it cuts the latent load of outdoor air during ventilation. The incoming air feels less clammy, so your AC sees less moisture to remove. Cold dry regions often prefer an HRV because it vents indoor moisture well during long heating periods. This reduces condensation risk on windows and in walls. A neutral or mixed region often leans toward ERV since it balances humidity swings across seasons.

Then view home behavior. A small, tight home where many people live will generate more moisture each day. Showers, cooking, breathing. If winter indoor humidity runs high in that home, an HRV may serve you better even if your summers are humid. A large or leaky home with two people can get painfully dry in winter. That home often feels better with an ERV because it retains some moisture. This nuance appears in Building Science Corporation guidance and in field experience from energy pros.

Cold weather operation worries many homeowners. Modern units include frost control. HRVs often begin defrost cycles near 23 degrees Fahrenheit. ERVs often run to lower temperatures, sometimes around 14 degrees Fahrenheit before defrost is needed. This is model specific. Broan publishes defrost thresholds and drain details in its ERV manual. See the manual at Broan ERV manual. RenewAire also explains why ERV frost susceptibility can be lower than HRV in many cases. Read more at RenewAire frost control white paper.

If you want a visual cue for climate fit, HVI and several manufacturers share simple climate maps that place HRV in long winter zones and ERV in humid summer zones. A helpful example is the Fantech and HVACQuick guide at HVACQuick map.

Humidity management ties directly to health. Poor control fuels mold risk and comfort complaints. If summer humidity stays high in your home, review our guidance on humidity risks for your HVAC and indoor air quality. That page shows why ventilation plus targeted dehumidification can deliver the best results in sticky climates.

  • Hot humid climate with regular AC use. Choose ERV.
  • Cold dry climate with long heating season. Choose HRV.
  • Mixed climate. Start with ERV. If winter indoor humidity often runs high in a tight home, consider HRV or a seasonal core swap if your model supports it.
  • Always confirm with sizing per ASHRAE 62.2 and certified HVI ratings.

HVAC integration

Distribution matters as much as product choice. A fully ducted ERV or HRV with dedicated supply to bedrooms and living areas plus dedicated returns from stale air rooms gives the most even results. You get measured flows to each room. You also avoid starving one space while flooding another. This is the gold standard.

A simplified connection can work in many homes. In that setup, the ventilation supply taps into the return side of your central air handler. The ventilation system then relies on the main ductwork to distribute fresh air. Design and balancing matter in this configuration. You want supply and exhaust to track within a small margin. Your installer will set damper positions and fan speeds so net pressure balances at the unit. Kitchen range hood exhaust must remain independent. Do not pull cooking effluent into an ERV or HRV core. Bathroom fans can be either local only or tied into the balanced system, depending on the model and code path. Building Science Corporation outlines these options with clear diagrams in their Info 611 guide.

Controls can be simple or smart. Some homeowners like a runtime control that delivers a set number of minutes each hour. Others prefer humidity based control that increases ventilation when relative humidity rises. Higher end models can pull signals from indoor air quality sensors. HVI offers consumer friendly advice on control choices at HVI continuous whole house ventilation.

Sizing and codes

Size your system using ASHRAE Standard 62.2. This sets minimum whole home ventilation targets. The common formula in I P units looks like this: Qtot = 0.03 × floor area in square feet + 7.5 × bedrooms plus one. That value is in cubic feet per minute. You can also claim an infiltration credit if verified. Some controls allow intermittent operation with a higher airflow while still meeting the daily target. The standard favors balanced ventilation in many code paths due to comfort and distribution benefits. You can review accessible references at this ASHRAE 62.2 overview and the tool guide at BASC tool guide.

ASHRAE 62.2 quick calc: Qtot = 0.03 × floor area + 7.5 × (bedrooms + 1)

Once you know your target airflow, shop with the HVI directory. Select a certified model that delivers the required airflow at a realistic static pressure. Compare ASRE or ATRE to gauge efficiency. Then check watt draw per CFM, sound, filter size, and frost control method. The HVI product directory sits at HVI product directory.

Energy and IAQ gains

Homes tighten up as insulation and air sealing improve. Fresh air still matters. EPA testing shows indoor concentrations of some pollutants reach two to five times higher than outdoors. A balanced ERV or HRV brings in filtered outdoor air on a steady basis. This dilutes pollutants like formaldehyde, VOCs, carbon dioxide, and fine particles from indoor sources. The inside story on indoor air quality is a good read at EPA IAQ.

Energy use shifts as well. ERV and HRV units temper incoming air so your HVAC system runs less to maintain setpoint. DOE notes that energy recovery works best in regions with intense summers or winters. Modeling studies in net zero housing also show reductions in HVAC energy when ERV or HRV is used instead of exhaust only ventilation. One study found HRV cut HVAC use by about thirteen percent while ERV cut HVAC use by about seventeen percent in a specific case. Total electricity use also fell in those simulations. Savings vary with climate, runtime, and equipment efficiency. Read the open access paper at this research article and the DOE overview at energy.gov.

Better ventilation also reduces allergy triggers. Filtration at the ERV or HRV helps catch outdoor pollen and fine particles. Cleaner air helps many households sleep better, think clearer, and feel fewer headaches. For seasonal relief tips, see 5 ways to improve indoor air quality this allergy season.

Energy recovery ventilators deliver fresh air without giving up the comfort you paid for. That is why these systems show up in many sustainable home projects today. They pair well with high efficiency HVAC and smart controls.

Costs

Budget for equipment, installation, and ongoing operation. Many mid market ERV or HRV units land between about seven hundred and two thousand nine hundred dollars for the equipment alone. ERV versions often cost a bit more than a comparable HRV. Forbes Home provides a good plain language price range for context. See their coverage at Forbes Home.

Installed residential projects commonly fall between roughly one thousand five hundred and five thousand five hundred dollars. The final number depends on capacity, location, duct complexity, and controls. Stand alone ducted systems usually cost more than a simple return side connection. Premium high efficiency products with advanced controls and sound ratings can push higher. A contractor example that shows typical ranges sits at Arrow HVAC. Green Builder Media also notes that premium systems for high performance homes can cost more. Read their overview at Green Builder Media.

Running costs include fan energy and filter changes. In very mild climates, the energy recovery benefit may not outweigh those costs. In extreme climates or tight homes, the return on investment often looks strong because comfort and moisture control improve while HVAC runtime falls. Incentives for high efficiency HVAC may also support your project. See our guide to green HVAC practices for a sustainable home for ideas that pair well with an ERV or HRV.

Maintenance

Plan simple upkeep to keep your unit reliable. Filters deserve attention first. Check or clean them every three to six months. Replace disposable filters as specified by your manufacturer. Many ERV cores use paper or polymer media that is not washable. Vacuum dust from the surface carefully. Many HRV cores use plastic or aluminum that can be rinsed. Only rinse during warm weather so you can dry the core completely before reassembly. Always confirm with your model manual. Panasonic and Broan manuals, plus specialty parts shops, offer clear guidance. See a typical ERV manual at Panasonic ERV manual and a maintenance FAQ at FreshAirParts FAQ.

Winter adds two more tasks. Frost control and condensate management. Many HRVs require a drain connection to remove condensate that forms in the core during cold weather. Some ERV designs avoid a drain. Follow the installation manual for your model. Frost control runs automatically. The controller will cycle the unit to protect the core when outdoor air drops below a set threshold. Broan explains these strategies and temperature thresholds in its ERV manual at Broan ERV manual. AHRI offers training resources on typical ERV and HRV components at AHRI education page.

Maintenance calendar

Quarterly: Inspect or replace filters. Vacuum dust in the cabinet. Check exterior hoods for debris.

Fall: Inspect core per manual. Confirm defrost function. Verify any condensate drain is clean and pitched.

Spring: Clean or rinse HRV core if allowed. Dry fully before reassembly. Check balancing dampers and reset controls for warmer months.

A maintenance mindset prevents most ventilation headaches. We share seasonal prep tips in Is your HVAC system ready for summer. Use that checklist to get ahead of issues before the peak season starts.

Commissioning tips

A good unit can underperform if it is not set up right. Ask your installer to balance supply and exhaust flows within a small margin. Twenty percent imbalance or less is a common target for comfort. Confirm duct sealing and insulation on any runs through attics or unconditioned basements. Verify frost control function at the panel. Set controls to meet ASHRAE ventilation needs while matching your occupancy pattern. If the system taps the main return, confirm that the air handler schedules will support fresh air distribution during occupied hours. Energy Code Ace offers a clear overview of indoor air quality and ventilation setup practices at Energy Code Ace guidance.

FAQs

Is an ERV better than an HRV in humid climates
Yes for most homes. An ERV reduces the moisture load of incoming air during ventilation. AC does less latent work. Comfort improves in many hot humid regions. Exceptions exist for very tight homes with excess winter humidity.

Will an ERV dehumidify my home
No. An ERV is not a dehumidifier. It reduces the moisture carried in with fresh air. Many homes in sticky climates still benefit from a dedicated dehumidifier during shoulder seasons.

Can I use an ERV in a cold climate
Yes. Modern ERVs include frost control and can run in cold regions. Defrost cycles will run during very low outdoor temperatures. Some units also need special installation details in winter. See the Broan manual for an example of defrost thresholds.

How do I size an ERV or HRV for my home
Use ASHRAE 62.2. The quick formula in I P units is Qtot = 0.03 × floor area + 7.5 × bedrooms plus one. Select a certified model from the HVI directory that meets the target airflow at a realistic static pressure.

How much does a whole home ERV or HRV cost to install
Typical installed projects range from about one thousand five hundred to five thousand five hundred dollars. Equipment only usually runs seven hundred to two thousand nine hundred dollars. Complexity and ductwork drive price. Get a local quote. See Forbes Home and the Arrow HVAC example for context.

What maintenance do these systems require
Quarterly filter checks. Annual core inspection and cleaning per your manual. Winter drain and defrost checks. ERV cores are often not washable. HRV cores are often rinseable during warm weather.

Can I connect an ERV or HRV to my existing HVAC ducts
Yes. A simplified return side connection is common. Fully ducted distribution gives the best room by room balance. Keep kitchen range hoods separate from the ERV or HRV.

Ready to breathe better

Fresh air should feel clean, quiet, and comfortable. Choose ERV for humid climates or HRV for cold climates as a starting point. Match the unit to your home’s size and occupancy using ASHRAE 62.2. Compare HVI ratings for performance. Plan for simple filter care and seasonal checks. Pair the right ventilation core with smart controls and your current HVAC for year round comfort with lower energy waste. If you want help selecting and installing the right whole home ventilation system, our team at Livinon Mechanical can size it, design the ducts, and commission it correctly. We are happy to walk your home, review humidity history, and present a clear quote that fits your goals.

A2L Refrigerant Safety for the R410A Phase Down

Thinking about replacing your AC or heat pump soon. You are hearing a lot of new terms. A2L. R 32. R 454B. R 410A phase down. This guide breaks down what is changing in 2025. How A2L refrigerants work in homes. What codes require in Austin and across the U.S. How much you might pay. How to pick a system that will serve you for years without headaches.

If you want a quick primer on greener refrigerants and why they matter, take a look at our post on eco friendly HVAC tech. The shift is real. The goal is lower climate impact without giving up comfort or safety.

The 2025 refrigerant change

Starting January 1, 2025, new central AC and heat pump models for homes must use refrigerants with a global warming potential of 700 or less. This comes from the EPA Technology Transitions program. It effectively ends new products that use R 410A for residential comfort cooling after that date. The EPA also limits the sale of higher GWP products three years after the compliance date for each sector. You can review the sector table on the EPA site for details on the limit and date framework at epa.gov.

The EPA provided a limited path for field assembled split systems that were already in the pipeline. Components that were manufactured or imported before January 1, 2025 can be installed through January 1, 2026. After that date, a new field assembled system must use a refrigerant at or below the 700 GWP threshold. This sell through provision is described in the interim action notice at epa.gov.

The broader phasedown of HFCs sits under the AIM Act. Supply steps down in stages through 2029 to 2036. The EPA FAQ page shows the step schedule from 2024 onward. This matters for price and availability. Reduced supply can add pressure on cost for older refrigerants. The schedule is posted at epa.gov.

Key dates for homeowners

  • Jan 1, 2025. New residential AC and heat pump products must use a refrigerant at or below 700 GWP.
  • Jan 1, 2026. Last day to install split system components made before 2025 that use higher GWP refrigerants.
  • Supply steps down again in 2029. Long term supply settles at a small fraction by 2036 under the AIM Act.

Recent legal action also supports the direction of travel. In August 2025 the D.C. Circuit upheld the EPA rule that allocates HFC allowances. That ruling helps stabilize the phasedown plans. Read the coverage at Reuters.

Why the industry is moving to A2Ls

A2L refrigerants give a large cut in climate impact compared to R 410A. R 410A has a GWP near 2088. R 32 is about 675. R 454B is near 466. Both R 32 and R 454B sit in the A2L safety class. That class means lower toxicity with a low burning velocity. Systems that use these refrigerants can hit strong efficiency targets. Your comfort does not have to suffer. Your bills can improve.

Want a quick look at how greener refrigerants fit into a cleaner home plan. See our tips for green HVAC practices. Refrigerant choice is one piece. Duct sealing, filtration, and controls matter too.

Are A2L systems safe

Short answer. Yes, when installed to code by trained contractors using listed equipment. A2L means lower toxicity with a flammability subclass that has low burning velocity. This is defined by ASHRAE Standard 34. The A family includes A1, A2L, A2, and A3. A1 is non flammable under test conditions. A2L is labeled mildly flammable because it can burn if a very specific mix and an ignition source are present. You can read the classification context in the ASHRAE Handbook at ASHRAE.

What mildly flammable means

A2L refrigerants need a relatively rich concentration in air before they can ignite. That threshold is called the lower flammability limit. R 32 has an LFL around 14.4 percent by volume. R 454B has an LFL around 11.8 percent. You also need a strong enough ignition source. Normal operation of listed equipment does not create that mix or condition. Industry training resources help frame that context for technicians and homeowners. See definitions in this ACHR News explainer at achrnews.com.

Model codes treat A2L equipment as suitable for homes with specific safeguards. These safeguards are baked into the product listing and the installation rules. The goal is prevention, early detection, and mitigation.

Built in protections

The current safety baseline for comfort cooling equipment is UL 60335 2 40. This standard requires design limits for refrigerant charge based on room size and layout. It also calls for integral refrigerant detection and mitigation for certain systems and sizes. Sensors must react at or below 25 percent of the lower flammability limit. That is a built in safety margin. Detection triggers controls that move air or shut down the system to dilute or prevent a hazard. Setpoints are part of the listing. They are not field adjustable. UL explains these updates in detail at UL Solutions.

Think of this as layered protection. The equipment must meet charge limits. Some systems include integrated detection due to their amount of refrigerant or the space they serve. Sensors must trip early. The system must respond in a predictable way. Contractors install per code to protect every space. Your job is simple. Hire trained pros who follow the rules. Replace filters and schedule yearly service.

If you want to keep your system clean and safe all season, bookmark our pre season tune up tips. Small steps prevent bigger problems.

Codes and permits

A2L equipment is permitted by the 2024 International Mechanical Code for comfort cooling with references to updated UL standards for high probability systems. The ICC Building Safety Journal covered the A2L changes for the 2024 cycle at iccsafe.org. Even with model code support, local adoption can vary during a transition year. Some states and cities have already adopted new codes. Others may be on a prior edition for a period.

Model code provisions and Austin

Austin adopted the 2024 technical building codes with an effective date of July 10, 2025. That timing gives clarity for A2L enabled installs in our market. The City announcement is posted at austintexas.gov. If your project is outside Austin city limits, your jurisdiction may be on a different adoption path. Permits and inspections will follow your authority having jurisdiction.

For a national view of which states and cities allow A2L refrigerants today, AHRI maintains a status map. It is a handy check during planning at ahrinet.org.

How to check your AHJ

Call your city or county permit office. Ask which code editions they enforce for mechanical work. Ask whether A2L refrigerants are permitted for residential comfort cooling. Ask about any local amendments that add clearances or equipment requirements. Your contractor should also confirm and pull the permit for you.

Smart controls can help meet comfort goals while you work within local rules. See ways to set up smarter savings in our guide to smart HVAC upgrades.

R 32 vs R 454B

Two low GWP choices dominate new unitary equipment. R 32 and R 454B. Both are A2L refrigerants. Both meet the EPA rule for 2025. Each has brand support and product depth. Both can deliver strong performance when paired with the right coil, compressor, and controls.

GWP, efficiency, and adoption

R 32 has a GWP near 675. Some brands in the Daikin group, including Goodman, favor R 32 in many product families. Goodman maintains a homeowner resource hub at goodmanmfg.com. R 454B has a GWP near 466. Carrier markets it as Puron Advance and adds integrated dissipation features to its new lines. Read more at carrier.com. Trane and American Standard are also moving to R 454B with integrated detection and mitigation strategies. See Trane homeowner guidance at trane.com.

There is no single winner for every home. Lab numbers on GWP do not predict your comfort or your bill. The system design does. Size it right. Match indoor and outdoor components. Use quality installation practices. Verify code compliance. That gives you safe cooling with lower impact.

What matters more than GWP alone

Whole system efficiency should lead your decision. A better matched system can cut energy use. Look at rated efficiency, compressor type, blower control, and coil design. Consider noise levels. Consider warranty terms and local service support. Factor in rebates from your utility or state program. Ask your contractor for a load calculation and a duct review. That beats picking a refrigerant label in isolation.

If you want a broader view of future ready features, our post on AI in home comfort shows how better controls drive savings today.

Keep or replace your R 410A system

You can keep using and repairing an existing R 410A system. The EPA allows manufacture of components for servicing after January 1, 2025 when labeled for servicing existing equipment only. If you replace both the outdoor unit and the indoor coil after January 1, 2026, that counts as a new system. A new system must use a refrigerant at or below 700 GWP. The EPA FAQ explains these service rules and definitions at epa.gov.

Service or full replacement

If your R 410A system has life left, parts and refrigerant will remain available, subject to phasedown supply. Repairs can extend its useful life. If the compressor fails or the coil leaks and the system is old, a full replacement may make more sense. From 2026 forward, a full field assembled replacement must be low GWP.

No drop in swaps and no mixing

R 454B does not drop in to an R 410A system. R 32 does not either. There are no known low GWP A1 drop ins for typical unitary systems. Never mix refrigerants. Follow the manufacturer instructions and use matched components. Johnson Controls provides a clear overview of these rules at johnsoncontrols.com.

Line sets matter too. Your installer will confirm if a line set can be reused after proper cleaning or if replacement is required. Correct brazing, nitrogen purging, evacuation, and charge procedures protect the new system and the leak detection architecture. Good practice is worth it. If you want routine care steps that protect your air and equipment, see our post on preventing mold in HVAC.

What it will cost

Expect some increase in upfront price for new low GWP models. OEMs guided roughly ten percent or more during 2024 to 2025 for certain lines. Inflation and supply chain shifts also play a role. This change introduces new components, detection hardware in some cases, plus new tools and training for contractors. ACHR News covered this trend at achrnews.com.

Plan your project to find savings beyond the sticker. Right sizing prevents short cycling. Duct fixes cut losses. Smart controls trim runtime without sacrificing comfort. Seasonal rebates and federal credits may offset a portion of the cost. Get quotes from reputable contractors who have completed A2L training. Compare full scope proposals. Look beyond the tonnage line.

If you want ideas that pay back quickly, our guide to smart HVAC upgrades highlights add ons that save energy. Our green HVAC practices article lists simple habits that cut waste too.

Future proof your purchase

Ask better questions before you sign. You can get a safe, quiet, efficient system that meets the new rules. You can also set it up for smooth service throughout its life. Use this homeowner checklist during sales calls and at the walkthrough.

A2L ready checklist

  • Confirm the equipment is listed to UL 60335 2 40. Ask for the model number and the listing class.
  • Ask whether your system size and layout require an integral refrigerant detection system. If the answer is yes, confirm the sensors and controls are the exact parts specified by the OEM. No field changes to setpoints.
  • Make sure your installer has completed A2L refrigerant safety training. ACCA offers a recognized program at acca.org.
  • Verify matched components. Outdoor unit, indoor coil, and controls must be designed to work together. No mixing of refrigerants or parts.
  • Discuss line set procedures. Cleaning, pressure testing, and evacuation must follow the OEM manual.
  • Check local code status and permit requirements. AHRI maintains a map that shows jurisdictions authorizing A2Ls at ahrinet.org.
  • Compare brand roadmaps. Carrier focuses on R 454B with added safety features at carrier.com. Goodman highlights R 32 education at goodmanmfg.com. Trane is rolling out R 454B across lines at trane.com.

A small note for those who like to peek behind the scenes. Cylinder markings are changing. AHRI Guideline N updated container IDs. Flammable refrigerants receive a red band near the top. Labels remain the primary ID. This helps techs pull the right cylinder for the right job. Read about the update at ahrinet.org.

Rebates, smart controls, and maintenance

Rebates can change monthly. Ask for a rebate check during your estimate. Utilities, state programs, and federal credits can all lower the cost. Smart controls trim energy use during peak hours. They also help the system reach the setpoint without stress. See how smarter controls pay back in our smart upgrades guide.

Maintenance helps protect an A2L system for the long run. Clean coils. Correct airflow. Tight electrical. Proper charge. Those basics extend life. Read our pre season tune up tips to get ahead of summer heat. Keep indoor air dry and clean to reduce strain. Our mold prevention guide shows simple steps that help.

If you want a quick read on why the refrigerant shift supports a cleaner home, start with greener refrigerants. That page connects the dots between refrigerants, efficiency, and comfort.

What this means for Austin homeowners

Austin is moving to the 2024 codes with an effective date in July 2025. That clears the way for A2L systems in most homes when permitted and inspected. Many brands now ship A2L models sized for Austin homes. Availability improves month by month. Pricing trends reflect the new tech and training. Expect quotes that look a bit higher than last year. Expect better options for efficiency.

We work with leading manufacturers that have published A2L safety architectures and training. We follow UL 60335 2 40. We verify charge limits by room size. We install listed leak detection when required. We use OEM specified sensors and controls. We train our team through programs like the ACCA A2L course. That is how we deliver safe, quiet comfort with lower climate impact.

Considering an HVAC replacement in Austin. Schedule a consult with our team. We will review A2L ready options, available rebates, and a code compliant plan for your home.

FAQ

Can I still buy an R 410A AC in 2025

Only in limited cases. The EPA allows installation of higher GWP split system components that were made or imported before January 1, 2025 through January 1, 2026. After that date, a new field assembled system must use a refrigerant with a GWP of 700 or less. Parts to service existing R 410A systems remain available.

Do A2L systems need leak detectors inside my home

Sometimes. It depends on the system charge, the space volume, and the specific equipment. UL 60335 2 40 requires an integral refrigerant detection system for certain sizes and layouts. Many new units include built in sensors and controls for this reason.

Which is better, R 32 or R 454B

Both meet the EPA rule. Both are A2L. Performance depends on the specific model, coil match, and installation. Focus on whole system efficiency, code compliance, and installer expertise. A good design beats a label choice.

Will my old R 410A system become illegal

No. You can use and repair an existing R 410A system through its useful life. Service components remain available. A full new system installed after January 1, 2026 must use a low GWP refrigerant.

Should I replace my line set

Your installer will advise. Some line sets can be cleaned and reused. Others should be replaced to protect the new system. Follow the OEM manual for cleaning, pressure testing, and evacuation. Proper line set work is a key part of A2L safety.

ERV vs HRV humid climates installation cost HVAC

Austin’s summer air feels thick for a reason. Outdoor air brings heat plus moisture. Tight homes trap that moisture. Your air conditioner fights both at once, which raises energy use and still leaves rooms stuffy. Whole home ventilation that recovers energy solves the stale air problem while keeping comfort steady. The question many homeowners ask is simple. ERV or HRV. This guide explains how each system moves heat and moisture, which one suits humid Texas weather, how to size it, how to connect it to your existing HVAC, and what a realistic project budget looks like. For a quick refresher on how humidity stresses equipment and indoor air, see our post on humidity risks for your HVAC and indoor air quality.

ERV vs HRV basics

Both ERVs and HRVs bring in outdoor air while removing stale indoor air at the same time. Each device uses an air to air heat exchanger. The two air streams pass through separate channels inside the core. They never mix. Energy moves across the core, which cuts the load on your heating or cooling system. That is the shared foundation. The difference sits inside the core material.

An HRV transfers heat only. This is called sensible heat. During a hot day, an HRV core will cool the incoming air with the cooler exhaust air from the house. Moisture stays on its respective side. During a cool night, the outgoing air warms the incoming air. The HRV does not move moisture across the core.

An ERV transfers heat plus moisture. The core includes a moisture permeable membrane. During a muggy afternoon, as fresh air enters, part of that moisture migrates into the exhaust stream that leaves the house. That reduces the humidity load on your air conditioner. During a dry winter day, an ERV can help retain moisture inside. Canada’s ENERGY STAR technical page for HRVs and ERVs explains this difference in simple terms and also clarifies that certification for these products is run in Canada. You can read the definitions there at Natural Resources Canada.

Balanced ventilation systems do more than dilute pollutants. They also reduce the energy penalty of ventilation itself. That is why many high performance homes select ERV or HRV as their fresh air system of record. The right pick for Austin rests on how each device handles moisture. That is the key.

Humid climate choice

In hot humid regions an ERV usually fits best. The ERV core reduces the amount of outdoor moisture that gets pulled into your living spaces. That lowers the latent load on your central AC. It also widens the comfort window on sticky evenings when temperatures drop but dew points remain high. This is the rule of thumb in much of Texas.

There is a common myth that an ERV acts like a dehumidifier. That is not accurate. The ERV reduces the moisture that hitchhikes with outdoor air. It does not actively pull moisture from indoor air. On sultry weeks you may still want a dedicated dehumidifier. Building Science Corporation explains this distinction along with climate guidance for ERV versus HRV selection in its balanced ventilation brief. You can read that at Building Science Corporation.

Austin sits in a humid subtropical zone. Long cooling seasons. High dew points for months. In this pattern, an HRV can bring in too much humidity because it only shifts temperature. That extra moisture shows up as longer run time for your AC and lingering clamminess. An ERV shrinks that penalty. Indoor air feels drier at the same set point. Odors clear faster. Bedrooms feel fresher at night.

There are exceptions. Small homes that see heavy occupancy during winter can prefer an HRV so the home does not get too damp. Homes at elevation with long freezing seasons need frost control on any energy recovery device. Those use cases do not match Austin. The central Texas home that runs air conditioning for most of the year is the archetype for ERV success.

Ventilation is one piece of a moisture plan. Source control in bathrooms. Tight ductwork. Clean gutters. No bulk water leaks. Then balanced ventilation. If you want a short guide to moisture risks inside the equipment cabinet, this post can help you spot trouble early. See how to prevent mold growth in your HVAC system.

Sizing and ratings

Ventilation that is too small does not protect indoor air quality. Ventilation that is too large wastes energy and can swing humidity. Good practice is to set volume to the residential standard from ASHRAE 62.2. This standard lays out a simple formula that weighs floor area and the number of bedrooms. It also sets guidance for intermittent boost flows in wet rooms. You can review the scope and find the document at ASHRAE. Your contractor should size the unit, set the continuous flow, and verify the delivered air with a flow hood or similar tool.

Once you know the target airflow, pick a unit with credible ratings. The Home Ventilating Institute publishes certified performance data that lets you compare models on equal footing. Look for SRE or Sensible Recovery Efficiency. Also look for TRE or Total Recovery Efficiency which includes moisture transfer. HVI also provides adjusted ratings called ASRE and ATRE that account for fan power and test conditions. In muggy summers, TRE and ATRE matter most. These numbers show what the ERV returns to you when the moisture transfer of the core really counts. You can study the rating methods and the directory at HVI’s consumer guide.

A quick word on labels. You will see very high SRE percentages in some brochures. That value does not tell the whole story in cooling seasons because it ignores moisture. A unit with excellent SRE can still let in a lot of humidity if it is an HRV. In Austin the TRE picture carries more weight.

Sound, fan power, and filter size deserve attention too. Quieter units get used more. Lower watt draw trims operating cost. Bigger filters last longer between service visits. An ERV that sits in a closet near a bedroom needs real attention to sound. In an attic, duct layout, insulation, and vibration isolation can bring sound readings down to a whisper.

Finally, ENERGY STAR labeling for HRV and ERV is a Canadian program. The United States does not run a product label for this category at the moment. Do not confuse a Canadian ENERGY STAR ERV with a federal tax credit by default. Read the fine print on any incentive. The Canadian program details live at NRCan ENERGY STAR for HRVs and ERVs.

HVAC integration

You have two broad installation paths. A fully dedicated ventilation duct system. Or a tie in to the existing forced air system. A fully ducted layout supplies fresh air to key rooms and pulls stale air from baths and other source points. This path gives the best distribution and the most control. It also costs more because of the extra ductwork.

A tie in uses the main air handler for distribution. This can work well with the right design. The usual method is to introduce the ERV supply into the supply side of the duct system. This is called a supply injection port. The ERV exhaust usually picks up air from the return side or from bathrooms using small runs. The main blower must run when the ERV runs. That way the fresh air gets pulled into all rooms. Martin Holladay has a clear overview of this method including layout rules and cautions at Green Building Advisor.

Separation of the connection points matters. You do not want the ERV supply and pickup too close to each other on the air handler. Short circuiting reduces exchange effectiveness. The Panasonic Intelli Balance manual spells out supply and return separation and also instructs techs to balance the ERV with the furnace blower running. Those steps prevent false readings. That manual also covers duct sizing and filter maintenance. You can read the instruction set at Panasonic Intelli Balance 200 installation guide.

Many ERV and HRV manufacturers offer a return to return connection method that can speed up installation in retrofits. The Lifebreath guide covers blower interlock wiring, balancing, and how to set modes for cooling and heating seasons. It also details boost options for bathrooms. Review that reference at Lifebreath installation guide.

Commissioning is not a nice to have. Each unit needs full function checks. Set the continuous flow. Confirm bath boost flows. Balance supply and exhaust to within roughly ten percent at high speed. Label the measured flows. Test static pressure. Verify that the air handler blower interlock works.

Controls matter. A simple dehumidistat can call for more ventilation when indoor humidity rises. A timer can run a boost cycle during showers or cooking. A smart controller can pace ventilation to occupancy. Your contractor can also set the ERV to pause on extreme outdoor humidity events to prevent spikes in indoor moisture. That strategy can work well with a standalone dehumidifier. These tweaks help keep indoor conditions steady while still meeting ventilation targets.

Location and duct routing matter in Austin. Attics get very hot. Place the unit in a conditioned space if possible. If the attic is the only choice, insulate the ERV ducts, seal every joint, and keep runs short. Fresh air terminals should sit away from exhaust terminations. Keep them clear of dryer vents. Use hoods with screens sized for easy cleaning.

Plan for service. Filters need cleaning or replacement. Cores need inspection and periodic cleaning based on the manufacturer schedule. Motors need a listen test. Balanced systems drift out of tune over time. Add a balance check to your annual tune up. Our HVAC preventative maintenance guide covers the basics and what we check on each visit.

Installed cost

Whole home ventilation projects span a wide range. Many standard ERV or HRV installations fall in a band from roughly the mid thousand range to around five thousand dollars for parts and labor. That ballpark comes from national cost guides such as Fixr. Scope drives price more than anything else. A fully ducted system with multiple pickups and dedicated supplies costs more than a simple tie in to an existing air handler. High efficiency passive house grade units and very quiet models can push project cost higher as well.

Ductwork and labor usually dominate the quote. Running new insulated ducts in an attic takes time. Routing in a finished home requires careful planning. Penetrations through the building shell need airtight sleeves and weatherproof hoods. Electrical work adds cost. Controls cost varies from a simple timer to a smart panel. Permits vary by city. Commissioning takes time too. Do not skip it. The difference between a balanced and unbalanced system shows up in comfort, humidity control, and energy use.

There are lower cost options for select cases. Single room ductless ERVs can ventilate a bedroom or a home office. They install through an exterior wall. These units often cost in the seven hundred to one thousand dollar range per room including equipment. Build with Rise keeps a current guide to the best ductless ERVs and HRVs by year with typical pricing. You can scan that list at Build with Rise. These devices do not replace a whole home system. They can target a problem room or a tight accessory dwelling where routing ducts is tough.

For a project planning lens, Fine Homebuilding offers a practical overview of whole house ventilation categories with cost context and design tips. Fully ducted multi point systems sit at the premium end. Centralized systems with simpler distribution sit mid band. You can read that guidance at Fine Homebuilding.

Every home is different. An Austin ranch with a vented attic calls for a different layout than a new townhome with a sealed attic and spray foam roof deck. We quote both options when possible. A dedicated duct system for perfect distribution. A forced air tie in for a lower entry cost. We also quote a maintenance plan so the system stays tuned for the long haul.

IAQ upgrades that pair well

An ERV or HRV sets the foundation for consistent fresh air. A few companion steps raise indoor air quality further and cut energy loss at the same time.

Start with air sealing. Reducing uncontrolled infiltration keeps pollutants out. It also lets the ERV do its job at the target rate rather than fighting random leaks. Our guide on sealing air leaks walks through common leakage points and quick fixes.

Improve filtration. Use a quality media filter sized for low pressure drop. Change it on schedule. Consider a dedicated filter on the ERV fresh air intake as well. That reduces dust load on the core. It also keeps pollen out of the living space during allergy season. For more practical tips that help during peak pollen weeks, see our indoor air quality tips for allergy season.

Control indoor moisture. Run bath boosts during showers. Use a range hood that vents outdoors during cooking. Keep relative humidity near fifty percent when possible. If it creeps above that level for long periods, consider a whole home dehumidifier. The ERV will cut the outside moisture load. A dehumidifier will tackle internal gains from showers, cooking, and people.

Mind the ducts. Leaky supply or return ducts waste energy and can pull dusty attic air into the system. Seal obvious joints with mastic. Insulate ducts in hot attics to reduce condensation risk. Clean supply vents as needed. Inspect outdoor hoods each season. Clear debris and confirm the flapper operates freely.

Finally, make maintenance routine. Clean or replace the ERV filters as directed. Vacuum the core face gently when dusty. Wash the core if the manufacturer allows it. Check the condensate path in cooling season. Schedule a balance check yearly. These simple steps protect the investment and keep indoor air clean.

FAQs

Is an ERV better than an HRV in humid climates
In most humid regions the ERV is the better pick because it reduces the moisture that outdoor air brings inside. That lowers the latent load on your air conditioner and helps keep rooms comfortable. Building Science Corporation presents this guidance in its balanced ventilation write up at Building Science Corporation.

Do ERVs dehumidify my house
Not exactly. An ERV reduces moisture coming in with the fresh air stream. It does not act like a dehumidifier. During very humid weeks you may still need a dedicated dehumidifier. This point is explained in the same Building Science resource above.

How much does an ERV or HRV cost installed
Many homes fall in a typical band from roughly the mid thousand range to around five thousand dollars. Ductless single room ERVs often land in the seven hundred to one thousand dollar range per room. Project scope and ductwork drive the final number. See national cost guides such as Fixr and ductless product roundups at Build with Rise for context.

Can I connect an ERV to my existing HVAC
Yes. With a proper design. Use a supply injection port on the supply side of the duct system. Interlock the furnace or air handler blower with the ERV so fresh air distributes through the ducts. Keep good separation between the ERV supply and the pickup point. Balance the system at high speed. Guidance on this method is covered by Green Building Advisor and by manufacturer manuals such as Panasonic Intelli Balance.

What size ERV or HRV do I need
Size the airflow to meet the residential ventilation standard ASHRAE 62.2. Then select a unit with HVI certified ratings to compare performance fairly. Review the standard at ASHRAE and rating guidance at HVI.

Are there ENERGY STAR ERVs or HRVs
Yes in Canada. Canada runs ENERGY STAR certification for HRVs and ERVs. The United States does not label this product category at this time. Learn more at Natural Resources Canada.

Schedule a ventilation assessment

If you live in Austin or nearby, we can size, specify, and install an ERV that fits your home and your budget. We also tune existing systems. That includes balancing, bath boosts, and blower interlocks. If an HRV makes more sense for your goals, we will tell you and quote that option too. Book a visit through our home page.

A final thought. Balanced ventilation pays off when the home is reasonably tight, the system is sized to ASHRAE 62.2, the unit carries HVI rated performance, the duct layout suits the house, and commissioning is done with care. In humid Central Texas, an ERV most often checks those boxes and gives you fresh air without the sticky side effects.

HRV vs ERV for humid homes

Fresh air should not bring sticky air and higher bills. If you live in a humid region like Austin, you likely search for a way to meet code ventilation while keeping indoor humidity steady. This guide explains HRV vs ERV for humid homes, shows how each system works, offers climate specific picks, covers retrofit options, rates, controls, upkeep, costs, rebates, and the real indoor air quality gains you can expect.

Quick answer for humid homes: Choose an ERV in hot humid regions to reduce the moisture that rides in with fresh air. It tempers humidity but does not dehumidify. Combine with good controls. Add a whole home dehumidifier if indoor RH still climbs above about fifty percent in summer.

HRV vs ERV for humid homes

The core question is simple. You want balanced ventilation for health. You want lower energy use. You do not want to invite extra moisture. An ERV transfers both heat and some moisture. That cuts the added humidity that enters with outdoor air during cooling season. An HRV only transfers heat. That can be fine in dry or cold regions. In a humid region the HRV brings in outdoor moisture at full strength. That can push indoor RH past a comfortable range.

The United States Department of Energy explains that heat recovery ventilators move heat only while energy recovery ventilators move heat plus some moisture through a special core. Typical cores recover a large share of the heat energy from exhaust air. That share often falls near seventy to eighty percent. The fans do add a small electric load. Defrost protection matters in cold weather. Maintenance matters to keep performance steady. See the DOE primer on whole house ventilation for a clear foundation on how these systems behave in real homes. DOE Energy Saver

If your home is in a hot humid climate, default to an ERV. If your home is cold or mixed, you will weigh occupancy, envelope tightness, and moisture goals. Building Science Corporation offers helpful guidance on that selection process. Balanced ventilation guidance

How HRV and ERV work

Both systems pull stale indoor air out while bringing fresh outdoor air in. They run two small fans. The air streams pass through a core that transfers energy from the outgoing air to the incoming air. The house stays in balance. Intake equals exhaust. That is why these systems are called balanced ventilation.

In an HRV, the core transfers heat only. In winter, heat from the stale air pre warms the incoming air. In summer, heat from the incoming air moves to the exhaust air. The fresh air feels closer to room conditions. Moisture does not transfer. Indoor humidity will track the mix of indoor sources and the weather outside.

In an ERV, the core transfers heat and some moisture. Moisture transfer can soften the effect of humid summer air on the home. It can also keep very dry winter air from over drying tight homes with low internal moisture. ERV cores are available in several media types. Each type has a range of moisture effectiveness and pressure drop. Good design picks a model with certified performance that matches the project goals.

Both HRV and ERV devices have ratings for efficiency, airflow, power draw, and moisture transfer. The Home Ventilating Institute certifies these values. The HVI directory is the best place to compare models on neutral data. Look for ratings like SRE which is sensible recovery efficiency, latent effectiveness, fan efficacy at the target flow, and sound. HVI Certified Products Directory

Key differences that impact choices

Heat transfer only versus heat plus moisture transfer. That is the big split. In humid homes the moisture transfer of an ERV cuts the latent load that comes in with fresh air. That keeps indoor RH steadier during long cooling seasons. In cold homes an HRV can help flush indoor moisture that builds from cooking, showers, and people. That can reduce window condensation.

Efficiency and fan power. Most quality cores recover a large share of sensible energy. Fan efficacy matters for total energy use. Compare watts per cfm in the HVI data. Higher SRE with low fan power gives strong performance. Keep in mind that duct layout and filter choice influence real world power draw.

Frost control and drains. In cold weather, HRVs can collect condensate. The unit needs a drain and trap. The ERV core transfers some moisture back and may frost at lower rates. Both types use strategies like recirculation, pre heat, or duty cycle defrost. Cold climate installs should pay close attention to frost control details in the spec sheet and manual.

Controls. Moisture transfer does not mean moisture control. An ERV needs smart runtime in humid regions. Interlocks to the air handler can prevent condensation in a supply trunk. Dew point aware control can hold down indoor humidity while still meeting ventilation goals.

Pick by climate zone

The right choice depends on moisture. That is the core message in the ASHRAE Handbook section on air to air energy recovery. In simple terms, match the system to your humidity goals. The United States DOE groups regions by climate zones. Hot humid zones include 1A and 2A with examples like southern Florida and much of coastal Texas. Mixed humid zones include 3A and 4A with examples like North Carolina and parts of Tennessee. Cold and cold dry zones include 5 through 8 with examples like the upper Midwest and the Northeast. DOE climate zones

Hot humid regions like Austin. Pick an ERV. It reduces incoming moisture during long cooling seasons. It will not dry the house by itself. If RH still climbs above about fifty percent, add a whole home dehumidifier. If you tie an ERV supply to your central duct trunk, interlock the air handler to run with the ERV. That step reduces the risk of condensation inside cool supply ducts. Building Science Corporation gives this exact caution for humid regions. Design cautions for humid homes

Mixed humid and marine regions. Summers can be sticky. Shoulder seasons can be humid. Many projects do well with an ERV to limit moisture swings during summer. Some homes that run tight with many occupants may see high winter RH. In that case an HRV can help reduce winter moisture. Project specifics drive the call. Tightness. People count. Bath habits. Cooking loads. A pro should review these items before selection.

Cold and cold dry regions. Either HRV or ERV can work. An HRV often helps push out indoor moisture and reduce window fog. An ERV can suit very tight homes with low internal moisture where indoor air gets too dry. In all cold regions, frost control strategy and condensate routing deserve attention.

How much ventilation you need

ASHRAE 62.2 sets minimum mechanical ventilation for dwelling units. It covers continuous whole house flow targets. It also sets local exhaust targets for kitchens and baths. The standard has a few sizing methods. The general outcome for a typical three bedroom home around two thousand square feet lands near the sixty to ninety cfm range for whole house continuous flow. That can vary if you use the infiltration credit method or if the home leaks more than expected.

Local exhaust still applies. Bathrooms need at least fifty cfm when switched on or twenty cfm if they run all the time. Kitchens need at least one hundred cfm when switched on or a continuous rate based on room volume. An ERV or HRV can be ducted to cover part of these flows if designed for that goal. Many projects still keep a dedicated kitchen hood for capture of grease and smoke. See this clear overview of 62.2 requirements for a homeowner friendly summary. ASHRAE 62.2 basics

Worked example. Picture a three bedroom home with two baths and two thousand square feet. The target whole house continuous flow will often pencil out around seventy cfm. Bathrooms still need code compliant local exhaust capability. The kitchen still needs its target flow as stated above. A pro will confirm the final numbers with the current method and will commission the system to those targets.

New build vs retrofit choices

New homes offer the cleanest path. A fully ducted HRV or ERV with dedicated supplies to bedrooms and living spaces plus dedicated exhaust from baths and laundry gives strong performance. This is the best distribution. It costs more up front. It delivers the most even ventilation. It also makes balancing easier and keeps kitchen and bath exhaust targets within reach with smart duct layout. Building Science Corporation highlights this as a best practice for performance homes. Balanced system layouts

Retrofits call for creative choices. A tie in to the central air handler supply or return can work with careful controls and proper balancing. In humid regions, link the ERV supply to the air handler so the blower mixes the fresh air immediately. That avoids a cool duct full of humid outdoor air without mixing. Duct insulation and airtight sealing matter for any run in unconditioned spaces.

Spot or decentralized ERVs offer another path for apartments, basements, or single zones. These wall units bring in fresh air while exhausting stale air in a compact form. They can solve a small project at low impact on finished spaces. See an example of a single room ERV used in many remodels. Panasonic WhisperComfort ERV

Homes in Austin and similar regions see long humid seasons. A retrofit that ties an ERV into existing ducts must include the interlock noted above. A dew point aware control strategy helps too. Your installer should discuss duct locations, insulation levels, and how to avoid condensation risks.

Controls, filters, and commissioning

Control strategy shapes both comfort and energy use. In hot humid weather, consider running the ERV during cooling calls or during periods when outdoor dew point is moderate. The DOE notes that controls that coordinate with the cooling system can help in humid climates. Simple timers can work but lack moisture awareness. Wall controls with humidity or dew point logic do better in sticky seasons.

Interlocks. If the ERV feeds the main supply trunk in a humid region, link the air handler blower to run with it. That step mixes fresh air with cool supply air so moisture does not condense in a cool metal duct. This is a small wiring item with a big payoff in risk reduction.

Filtration. ERVs and HRVs do not filter like a high end air cleaner. They do use filters on the intake and often on the exhaust. Choose models with easy access filter bays. A MERV 8 to 13 filter on the supply can catch a large share of common particles without a large pressure penalty in many systems. The right choice depends on system resistance and goals. The EPA lists ventilation and filtration alongside source control as the three pillars of better indoor air. EPA IAQ strategies

Commissioning. The system must be balanced. That means supply and exhaust flows match at the selected speed. Measured flows should meet the ASHRAE 62.2 target at low noise and low power. A pro will verify against HVI data for the unit. They will also confirm defrost function in cold setups and verify that condensate drains properly on HRVs used in cold weather.

Spec sheets. For buyers who want a strong model, consider units that meet current ENERGY STAR H ERV criteria in North America. Natural Resources Canada manages this program for the region. Version 2.4 will apply to units made in two thousand twenty six and later. The spec sets minimum SRE and fan efficacy levels and references HVI and CSA test methods. ENERGY STAR H ERV program update You can also read the technical spec to learn how to read SRE and fan efficacy on a data sheet. H ERV technical specification

Maintenance and service

A small amount of routine care keeps an HRV or ERV performing well. Check or replace filters every one to three months. Homes with pets or dust may need shorter intervals. Once per year, clean the core and the fan wheels per the manual. HRVs used in cold regions need a clear condensate drain and a good trap. Cold climate setups should also verify defrost operation before winter.

The DOE cautions that poor maintenance cuts performance and can lead to biofilm growth inside the unit. Cleaning the core and fans restores air flow and efficiency. Many homeowners bundle an annual tune up with other HVAC service to keep things simple. DOE on upkeep for H ERV systems

Costs and rebates

Budgets vary by home size, duct complexity, model class, and finish level. A simple spot ERV used for a single zone remodel can be a modest cost. The Panasonic single room unit linked above is one example used often by remodelers for baths or basements.

High efficiency ducted units used in Passive House style projects cost more. The box alone can range from the mid three thousands to over five thousand for larger models with pre heat features. These examples from Zehnder are helpful to understand equipment tiers, not endorsements of a brand. ERV unit example 1 ERV unit example 2

Installed costs for a whole home ERV or HRV often land in a range from a few thousand dollars to near ten thousand for larger homes or complex ducts. Project scope moves the number more than any single feature. Duct routes. Access. Finish work. Regional labor. Commissioning time. You can survey typical HVAC project cost ranges from consumer guides for context on local labor variability. HVAC cost context

Rebates and tax credits can help. The Inflation Reduction Act created Home Energy Rebates programs that many states are rolling out now. Many versions of the HEAR program list insulation, air sealing, and ventilation as eligible for rebates up to one thousand six hundred dollars for qualifying households. Each state sets rules. Timing varies. Start at the ENERGY STAR portal for current links to your state. HEAR program overview State energy offices have more detail on timing and eligibility. DOE consumer portal If you live in Texas, review the state energy site for updates on rebate rollouts. State program hub

Some utilities offer incentives for ERV or HRV projects. These are more common on the commercial side but can appear in residential programs. One example is a CFM tiered ERV incentive program in Maine that targets larger dedicated outside air systems. It shows the pattern to look for in your region. Efficiency Maine ERV incentives Austin Energy lists ERVs for commercial offerings. Residential rebates differ, so check the current residential portal for updates before you buy. Austin Energy ERV page

Cleaner air without high bills

Balanced ventilation replaces stale air with filtered outdoor air at a measured rate. That exchange cuts indoor pollutant levels from VOCs, moisture, and particles generated by daily life. The EPA frames healthy home air as a mix of source control, ventilation, and filtration. HRVs and ERVs hit two of those pillars when paired with good filters. EPA on weatherization and IAQ

Energy impact stays reasonable when the system is designed well. The DOE notes that HRV and ERV cores recover a large share of waste energy. Fan power adds a modest load. Savings depend on climate and runtime. One peer reviewed net zero study found HVAC energy fell by about fourteen percent with an HRV and about seventeen percent with an ERV when compared to a case with no heat recovery. Whole house electricity fell by under ten percent. Your results will vary. Use this as an example of what is possible with efficient recovery and smart control. Net zero ventilation study

Balanced systems also help manage humidity in a measured way. ERVs reduce the moisture load from ventilation. This does not replace dehumidification during very humid weather. It does cut swings. That supports comfort and reduces mold risk when paired with good filtration and moisture control. If indoor RH regularly rises above fifty to sixty percent in summer, add a dedicated dehumidifier sized to the home.

Frequently asked questions

Is an ERV better than an HRV for humid climates
Yes in most cases. An ERV reduces the incoming moisture load which helps keep indoor RH steadier in hot humid regions. It does not dehumidify. Pair it with smart controls. Add whole home dehumidification if RH still runs high. See Building Science guidance for design notes. Climate guidance

Will an ERV raise or lower my energy bills
ERVs and HRVs recover energy from exhaust air which lowers HVAC load compared to simple exhaust or supply only fans. Fans use some power. Net effect depends on climate, runtime, model, and duct design. DOE reports typical recovery near seventy to eighty percent. One study found modest whole house savings with ERV and HRV. DOE on whole house ventilation Study example

Can I add an ERV without tearing up walls
Yes in many homes. You can tie an ERV into the central air handler with careful controls and balancing. Decentralized or spot ERVs work for single rooms or small apartments. These can be installed with minimal disruption. Single room ERV example

Do I still need bath and kitchen exhaust fans
Usually yes. ASHRAE 62.2 still requires local exhaust in bathrooms and kitchens unless your HRV or ERV design covers those rates by design. Most projects keep a dedicated kitchen hood for capture of cooking pollutants even when a balanced system is present. 62.2 overview

How often do filters and the core need service
Check or replace filters every one to three months. Clean the core and fans once per year. HRVs in cold regions need a clear drain and working defrost. The DOE recommends regular cleaning to prevent performance loss. Upkeep guidance

How do I size ventilation for my home
Use ASHRAE 62.2. A pro will apply the current method and any infiltration credit. Many three bedroom homes near two thousand square feet land in the sixty to ninety cfm range for whole house continuous flow. Balance the system to match that target. Verify flows during commissioning. 62.2 basics HVI directory

What to check before you buy

Make a short plan with your contractor. Confirm the ASHRAE 62.2 whole house rate and local exhaust targets for your home. Decide on HRV or ERV by climate and occupancy. Verify HVI certified ratings for SRE and fan power at your target flow. Ask about filter sizes and access. Confirm duct routing, airtightness, and insulation. In humid regions, specify an interlock if tying an ERV into the supply trunk. Review defrost method and condensate routing for cold regions. Plan a maintenance schedule. Get a commissioning sheet at the end that shows measured supply and exhaust flows at the chosen speed.

Local help and related guides

Humidity control goes hand in hand with ventilation in Austin and similar regions. Our guide on moisture risk shows why indoor RH control protects comfort and equipment. Humidity risks for your HVAC and IAQ

Allergy season magnifies indoor air concerns. Pair balanced ventilation with filtration and smart habits for a healthier home. Ways to improve indoor air quality this allergy season

Tight homes need planned fresh air. Seal leaks to cut waste. Then add balanced ventilation to replace stale air in a controlled way. Sealing air leaks in your home

Moisture control also keeps mold out of your HVAC. Use clean filters. Use an ERV in humid regions. Keep RH stable. Prevent mold growth in your HVAC system

If you want a full ventilation and IAQ review, contact Livinon Mechanical. We design balanced systems that meet code flows, protect comfort, and control moisture in humid regions like Austin.

HRV vs ERV Whole House Ventilation Guide

Fresh air feels great for a minute, then your comfort drops as heat and moisture rush in. That is why balanced ventilation has become the standard for tight homes. Heat recovery ventilators and energy recovery ventilators bring in filtered outdoor air while sending stale air out through a heat exchange core. You get cleaner air with far less energy waste. This guide explains HRV vs ERV technology, shows which one fits your climate and home, covers sizing, retrofit or new build strategies, costs, upkeep, and how to choose a model with confidence.

Why balanced ventilation matters

Balanced ventilation supplies outdoor air in a controlled way while exhausting pollutants at the same time. Each airstream gets filtered. The core transfers energy between the two flows so the incoming air arrives tempered for comfort. Berkeley Lab describes how balanced systems cut indoor pollutant levels compared with exhaust only strategies that pull makeup air from random leaks and garages. You get steady dilution of carbon dioxide, odors, and VOCs without the comfort penalty of cracked windows. See the balanced ventilation primer from Lawrence Berkeley National Laboratory for a clear overview at svach.lbl.gov.

Central Texas homes face humidity swings for much of the year. Infiltration brings moist air that burdens your cooling system. Controlled outside air through an ERV helps keep that extra moisture out. If you want a refresher on how excess humidity hurts comfort and indoor air quality, read our guide on humidity risks.

Tightening the envelope with air sealing often comes first in energy upgrades. Less leakage cuts bills yet it also reduces incidental fresh air from cracks. That raises the value of a dedicated fresh air system. If you are planning envelope work, bookmark our field guide to sealing air leaks.

What is an HRV and an ERV

Both devices are balanced ventilation systems. Each pulls stale air out while bringing outdoor air in. The two airstreams pass through a core that recovers energy you would otherwise throw away.

A heat recovery ventilator moves heat between the outgoing and incoming air. It does not move moisture by design. An energy recovery ventilator moves both heat and moisture using an enthalpy core or wheel. These working definitions come from the ENERGY STAR HRV and ERV specification page hosted by Natural Resources Canada. See the formal descriptions at natural-resources.canada.ca.

How the cores transfer heat and moisture

Think of the core as a highly specialized radiator. In an HRV, the surfaces conduct thermal energy from the warm airstream to the cooler one. The two airstreams never mix. In winter, outgoing warm air preheats the incoming cold air. In summer, outgoing cooler indoor air precools the incoming hot air. That is heat recovery.

In an ERV, the core also allows a portion of water vapor to move across a membrane. During a humid summer, an ERV passes some moisture back to the outgoing airstream so the air entering your home carries less water. During a dry winter, it can hold on to some indoor moisture so indoor relative humidity does not crash. The key nuance from Berkeley Lab is simple. An ERV does not dehumidify the house. It only reduces the amount of moisture the ventilation air brings in or takes away. See that clarification at svach.lbl.gov.

What HVI ratings mean

Comparing models by brochure buzzwords falls short. Use the standardized ratings from the Home Ventilating Institute. The HVI Consumer Guide explains the metrics in plain language and links to an online directory for side by side comparisons at hvi.org.

Key terms you will see:

  • SRE or Sensible Recovery Efficiency. This shows how much sensible heat the unit recovers after accounting for case losses, airflow imbalance, leakage, defrost, and actual fan power. Use this for heating season comparisons.
  • TRE or Total Recovery Efficiency. This adds latent energy to the picture. It is most helpful for cooling season performance and ERV comparisons.
  • ASRE and ATRE. These are adjusted metrics that remove fan energy. They support whole home energy modeling and fair apples to apples checks.

Why this matters. Older ASE or ASEF values can hide high fan watt draw or leakage. Fantech summarizes this pitfall and why SRE or TRE tell a more honest story. Their short explainer is at fantech.net.

HRV vs ERV by climate

Climate drives the choice more than brand or gadget features. In hot humid regions such as Austin, Houston, or Atlanta, an ERV shines. The enthalpy core reduces the added moisture load that would otherwise ride in with your fresh air. A peer reviewed modeling study found ERVs cut total HVAC energy compared with HRVs by roughly ten to seventeen percent in Miami, Houston, and Atlanta. The study also showed gains in Baltimore and Los Angeles, though recovery did not beat no recovery in Los Angeles due to mild conditions. You can read the open access paper at pmc.ncbi.nlm.nih.gov.

In cold or cold dry climates, many homes still favor an ERV because it helps keep indoor relative humidity from plunging in winter. Wood floors, trim, and musical instruments hold up better with stable humidity. Family comfort improves when winter air does not feel parched. That said, some tight small homes with high occupant density may need an HRV in winter to keep indoor humidity in check. Energy Vanguard explains this nuance well at energyvanguard.com.

In the mild Pacific Northwest, many projects use HRVs due to modest temperatures and fewer high humidity events. The better answer is still project by project. Think about occupant loads, cooking or shower habits, pets, and allergy concerns. Match the device to the moisture profile you expect. A good designer will review both SRE and latent effectiveness for the target airflow.

One more reminder. An ERV limits how much moisture the ventilation air adds or removes. It does not replace a whole home dehumidifier in a hot humid climate with long wet seasons. Berkeley Lab makes this point directly in the balanced ventilation primer linked above.

How to size ventilation

Sizing starts with the ASHRAE 62 point 2 whole building rate. The simple formula used in many U S codes is about one cfm per one hundred square feet of conditioned floor area plus seven point five cfm times the number of bedrooms plus one. Energy Code Ace shows the calculation with examples and a small table at energycodeace.com.

Quick example for context. A one thousand eight hundred square foot home with three bedrooms lands near forty eight cfm for continuous ventilation. That is a starting point. Some projects select a unit with higher maximum airflow for boost mode during parties or large gatherings. Some regions permit intermittent operation with higher cfm and shorter run time. Your local code and comfort goals set the final target.

Remember filters. If you want MERV thirteen intake filtration for allergy control, account for the added pressure drop. A larger unit can run at a lower fan speed to stay quiet and efficient.

If allergies flare up each spring, you will find practical tips in our guide to improve indoor air quality. Better filters in your HRV or ERV are a strong start.

Retrofit vs new build

New construction offers a clean slate. You can route short, straight ducts to bedrooms and living areas for supply air, then pull exhaust from baths, laundry, and near the kitchen. Retrofits require creativity. Finished ceilings and tight chases push design toward compact units, decentralized strategies, or careful integration with existing ductwork. Good outcomes come from simple airflow paths, low fan watts per cfm, quiet operation, and clear service access for filters and core cleaning.

Fully ducted best practice

A dedicated supply to the main living spaces gives you fresh air where people spend time. Dedicated exhaust from baths and laundry removes moisture at the source. Place a pickup near the kitchen rather than over the range. A range hood still handles cooking peaks. Keep duct runs short for lower static pressure. Choose ECM motors with low watts per cfm. Pick a unit rated for quiet operation in bedrooms. Fine Homebuilding summarizes this strategy and warns against using a central furnace blower to move ventilation air due to the energy hit from continuous fan operation. Read their overview at finehomebuilding.com.

Integrate with existing ducts

Many retrofits tie a supply from the HRV or ERV into the return trunk of a furnace or air handler. That can work if designed correctly with interlocks. It can also short circuit if both intake and exhaust tie to the return, which just recirculates air without delivering outdoor air to rooms. The Building America Solution Center flags this risk and offers guides to avoid it at basc.pnnl.gov.

In hot humid regions, field pros often avoid dumping outdoor air into a return unless the plan is engineered in detail. Poor design can create condensation in ducts, wet insulation, mold, and comfort complaints. HVAC School has a clear warning on return tie pitfalls plus better options at hvacrschool.com.

Integrations must prevent the air handler from running full time just to distribute ventilation air. Separate controls or a smart relay help. The goal is tempered outdoor air delivered efficiently without an energy penalty.

Spot ERVs for tight spaces

Some homes cannot fit new ductwork without major drywall work. A small spot or decentralized ERV can meet the ventilation requirement in a compact package. Panasonic WhisperComfort models sit in a ceiling bay or wall, run at modest cfm, and use small diameter ducts with a single wall cap. They are popular for apartments or targeted rooms. See the 60 cfm model overview at na.panasonic.com and the product page at iaq.na.panasonic.com.

Cold weather operation

When outdoor air drops below freezing, moisture can condense and freeze inside a core. HRVs and some ERVs use frost control strategies to protect the core. Methods include a preheat coil upstream of the intake, periodic defrost cycles, or a temporary supply and exhaust imbalance that warms the core. The right method depends on your unit and climate. RenewAire outlines frost control approaches at supporthub.jswmi.com. Zehnder has a concise cold weather FAQ at zehnderamerica.com.

Cold climate owners sometimes worry that ERVs cannot handle deep winter. Modern ERVs with proper frost control operate well. They also help keep indoor air from becoming desert dry. In certain small and very tight homes, a winter HRV core may better manage moisture. Some multifamily Passive House projects even swap cores seasonally. Steven Winter Associates compares winter HRV and summer ERV strategies in multifamily at swinter.com.

Costs and what drives price

Installed cost spans a wide range because every home is different. Many contractor quotes fall in the two thousand five hundred to five thousand five hundred dollar range for a conventional HRV or ERV with moderate new ductwork. Examples include a Midwest contractor page at womackheatingandcooling.com and a Southeast contractor page at arrowhvacsc.com. Cost calculators sometimes cite eight hundred to twelve hundred dollars for install labor if ducts already exist or a lower add when paired with new HVAC. Treat those as low end. Inch Calculator provides context at inchcalculator.com.

On the other end, premium European systems with fully ducted layouts and high grade filtration can reach five figures in large homes. Market anecdotes often cluster between four thousand five hundred and six thousand one hundred dollars for mid range jobs, with top tier packages running fifteen to twenty thousand in single family homes. Treat forum posts as stories rather than quotes. The point is to set expectations about spread. A typical thread with user reports lives at reddit.com.

What moves price up or down in real projects:

  • Whether new ducts must be added or existing ducts can be tapped without short circuiting
  • One story versus two story routing with long vertical chases
  • Target filtration such as MERV thirteen or HEPA cabinets
  • Noise goals for bedrooms that push toward larger, slower fans
  • ECM motors and smart controls with boost timers and humidity limits
  • Commissioning, balancing, and post install airflow verification

A site visit gives the only reliable quote. We measure actual static pressure paths, check attic and crawlspace access, evaluate exterior termination locations, and confirm make up air paths in closed door scenarios.

Maintenance checklist

HRVs and ERVs last a long time with simple care. Set reminders for filter checks and a yearly core inspection. A little attention protects airflow, efficiency, and clean air delivery.

Use this quick list as a guide. Always follow your specific manual.

  • Filters. Inspect every two to three months. Clean or replace every six to twelve months or sooner in dusty seasons. Many units accept MERV eight to MERV thirteen. Venmar offers a clear maintenance outline at venmar.ca.
  • Core service. HRV cores can be washed gently with mild soap in warm weather so they dry completely before reassembly. ERV paper type enthalpy cores should not be washed. Vacuum dust off the surface only.
  • Exterior hoods. Keep intake and exhaust at least ten feet apart. Clear leaves, lint, and nests seasonally. Verify screens are free of debris.
  • Condensate. Check drains for clear flow in humid months or during defrost cycles.
  • Balance. Recheck and adjust flows after any filter or core work. Consider a yearly professional balance and a tune up. Book HVAC preventative maintenance to keep ventilation performance on track.

What to look for in a model

Two units can look similar yet perform very differently once installed. Focus on ratings, fan energy, sound, and service. Your future self will thank you.

Use this buyer checklist when comparing options:

  • HVI certified SRE and TRE at the airflow you plan to use. Also check ASRE or ATRE if you need modeling inputs. Then verify fan watts per cfm at that same point. The HVI directory is at hvi.org.
  • Latent effectiveness for ERVs in humid climates. Better latent transfer reduces the moisture you bring in during sticky months.
  • Noise rating in sones or decibels. Bedrooms demand quiet. A larger unit running slower can help.
  • Filter options. Can the intake side take MERV thirteen without a large pressure drop. Is there room for a deeper filter to extend life.
  • Frost strategy for cold regions. Check if the unit uses preheat, recirculation, or duty cycle defrost and whether your climate calls for one method or another.
  • Service access. Filters should slide out without special tools. The core should be reachable without removing the entire unit.

When comparing literature, rely on SRE and TRE rather than older ASE numbers. As Fantech notes, high ASEF can hide high fan watt draw. Better to choose a unit with honest recovery numbers at low watts per cfm, especially for continuous operation.

FAQs

Do I need an ERV or an HRV in Austin TX

Most homes in Austin benefit from an ERV. The ERV reduces the extra moisture carried by your fresh air during long humid seasons. A peer reviewed study showed ERVs beat HRVs on total energy in hot humid cities. See the study at pmc.ncbi.nlm.nih.gov. Pair the ERV with good dehumidification if indoor humidity still rises above comfort targets. The Berkeley Lab primer also explains why the ERV helps by limiting moisture transfer, not by drying the house. See svach.lbl.gov.

Will an ERV control indoor humidity by itself

No. An ERV does not dehumidify a home. It simply reduces how much water vapor the ventilation air adds or removes. In hot humid regions, plan on an ERV plus sensible cooling that runs long enough to pull latent load, or a dedicated whole home dehumidifier when needed.

Can ERVs be used in cold climates

Yes. Modern ERVs operate in cold climates with proper frost control. They help prevent the house from feeling bone dry. Follow the manufacturer guidance for defrost. RenewAire and Zehnder offer good references at supporthub.jswmi.com and zehnderamerica.com.

Can I connect an ERV to my furnace return

Tread carefully. A simple dump of fresh air into the return can short circuit or cause condensation issues in humid climates. At least one side should be separately ducted. Proper controls must prevent unnecessary blower energy. The Building America Solution Center and Fine Homebuilding both warn about this path and show better options at basc.pnnl.gov and finehomebuilding.com.

How loud are HRVs and ERVs

Quieter models publish lower sone or dB values. Real world noise also comes from duct design. Short, smooth, well insulated ducts reduce blower noise. Bedrooms call for low fan speed or remote units. This is one reason fully ducted systems often cost more yet deliver a better daily experience.

What is better for small tight apartments in winter

It depends on occupant density and moisture sources. A small tight apartment with frequent showers and cooking may push winter humidity too high. An HRV can help dry the space. Some designers swap an HRV core for winter and use an ERV core for summer in larger projects. Steven Winter Associates discusses this seasonal approach for multifamily Passive House at swinter.com. For tight retrofits where ducting is tough, a spot ERV can meet code rates without major work.

Safety and installation notes

Keep outdoor intake and exhaust terminations separated to avoid cross contamination. Ten feet is a common minimum in manufacturer manuals. Do not pull air from garages, attics, or crawlspaces. Seal and insulate ducts per ACCA Manual D and the unit manual. The Building America Solution Center offers practical installation tips at basc.pnnl.gov.

A quick way to move forward

Start with a short assessment. We measure your current airflows, check rooms that need supply or exhaust, look at filter goals for allergies, verify access for a serviceable installation, and match a model to the airflow you need. Balanced ventilation supplies filtered outdoor air while exhausting stale air, which reduces pollutants compared with exhaust only approaches. Berkeley Lab makes that case clearly in their primer at svach.lbl.gov.

If you live in a hot humid climate like Central Texas, an ERV is often the smarter choice for comfort and energy. If your project is a cold climate new build, an ERV with frost control often keeps winter comfort steadier. Tight homes need fresh air by design after envelope work, so coordinating sealing air leaks with a fresh air plan pays off. Schedule a ventilation assessment or ask about pairing ERV with whole home dehumidification. If your system is already in place, book HVAC preventative maintenance so filters, cores, and flows stay in top shape.

HVAC Air Duct Materials Guide Pros Cons Best Uses

Choosing the right material for your HVAC air ducts sets the foundation for reliable indoor comfort, energy efficiency, and indoor air quality. Many homeowners wonder how duct material impacts the performance and longevity of their system. This article provides deep insights into the most common HVAC duct materials used today. With an emphasis on strengths, weaknesses, and the conditions that make each option suitable, this guide aims to help those upgrading, replacing, or planning new ductwork systems. Whether you manage a home, apartment building, or business, understanding air duct types makes a real difference in long-term results.

Understanding HVAC Duct Materials

HVAC duct materials influence much more than just airflow. Each air duct type affects everything from sound level and energy bills to the risk of mold and the air you breathe. Material selection impacts how easily ducts can be installed, how often they need maintenance, and how well the system resists physical stress and environmental hazards. Popular air duct materials each bring unique properties. Some shine when durability is a priority while others offer cost savings or insulation benefits. Walking through every major air duct type, weighing their best uses, reveals how to make informed choices that meet your needs. Reviewing these options will help you identify what works best for your property and climate.

Galvanized Steel Ducts: Strength and Fire Resistance

Galvanized steel stands as one of the most widely used materials for commercial and residential HVAC ducts. The steel core receives a zinc coating in a specialized process, which helps the duct resist corrosion even in moist or humid air. This material’s real strengths shine in environments where physical toughness and longevity matter most.

Galvanized steel ducts handle bumps and impacts, making them a favored choice for high-traffic or industrial sites. Their fire resistance provides safety during emergencies. The smooth inner surface creates less drag on moving air, supporting quiet and efficient system operation. Over time, this trait lowers the risk of mold development and minimizes debris build-up. While installation is more labor-intensive due to the weight of each segment, the payoff comes in a long service life punctuated by few issues.

Cost remains a consideration, as galvanized steel stands at the higher end of the material spectrum. The added expense reflects years of dependable use. For homeowners or businesses seeking peace of mind regarding fire protection and lifespan, galvanized steel ducts fit the bill. Both new builds and renovations benefit from their unwavering reliability in demanding conditions.

Aluminum Ductwork: Lightweight and Rustproof

Aluminum appeals to those seeking equipment that is quick to manage yet stands up to challenging environmental conditions. This material checks boxes for ease of handling, which cuts installation time and makes it ideal for complicated layouts. It naturally resists corrosion, making it perfect in coastal areas or spaces where humidity might otherwise shorten the lifespan of metal ducts.

Flexibility adds to its appeal. Installers find it easier to fit aluminum ducts around tight corners or unusual architectural features. Aluminum’s light nature means the supporting structures do not need the same heavy-duty bracing required by galvanized steel. While the cost trends higher compared to other options, many find the balance of longevity and ease of use worthwhile.

One reality with aluminum involves its softness as a metal. It can pick up dents or scratches from heavy impacts. For homes in wet regions, aluminum ductwork offers a great solution to rust worries. With professional maintenance, these ducts keep performing quietly and cleanly for many years. Aluminum also helps in remodels or expansions where the original space was not designed with ductwork in mind, allowing for creative solutions without sacrificing quality.

Fiberglass-Lined Ducts: Sound Dampening and Insulation

Where sound control and thermal stability matter, fiberglass-lined ducts have proven their value. Their core is typically a metal, most commonly sheet metal, which receives a lining or wrap of fiberglass insulation. This two-layer construction serves both to dampen noise from air handling equipment and to prevent unwanted heat exchange.

The ability to reduce the sound of passing air appeals in offices, hotels, schools, or any building where quiet matters. These ducts keep heated or cooled air at the right temperature as it travels, improving energy usage. However, there are special cleaning and maintenance considerations. When the internal fiberglass starts to degrade, small particles could enter the air supply. Moisture that becomes trapped could trigger mold growth, particularly after water damage events or if the ducts are not kept clean.

Cautious maintenance is needed. Only specialists with the correct equipment should clean or repair these ducts. Despite these challenges, fiberglass-lined ducts remain popular in spaces where other materials would result in noisier or less efficient operation. Their value grows in large office complexes or entertainment venues where distractions from HVAC sounds are unwelcome.

Fiberboard Ducts: Cost Savings and Simple Insulation

Fiberboard ducts provide an affordable alternative to traditional metal ductwork. These are created by compressing fiberglass strands with resin, resulting in a material that is rigid yet lightweight, and inherently insulated. The insulation is built directly into the duct, reducing the need for extra wrapping or covering.

For projects with tight budgets, fiberboard brings upfront savings. It can be cut on-site to suit various layouts and is easy for installers to move and adjust. The ability to minimize heat loss or unwanted heating of cooled air gives fiberboard strong appeal in mild climates and low-traffic areas.

However, the structure’s porous nature can catch and hold dust, dirt, and moisture. Over time, this increases the risk of mold growth or indoor air quality issues. Fiberboard wears down more quickly than metals, making frequent replacement or repairs more likely in demanding settings. In environments with proper moisture control and where the system will see only moderate use, fiberboard serves as a practical, budget-friendly choice.

Flexible Ductwork: Versatility for Tight Spaces

Flexible ducts, as the name suggests, allow for twisting and turning through challenging underfloor spaces and sharp corners. Built from a wire coil surrounded by plastic and then wrapped in insulation, they quickly adjust to bespoke layouts without the need for special tools or labor. Their lower cost makes flexible ducts suitable for use where budget constraints exist or in areas that will not see rough handling.

However, they are not as tough as rigid materials. Over time, rough installation or physical pressure can leave them torn or sagging. These flaws restrict airflow, drive up energy use, and create opportunities for contamination. Flex duct is highly effective for short runs from a main duct branch to an individual vent. It fills the gap in spots traditional ducts cannot reach, such as ceiling drops or tight attic corners.

Correct installation is essential. Professional attention reduces the risk of kinks that choke air movement. Insulation protects the air inside from temperature swings. Flexible ductwork remains a go-to solution for renovations and additions where working space is extremely limited, as well as for quick fixes where long-term durability is less of a concern.

PVC Ducts: Control Moisture and Chemical Exposure

PVC, or polyvinyl chloride, brings another set of benefits to the HVAC world. Resistant to water and many chemicals, these ducts work in places where high humidity or corrosive vapors would quickly damage metals. PVC duct installations show up in swimming pool buildings, laboratories, and some industrial spaces. Their resistance to corrosion enables systems to last longer in environments with heavy moisture or chemical fumes.

Installation tends to be quick. Components are light and easy to secure together. However, PVC’s main drawback is its limited tolerance of high temperatures. It cannot be used where heated air would build up enough to reach softening or deformation temperatures. For ventilation, cooling, or where only modest heat is expected, PVC air ducts present a fitting solution.

Maintenance for PVC ductwork is straightforward. The nonporous surface sheds water and most chemicals without breaking down. However, operators must avoid using PVC in sections intended to carry hot exhaust or furnace air. Deciding where to use this duct material starts by matching your system’s demands to the strengths of PVC, always considering both safety and comfort needs.

Fabric Ducts: Flexible, Quiet, and Visually Appealing

Fabric ducts, sometimes called textile ducts, offer a unique approach compared to rigid metal or plastic alternatives. Made from textiles, they distribute air by way of porous fabric, creating a gentle, even flow. This can help eliminate hot and cold spots and minimize drafts. Their lightweight nature means quick installation and easy adjustment for seasonal or evolving needs.

One advantage lies in appearance. Color options and flexible layouts make them suitable for architectural projects or venues with strict design requirements. Maintenance differs from rigid ducts, as fabric segments often need regular removal and washing to prevent mold or mildew. They may not last as long as metal ducts under wear or daily physical stress, but their ease of use wins favor in special installations or where aesthetics matter.

Fabric ducts shine in fitness centers, event venues, or retrofits where traditional infrastructure cannot be installed or does not match the room’s style. Management teams enjoy the way these systems handle frequent changes in occupancy or layout, responding to comfort needs with minimal disruption.

Comparing Air Duct Types for Different Needs

Sorting through HVAC duct materials brings up questions of environment, cost, health, and practical fit. In residential settings, galvanized steel or aluminum works well in most climates if long lifespan and fire resistance top the list. Flexible ducts shine in retrofits, short connections, and multi-family properties where traditional access is blocked. Fiberglass-lined options provide quieter performance in office spaces or educational buildings. Fiberboard gives a cost-saving advantage for homes without high moisture concern where budget is a key factor.

Commercial spaces with advanced air quality requirements or changing layouts often turn to fabric ducts, balancing performance with looks. Meanwhile, laboratories, indoor pools, or chemical processing sites benefit from PVC ducts, as resistance to water and chemicals takes center stage. Each type comes with unique maintenance challenges, installation differences, and long-term value claims.

Choosing the right material can be influenced by your region’s climate, your building’s demands, and your future plans. Consult with experienced HVAC professionals to match each material to its intended role. Modern systems can blend multiple duct types in a single layout, optimizing installation labor, safety, and performance throughout the building.

Impact on Air Quality and Energy Use

Every air duct type directly affects health, comfort, and house efficiency. Smooth metal surfaces reduce dust and support easy cleaning. Fiberboard and fiberglass options bring built-in insulation but require routine checks against moisture and contamination. Proper selection reduces energy waste as each material’s insulation and airflow properties limit heating or cooling loss as air travels from the unit to rooms.

Mistakes in duct material selection increase allergy risks, energy costs, and system downtime. Well-chosen ducts maintain steady temperatures, filter pollutants more effectively, and eliminate nuisance noise that can disrupt sleep or work processes. Energy savings often grow over time when ducts have minimal airflow resistance and are protected from outside temperature swings, supporting equipment longevity and lower utility bills.

Indoor air quality remains a constant concern for homeowners and facility managers alike. Metal ducts, especially galvanized or aluminum, remain the baseline for clean airflow. Where insulation is needed, external wrapping prevents fibers from escaping but may carry extra installation steps. Flex ducts require careful handling to avoid accidental tears that create mold points or dust traps. PVC or fabric versions keep air fresh in specific niches where their strengths counter ordinary risks.

Installation and Maintenance Considerations

Although upfront cost and material availability guide many first decisions, installation factors can tip the balance. Galvanized steel ducts demand precise measurement, specialized tools, and skilled installers. Aluminum offers easier handling, fitting complicated frameworks or low-clearance spots. Fiberboard and flexible ducts stand out in timesaving capacity, though installers must work with care to avoid accidental crushing or misalignment.

Ongoing maintenance sets long-term value. Some ducts withstand vacuuming and heavy scrubbing. Others need delicate cleaning to avoid disturbing surfaces or insulation material. Homeowners and building operators should plan on periodic inspections to catch sagging, disconnected joints, moisture intrusion, and early signs of dust buildup.

When selecting air duct types for your next project, factor in both immediate usability and total ownership cost over the entire working life of the system. Maintenance contracts often look very different between duct types and may affect your ability to hold warranty coverage or meet state code requirements. Thoughtful planning now can save significant time and money later, prolonging the life of both ductwork and air conditioning equipment while maintaining confidence in system hygiene.

Key Points for Choosing Ductwork Material

Selecting the right material for HVAC ductwork requires careful assessment of conditions and project goals. Think ahead to anticipated energy demands, occupant health goals, and system access needs. Prioritize durability, especially in high-use or exposed locations where damage would be costly. Consider combined use of materials when conditions vary from one section of the building to another.

In climates with humid air or heavy rainfall, aluminum, PVC, or high-quality galvanized steel keep corrosion at bay. For spaces like theaters or hotels where silence enhances comfort, fiberglass-lined ducts or sound-dampening fabric types perform best. Value-focused goals point toward fiberboard for mild climates, but only when moisture is strictly controlled. Where appearance is a factor, fabric ducts match creative design while providing ease of change over the years.

Rely on professionals to assess connections, airflow balance, and sealing requirements before final installation. Installers need to match material strengths to each job, ensuring vents and returns stay clear, air moves quietly and cleanly, and the system remains flexible enough for future upgrades.

Future Trends in HVAC Duct Materials

Trends in HVAC design push for greater energy efficiency, air quality, and adaptability. Manufacturers continue to refine existing air duct types, adding antimicrobial coatings, stronger joinery, and lighter frames to current favorites. Technologies that allow remote inspections or simpler in-place cleaning promote longer system life and lower maintenance needs.

In many regions, demand for nontoxic, recyclable duct materials grows each year. Aluminum recycling processes now make new installs more environmentally friendly. PVC manufacturers introduce safer formulas for labs and schools. Fabric duct producers continue to expand color palettes and finish options, supporting creative architectural design as well as practical comfort. For the foreseeable future, the range of choices will only broaden, giving property managers and homeowners more power to tailor systems.

Choosing HVAC duct materials is not just a technical task. The right decision creates a strong foundation for system performance, protects health, and supports lower energy consumption year after year. Think ahead to your unique needs with each property and consult with trusted professionals before finalizing your system design. The backbone of any comfortable home or business lies in these unseen channels. Make your choice wisely to enjoy quiet comfort, low bills, and safe, healthy air in every season.

Reduce HVAC Allergens with HEPA Filters and UV Purifiers

Clean, healthy indoor air matters for everyone, especially those who suffer from allergies or respiratory issues. Air inside homes often carries dust, pet dander, mold spores, and countless microscopic particles. Left unchecked, these particles can trigger allergies, worsen asthma, and contribute to general discomfort. The right HVAC solutions can make a major impact. This article explains how advanced approaches like using HEPA air filters and UV HVAC purification can radically reduce airborne allergens. You will also find actionable strategies for gaining fresher, safer air quality every day.

Understanding Allergens in Home HVAC Systems

Every HVAC system in residential buildings draws in and circulates air. This air travels through vents and returns, but along the way, it often picks up undesirable companions. Allergens can be as large as a bit of pet fur or as tiny as bacteria. Common offenders include dust mites, pollen, mold spores, pet dander, lint, and even microbes that slip past basic filters.

Changes in outdoor weather can influence indoor air quality. For example, spring pollen season or autumn leaf decay quickly increase the allergen count. The smallest particles are often the most irritating, staying suspended in the air and making their way deep into the lungs with every breath. Regular HVAC filters can only do so much. Many of these microscopic particles float freely, circulating through the house and lingering in the air long after windows are closed. Upgrading your HVAC system means actively addressing this constant flow of irritants and creating a safer breathing environment.

HEPA Air Filters for Maximum Allergen Reduction

HEPA air filters are the gold standard for filtering out the tiniest particles that regular filters miss. Each HEPA filter works through dense layers of material that force air to weave through a maze-like surface. Only particles smaller than 0.3 microns, about 300 times smaller than a human hair, might slip through. What does this mean for a homeowner? Nearly all pollen, pet dander, smoke particles, and even some viruses get trapped before ever reaching your living spaces. The result is a dramatic drop in irritation and allergy triggers in the air.

Installing a HEPA filter feels like an easy first step, but it calls for attention to detail. These filters are thicker and denser than standard ones. Some HVAC systems cannot generate enough airflow to push air through HEPA material. Trying to fit a true HEPA filter into a standard return slot might lower system efficiency or even stress the blower motor. Consulting with a licensed HVAC professional helps you avoid these risks and get the best performance from your system. Some systems allow for external HEPA filtration units that filter air without straining the existing ductwork. This professional evaluation also ensures that any changes still meet energy efficiency requirements and maintain warranty protection.

For allergy sufferers or families with young children, the investment in HEPA filtration pays off with fewer sneezing fits, less eye irritation, and a noticeable drop in dust that accumulates on furniture.

Benefits and Limits of HEPA Filtration

HEPA filtration’s strongest advantage lies in its ability to trap almost all particulate matter in your indoor air. Dust mites, droppings, mold spores, pollen, and pet hair all stay neatly trapped. For those sensitive to seasonal allergies, this can mean uninterrupted sleep and easier breathing year-round. Asthma symptoms may also become less frequent when triggers are controlled.

Still, there are limits. HEPA filters do not neutralize or remove odors, gases, or volatile organic compounds. They also do not sterilize what they trap. If bacteria or viruses pass through, the filter holds onto them, but does not kill them. Over time, a dirty HEPA filter can become a breeding ground for mold or bacteria if not changed regularly. Scheduled filter changes every three to six months, depending on usage and local air quality, address this risk.

Sound operation, lower allergy rates, and peace of mind are all possible for those willing to upgrade, but frequent inspection and professional assessment remain important. Knowing how often to service or replace a HEPA filter depends on factors like pets, household size, and local environmental conditions. Regular filter monitoring provides the best results.

UV HVAC Purification for Microbial Control

While HEPA filters handle particles, UV HVAC purification deals with living microorganisms suspended in the air. Ultraviolet-C (UV-C) lights work by emitting a frequency of light that disrupts the DNA of viruses, bacteria, and mold spores, making them harmless. By installing a UV light inside HVAC ductwork or near cooling coils, you target the very places where moisture can encourage microbial growth.

Many microorganisms can survive a trip through even the best mechanical filter, but exposure to a well-positioned UV purifier stops them from reproducing. Over time, this decreases mold colonies, bacteria, and viral particles in circulated air. Air feels cleaner and has less of that “musty” odor that builds up when microbes thrive in a damp environment. UV purification’s effect is strongest in regions where the air is humid or the HVAC system runs frequently, such as during summer or in rainy climates. That ongoing sterilization makes day-to-day allergy or illness triggers much less likely.

Professional installation makes all the difference with UV purification. UV-C light must be calibrated for the airspeed and system size. Placement inside the air handler or near the evaporator coil allows the unit to treat the most air with every cycle. Routine replacement of bulbs every year keeps the system effective. Homeowners who notice lingering odors or persistent HVAC-related respiratory irritation find relief with this air cleaning approach.

Choosing the Right UV HVAC Purification System

The variety of UV HVAC purification systems on the market may feel overwhelming, but all serve the same goal of sterilizing air inside your ductwork or at the point of cooling. Some units mount in supply ducts, bathing moving air in UV light before distributing it through the home. Others sit near the cooling coil to reduce mold and mildew formation at one of the most common growth points. The right choice depends on the size of your HVAC system, existing air quality issues, and your family’s health profile.

Select units with safety shields and timers to prevent direct exposure to UV light. Working with a licensed installer provides peace of mind that the product suits your needs and does not disrupt normal operation. UV systems typically function silently and automatically with your air handler, demanding only occasional visual checks and annual lamp changes. Keep in mind that UV purification works as part of a holistic allergen reduction strategy and performs best in homes that already stay clean and dry.

Best Practices for Maintaining Air Quality

Technological upgrades like HEPA filtration and UV purification work best when supported by strong habits and maintenance routines. Airborne allergens thrive in dirty or neglected systems. Regular inspection and cleaning prevent your HVAC from acting as a delivery system for dust and mold. Prioritize cleaning air returns, supply vents, and replacing or washing pre-filters on the recommended schedule. If you have pets or live in a dusty area, increasing filter change frequency may be wise.

Duct cleaning plays a big role over the long term. Even the most advanced filter cannot trap debris already inside your ductwork. Professional duct cleaning removes years of accumulated dust, dander, and microbial sources that have settled out of the air but continue to seed new allergens. Sealing ducts further boosts system efficiency and reduces the risk that dust or pollen enters through tiny gaps in the ductwork. These simple steps limit the load on filters and improve overall system performance.

Humidity control rounds out your indoor air strategy. Dust mites and mold both thrive in damp conditions. Maintain relative humidity between 40% and 60% to create an environment that feels comfortable without encouraging unwanted growth. Using dehumidifiers or portable humidifiers lets you fine-tune this balance throughout the year. Paired with consistent cleaning, this keeps allergen levels predictably low.

Complementary Strategies Beyond HVAC Components

Allergen reduction begins with air movement and filtration, but success also comes from broader household practices. Keep floors clean with frequent vacuuming using HEPA-grade vacuum bags. Wash bedding in hot water to strip away pollen or dust mites. Limit clutter that attracts dust, and use hypoallergenic bed covers or pillow protectors if allergy symptoms persist.

Consider plants carefully. While some houseplants purify the air, others can carry mold. Check the condition of indoor plants regularly and keep potting soil dry. Choose hard-surface flooring over deep carpets if possible. For those highly sensitive to allergens, removing shoes at the door and using air-purifying sprays or gels away from HVAC returns can make a meaningful difference.

Work to make your home a sanctuary from pollen, pet hair, and mold. Closing windows during high pollen days and limiting indoor smoking further reduces potential irritants. Combine this awareness with advanced filtration and UV treatments for the strongest results imaginable long term.

When to Call a Professional for Help

Some upgrades are DIY friendly, but the complexities of HEPA integration or UV HVAC purification call for certified HVAC technicians. Professionals assess your system’s airflow and structure, determining whether modifications are practical. They can also recommend compatible products for your specific brand or model. These specialists locate the best positions for filters and purifiers, balancing air cleaning with energy efficiency and safety standards.

Unexpected increases in allergy symptoms, musty odors, or sudden dirt buildup at vents suggest it’s time for a thorough evaluation. Fast action prevents costly repairs or persistent health issues in the future. Annual or biannual service appointments can uncover developing problems long before they trigger visible side effects. For homeowners seeking a local solution, experts like those at Livin On Mechanical bring years of experience with filter upgrades, duct cleaning, and indoor air improvement.

Signs Your HVAC Is Contributing to Allergens

Sometimes the source of home discomfort is subtle. Frequent sneezing, itching eyes, unusual musty smells, or excess visible dust returning quickly after cleaning all point to unresolved HVAC issues. If symptoms worsen when the system operates, or certain vents seem to blow “dirty” air, underlying problems demand attention. These warning signs can indicate anything from dirty filters to unseen moisture or microbial growth inside the ducts.

Poor humidity control leads to condensation gathering around vents or window sills, creating the perfect breeding ground for mold. Chronic sinus congestion, headaches, or fatigue in household members can also come from polluted indoor air. Addressing these concerns with a mix of HEPA filtration, UV treatment, and maintenance tackles the roots of allergen problems instead of simply masking the symptoms.

Improving Health and Comfort Year Round

Healthier air transforms the living experience, especially for allergy-prone households. With each breath comes reassurance that harmful particles are trapped or neutralized instead of swirling unseen. Sleep improves, daytime symptoms decrease, and rooms simply feel fresher.

Reducing allergens also creates cost savings. Systems free of debris operate more efficiently, lowering energy bills and prolonging equipment life. Reduced dust means less time spent cleaning surfaces. Children, older adults, and those with immune sensitivities all benefit from the cleaner indoor environment. Families gain confidence knowing that new systems remove virtually all particles while UV HVAC purification takes care of whatever slips through.

Over time, these interventions produce fewer dust layers on shelves and appliances, lower replacement needs for filters, and a newfound clarity in every room. Occasional checkups or filter changes keep these benefits rolling in month after month.

Putting It All Together for Cleaner Indoor Air

The best results come from combining strategy, technology, and commitment. HEPA air filters trap the finest particles while UV HVAC purification disables living threats in the air you breathe. Pair these with duct cleaning, humidity management, and conscious housekeeping to create an environment where allergens struggle to survive. Work with licensed professionals for safe, lasting improvements to your HVAC system and feel the change in air quality almost immediately. Investing in these methods supports health, comfort, and peace of mind for every member of the household, season after season.

Ceiling Fans and HVAC Efficiency Myths and Facts

Ceiling fans often sit at the center of common debates about comfort and energy use inside homes. Some people think they dramatically lower energy costs. Others believe fans do little compared to air conditioning. Confusion grows with myth and hearsay. If you want to change the way your home feels and save money, you need accurate details. This article separates fact from fiction about ceiling fans and HVAC systems. It corrects popular myths, shares proven insights, and offers tips on how fan direction and other details affect your comfort year-round.

The Power of Perception: How Ceiling Fans Really Work

A gentle breeze from your ceiling fan seems to melt away the summer heat. Many believe that means ceiling fans cool an empty room. That is one of the biggest misunderstandings. Ceiling fans do not lower the actual temperature. They move air, helping sweat evaporate from your skin faster. As a result, your body feels cooler. This “wind-chill effect” tricks your senses. When you step out, the fan keeps spinning, but the room does not get any cooler. Energy gets used with no benefit. Turning off fans in rooms without people is a simple habit to stop energy waste.

This difference matters when you think about your electricity bills. Leaving fans running in unoccupied spaces only increases costs. You get no gain in comfort. Understanding this fact means you only use fans where you need them. Your HVAC system then works as intended, and your wallet stays thicker. When it comes to cooling, fans alone will not do the job unless someone is there to enjoy the effect.

Ceiling Fans and HVAC: Myths and Reality

People often pit fans against air conditioners in online comparisons. The truth is more balanced. Fans will not cool your home like an air conditioning system. They can support your cooling system, though. When used wisely, fans help you feel cooler at higher thermostat settings. Bumping up your thermostat while letting the ceiling fan run makes the room feel just as comfortable. Your air conditioner gets a break since it cycles on less often. Each raised degree on the thermostat can cut a chunk off your cooling bill.

This does not mean you should keep your ceiling fans spinning all the time. There’s no extra reward in running fans in every room. Use your fan in an occupied space and enjoy the breeze. Adjust the thermostat to match how cool you actually feel, not just the number on the wall. Your energy bill reflects practical choices like these.

A common question is whether to choose fan or air conditioning for comfort. On extremely hot days, fans only provide a surface level of relief. Air conditioning remains the primary way to keep spaces at safe and pleasant temperatures. On mild days, ceiling fans can let you limit air conditioner use for even more savings.

Energy Efficiency: Not All Ceiling Fans Are Created Equal

Ceiling fans have a reputation for being easy on energy use. This is not always true. The efficiency of a fan depends on its design, materials, and the quality of its motor. Cheaper models can actually waste more energy than you realize. Inferior motors create more heat with less airflow. If your fan also has lights powered by old incandescent or halogen bulbs, the problem grows. Those bulbs waste electricity and release warmth back into the room, undermining your cooling efforts.

Switching to ceiling fans fitted with energy-saving motors reduces electric use. Modern brushless motors and DC technology bring improvements in airflow per watt consumed. If your ceiling fan offers a built-in lighting fixture, opt for LED bulbs. They use less power and barely warm up while lighting a large area. This combination drives down both energy use and heat output, helping both your budget and comfort year-round.

Another factor is the size and blade design of the fan. Larger blades or unique shapes move more air with less effort. Quiet operation reflects both sound engineering and efficient airflow design. If your old fan rattles or seems to work harder, it may be time to upgrade to a more efficient model.

Ceiling Fan Direction: The Secret Behind Year-Round Comfort

Ceiling fan direction remains one of the most misunderstood details in home comfort. Setting your fan blades to spin counterclockwise in summer blows air downwards. This creates that familiar gentle breeze. You feel cooler as a result. Homeowners who don’t adjust the direction every season leave results up to chance. Comfort may fall short, and energy bills stay high.

When temperatures drop, switch your fan direction to clockwise. Instead of pushing air straight down, the blades now help pull cool air up. Warm air near the ceiling circulates down the walls without a strong wind. This keeps heat more uniform from top to bottom. You might even feel less tempted to crank up the thermostat as a result. The process is subtle but noticeable in rooms with high ceilings, lofts, or open layouts.

Setting ceiling fan direction correctly supports your central HVAC system. Less energy goes into heating or cooling since the air temperature stays more even. Change the switch on the fan base as seasons shift. Watch for a gentle updraft in winter and a pronounced downward flow for summer. The small switch brings a big change in how your home feels and how much you spend to stay comfortable.

Common Myths About Vents, Fans, and Energy Use

Another persistent belief is that closing supply vents in unused rooms means saving energy. The idea holds appeal because it “seems” like you force more cold or hot air into the parts of the house you actually use. This does not pan out in reality. Modern HVAC systems rely on balanced airflow to work smoothly. Blocking vents builds up air pressure, stressing the system and ductwork. That can cause leaks, noisy performance, and even damage that cuts years off your system’s life.

Rather than picking and choosing which vents stay open, let your HVAC technician make adjustments if you seek zone-level heating or cooling. Some modern systems allow true zoning controls built into the system from the start. For most homes, keeping all vents open keeps air moving freely so every room hits a steady temperature. This gentle but constant airflow gives your system a consistent load and supports even heating or cooling throughout the entire living space.

With ceiling fans, the story circles back to use. Fans should not run in empty rooms. Only direct airflow to occupied spaces where people can enjoy the comfort boost. Anything else wastes electricity.

Routine Maintenance Shapes Performance

Neither your HVAC system nor your ceiling fans work at their best if neglected. Dust builds up on fan blades, reducing their effectiveness. Wobbling fans often signal loose mounts or blade imbalances, which can cause extra noise and waste power. Take the time every few weeks to wipe down fan blades and check each mount.

HVAC maintenance is even more important. Clogged filters force systems to run harder. Unchecked ducts collect debris that restricts airflow. Low refrigerant leads to erratic cooling or freezing. It pays to change your HVAC filters regularly and schedule professional inspections at least once a year. Addressing leaks, calibrating thermostats, and confirming safe operation keeps everything working as intended.

Combining a clean, smoothly running ceiling fan with a well-serviced HVAC system lets each support the other. Airflow blends seamlessly, heating or cooling becomes more even, and bills reflect a smarter, more responsible approach to home comfort.

Ceiling Fan Upgrades: Features to Look for

If you have not changed out your ceiling fans in a while, modern options offer real benefits. Today’s ceiling fans include energy-efficient motors that move air at multiple speeds while using only a fraction of the energy of older styles. Many come with LED lighting built-in, with cool operation and smart dimming features.

Some models now include remote controls that let you adjust speed or direction with a tap. A handheld remote is a welcome upgrade, especially in bedrooms and living rooms. Whisper-quiet motors and vibration control also mean you can keep your fan running while watching TV or resting without disturbance.

Ceiling fans sized to fit your room are crucial. A fan too small barely moves air, while one too large for the space can create uncomfortable drafts. Measure carefully and check manufacturer recommendations before purchasing. Many reputable mechanical companies will help with sizing and installation to get the best results.

Look for the ENERGY STAR label when shopping for new fans. This mark shows the model has passed independent testing for efficiency and airflow. Even the blade angle and finish play a part in how the air moves. A good installer makes sure your new fan stays firm, silent, and works with your room’s features year after year.

Practical Tips for Maximum Home Comfort and Savings

Your ceiling fans and HVAC can work as a team when you know how to use them together. Always match ceiling fan direction to the season: counterclockwise in warm months, clockwise at low speed in the cold. Activate your ceiling fan in the room you are using, then raise the thermostat a few degrees for extra savings. Remember to turn fans off when leaving the room.

Install ceiling fans in areas with frequent activity: living rooms, bedrooms, kitchens. Combine fans with open doors and hallways to move cool or warm air further. Keep your fan blades clean for best performance. Replace old bulbs with LEDs to cut heat and reduce costs.

Stay on schedule with HVAC maintenance. Clear filters let more air pass with less effort. Clean your vents and ducts every season so dust does not pile up. A professional technician checks for leaks, proper refrigerant levels, and any trouble spots before small issues become expensive repairs.

Avoid closing vents in unused rooms. Let your HVAC keep airflow steady. Investing in programmable thermostats gives added precision. Program your system to fit your daily habits. Use ceiling fans to reduce the demand peaks that trigger more air conditioning use. Keep humidity at bay with either your fan or a dedicated dehumidifier if conditions warrant.

If your home ever feels persistently stuffy or rooms stay too far apart in temperature, it may be time to update the airflow strategy. A reputable mechanical expert can evaluate your setup for improvements or share advice unique to your floor plan and system age.

Final Thoughts for Smarter Comfort

Ceiling fans have their place alongside modern HVAC systems. When used with care and understanding, they add comfort without draining power. Direction, efficiency, and routine habits combine to shape your experience. Fans do not make a room cooler unless people are present. They do not replace AC but can make it less necessary. Not all fans use electricity wisely, so choose models with efficient motors and LED lighting. Cleaning, regular upkeep, and proper use all come together for lasting energy savings. Your decisions around ceiling fans and air conditioning pay off in lower bills and greater comfort over time.

For help with ceiling fan installation, HVAC tune-ups, or professional insights on home efficiency, reach out to your local mechanical experts at Livin’ On Mechanical. Comfort, energy savings, and smart solutions start with the right advice and regular service.